Release Notes August 2020
Views: 1542
On August 2020, your Kareo account will be upgraded to the latest version.
Kareo's Help Center Survey
Your feedback matters to us. Take this quick survey to help us improve your experience with our Help Center.
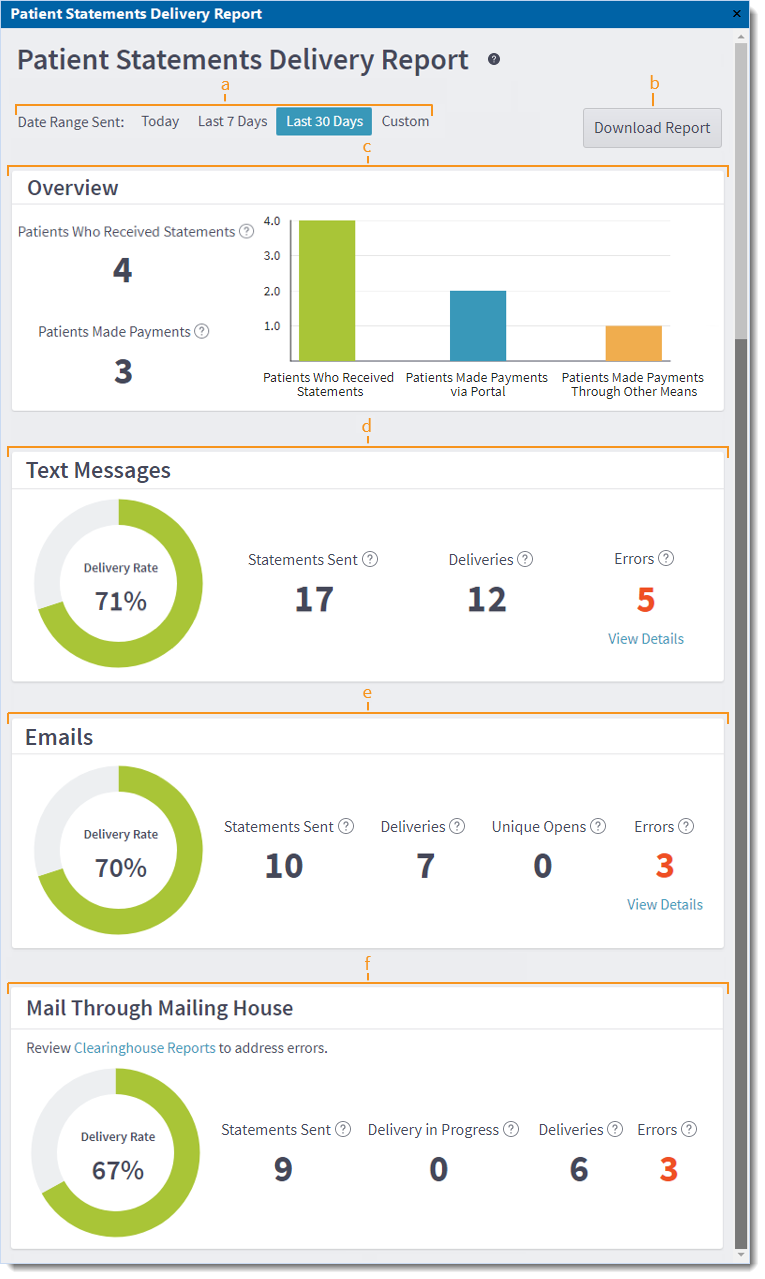
BillingPatient Statements Delivery ReportThe new Patient Statements Delivery Report provides tracking and measurement of patient statements and patient payments activity for a specified time frame. This report provides actionable insights to improve Statement Delivery methods (e.g., Text, Email, Mail) to ensure patients are reading and responding to statements. The Patient Statements Delivery Report also reveals which patient’s mobile, email or mail address needs to be verified if they appear on an error list.
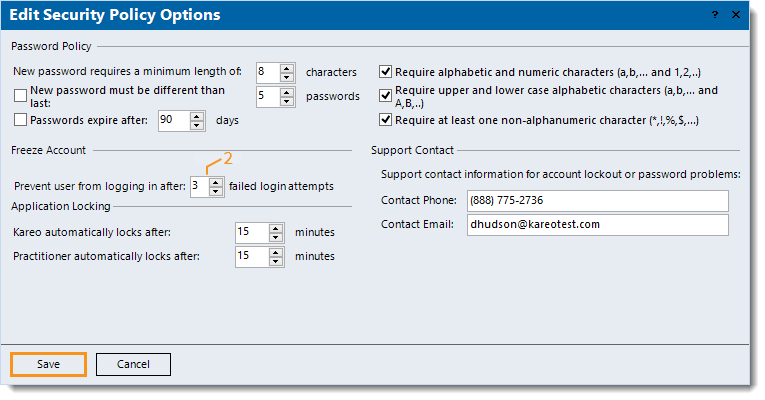
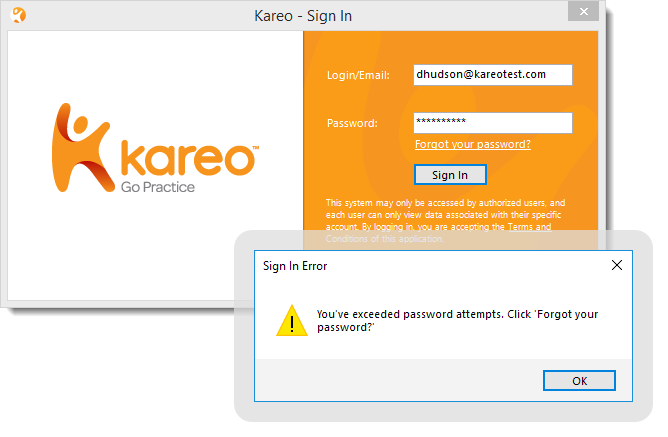
Security Policy OptionsTo save time for System Administrators, users who exceed the set amount of failed login attempts are no longer locked. Upon sign in, they are instead prompted to reset their password. Only users that have intentionally been deactivated are prompted their account has been locked and to contact their System Administrator.
|
Billing General Improvements
- A message now displays when sending patient statements that Text Balance Reminders will not be sent to patients who have opted out.
- Updated certain CPT code rates to reflect new Medicare fees as of April 30, 2020.
Billing Resolved Issues
- Fixed an issue where users experienced error, "Named Pipes Provider", upon Kareo log in
- Fixed an issue where users experienced an error when searching for the keyword, "document", in All fields of the Find Document window
- Fixed an issue where users experienced an unhandled exception error when opening patient records
- Fixed an issue where the patient's mobile phone number was not populating on encounter forms
- Fixed an issue where users experienced a blank window when initiating a new message from the patient record
- Fixed an issue causing Jopari claims to reject for missing information/attachments
- Fixed an issue where users experienced an incorrect code scrubbing error for procedure codes 90837 and 90791
- Fixed an issue where Health Prime accounts experienced an internal server error when updating the procedure line on Billing Tasks
- Fixed an issue where the date of service defaults to the start date of a recurring appointment series when creating a Charge Capture
- Fixed an issue where provider and service location information does not auto-populate from the appointment when creating a Charge Capture if the patient does not have default information
- Fixed an issue where users received the duplicated procedure code error when sending a Charge Capture with the same procedure code but different modifiers
Clinical
Treatment Plans
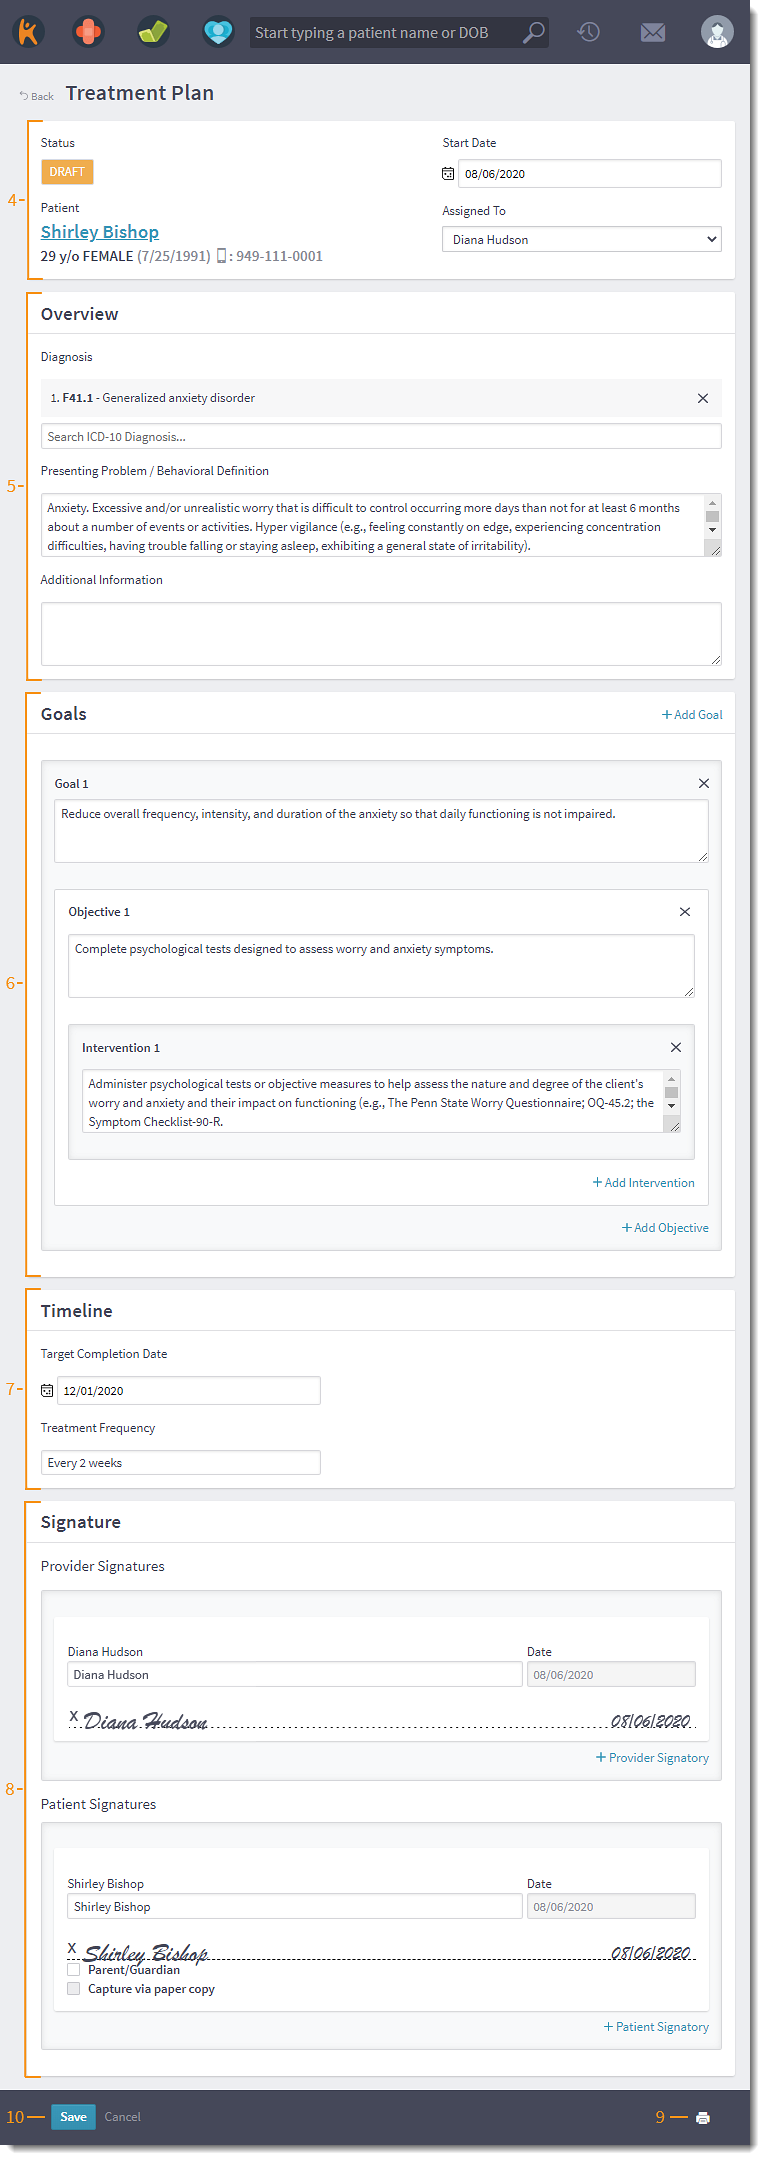
Kareo's new Treatment Plans allow providers to build comprehensive treatment plans for their patients. This is a powerful tool for engaging patients in their treatment through detailed plans tailored to their individual needs. Treatment Plans help guide patients towards reaching their goals while providers can monitor their progress and make treatment adjustments when necessary.
|
Create Treatment Plan
|
 |
|
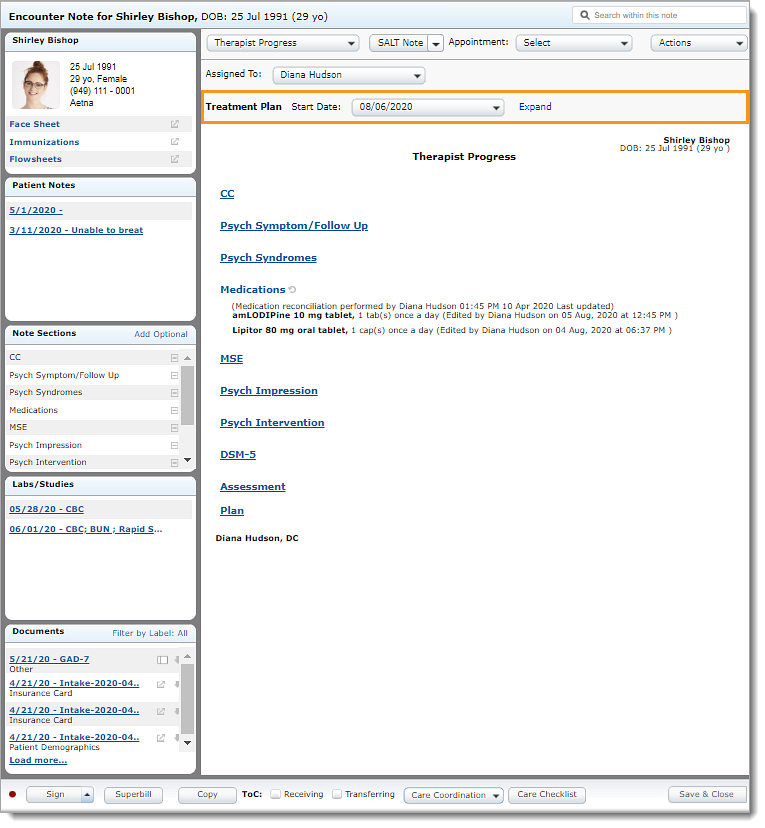
Reference Treatment Plan in Note Feature available on August 27, 2020. Providers can reference active treatment plans while documenting a clinical note. The Treatment Plan section will display when:
Referencing the treatment plan in the note allows the provider to pull in certain goals or objective to focus on.
|
 |
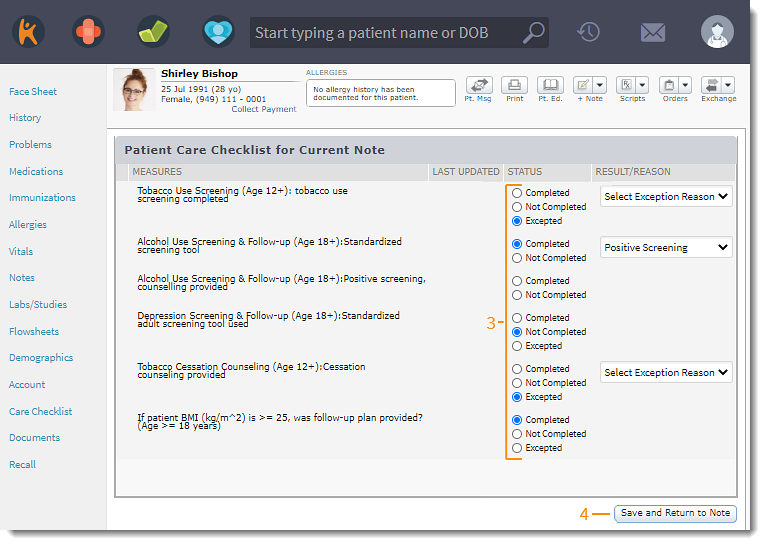
Enhanced Care Checklist
The enhanced Care Checklist allows providers to mark Care Checklist items in accordance with the Regulatory requirements for 2020. The Care Checklist must be completed the same day as the visit and before the note is signed.
|
Care Checklist Workflow
|
 |
|
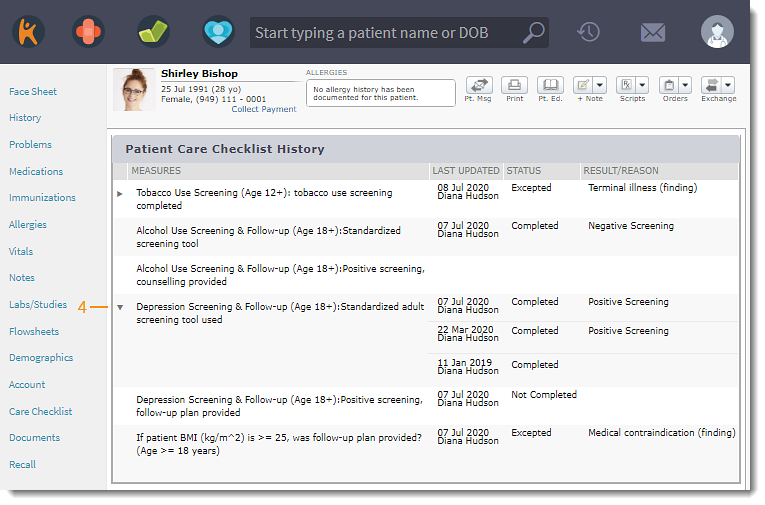
Care Checklist items are saved and displayed in the Patient Care Checklist History. This is a read-only view of the previous Care Checklist items.
|
 |
Clinical General Improvements
- The clinical quantity dispense form now displays next to the quantity field when prescribing or adding a medication.
- Updated Vaccines to the FDA 2020 Vaccines Licensed for Use.
- Updated DTaP-IPV Vaccine to include brand Quadracel by Sanofi Pasteur.
- Updated the VIS date for Hepatitis A to reflect current CDC guidelines.
Clinical Resolved Issues
- Fixed an issue where users received an error message when prescribing Basaglar KwikPen U-100 Insulin
Engage
Engage Resolved Issues
- Fixed an issue where patient's were unable to request appointment through the Provider Profile
- Fixed an issue where users were unable to view and publish patient reviews
- Fixed an issue where Service Details in the Provider Profile did not save changes after editing
- Fixed an issue where users were unable to view new messages under the Other folder
- Fixed an issue where links added to Consent Forms were not being saved
- Fixed an issue where the incorrect appointment date and time displayed after confirming the appointment
- Fixed an issue where the appointment confirmation was displaying the Practice phone number instead of the Service Location phone number
Platform
Platform Resolved Issues
- Fixed an issue where users were unable to access the Patient Portal tab in the patient's demographics
- Fixed an issue where the provider's name displayed the incorrect capitalization on Patient Intake emails
Mobile
Mobile Resolved Issues
- Fixed an issue where users received an error message when prescribing from a note
- Fixed an issue where some drug-to-drug interactions did not display in the mobile app