Updated: 09/28/2023 | Views: 12665
Tebra offers several ways to get statements out to your patients quickly to reduce your patient billing cycle and increase revenue.
Once patient statements are prepared:
- Send actionable Text Balance Reminders to ensure patients receive alerts regarding outstanding balances while their visit is still top of mind.
- Send Email Balance Reminders so patients can review the balance and make quick, convenient, and secure payments online.
- Use Tebra's secure patient statement mailing service to accelerate your patient collections, save staff time, and cut processing costs.
- Self-print on-demand patient statements to mail from your office or to provide a patient with a walk-out statement.
- Enable Automated Patient Billing for intelligent patient messaging that optimizes both digital and mailed statements to save you time and get you paid faster.
Note: If you have not already done so, configure the Patient Statement Options, and if your remit-to address is a P.O. Box, there are two additional steps to complete when configuring the settings.
Send Statements
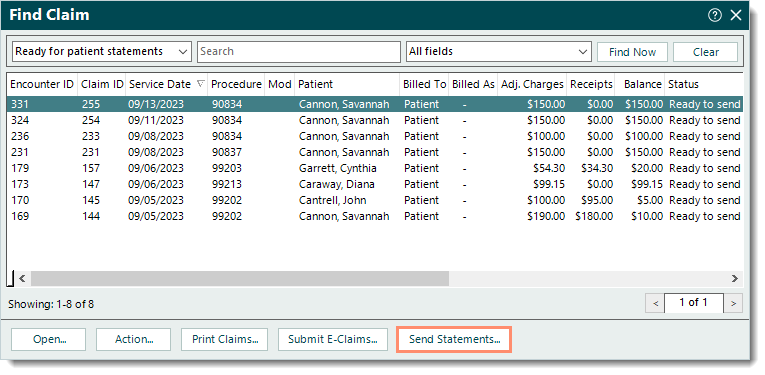
- After preparing patient statements, click Send Statements at the bottom of the Find Claim window. The Send Patient Statements - Select Criteria window opens.
- To navigate from the Practice Home window, click Encounters > Send Patient Statements.
|
 |
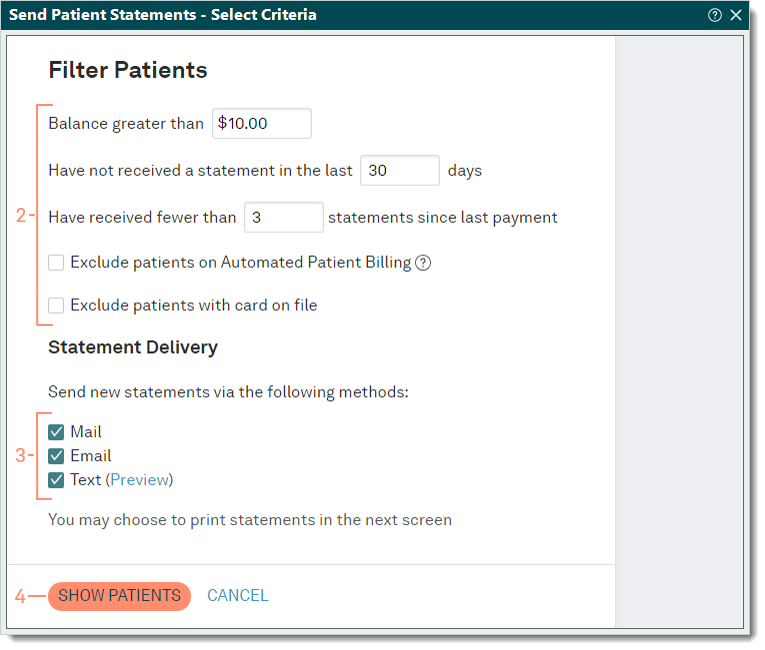
- Filter Patients: Enter the appropriate criteria to filter the patients.
Note: The criteria auto-populates with the Default Batch Options set in the Patient Statement Options.
- Statement Delivery: Click to select the method(s) to send the new patient statements.
- Click SHOW PATIENTS. The Send Patient Statements - Confirm Patient List window opens.
|
 |
- Review the patient list and information.
Note: The Statement Delivery column indicates the method(s) the patient will receive the patient statement(s).
- If applicable, click to clear the checkbox on the left of the patient ID number to exclude the patient from receiving a statement.
- To view the mailing address, mobile phone number, and/or email on file, click the patient name to open the Patient record then select the General tab. Close the window to return to the patient list.
- Click Send Patient Statements to send statements via text, email, and/or mailing service. A confirmation pop-up appears.
- To self-print the patient statements selected, click Other > Print Patient Statements. A confirmation pop-up appears. Click Yes to confirm and the Adobe print window opens to print the statements. In the Desktop Application (PM), the Patient Statements Sent window opens. Then, proceed to step 8.
- To save an XML file for another third party vendor to process the patient statements, click Other > Save to File. After saving the file, the Patient Statements Sent window opens. Then, proceed to step 8.
- Click Yes to confirm. The patient statements are sent and the Patient Statements Sent window opens.
- If patient statements are being sent through the mailing service, a transaction fee warning pop-up appears. To agree to the charges and submit the statements, click Yes.
Note: Undeliverable and rejected statements by the USPS are still charged at the normal rate. See the Patient Statement Mailing Service Fees section of the Pricing Policy for cost details.
|
 |
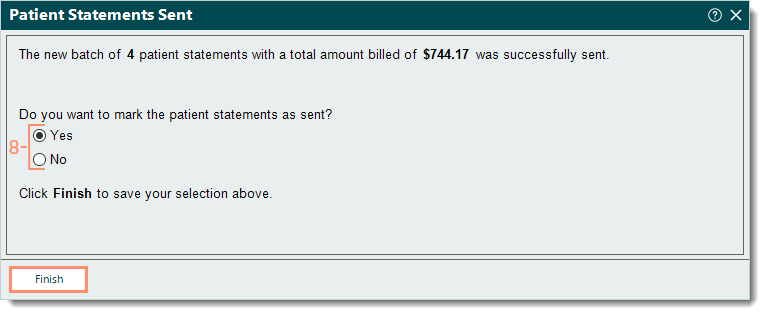
- Make the appropriate selection to mark the patient statements as sent.
- "Yes": Selected by default and updates the status of the claim(s) to Pending patient.
- "No": Click to select "No" if the status of the claim(s) should remain as Ready to send statements.
- Click Finish.
|
 |