Add New User or Provider Account
- Last updated
-
-
Save as PDF
Updated: 08/15/2023 | Views: 25199
System Administrators can create new user accounts at any time. Before adding a new user, be sure to have the person's full name, valid email address, and valid phone number on hand. Once users are added, the system will automatically send an email to them with their user name and login instructions. New users are prompted to create a new password upon the first login.
Access User Settings
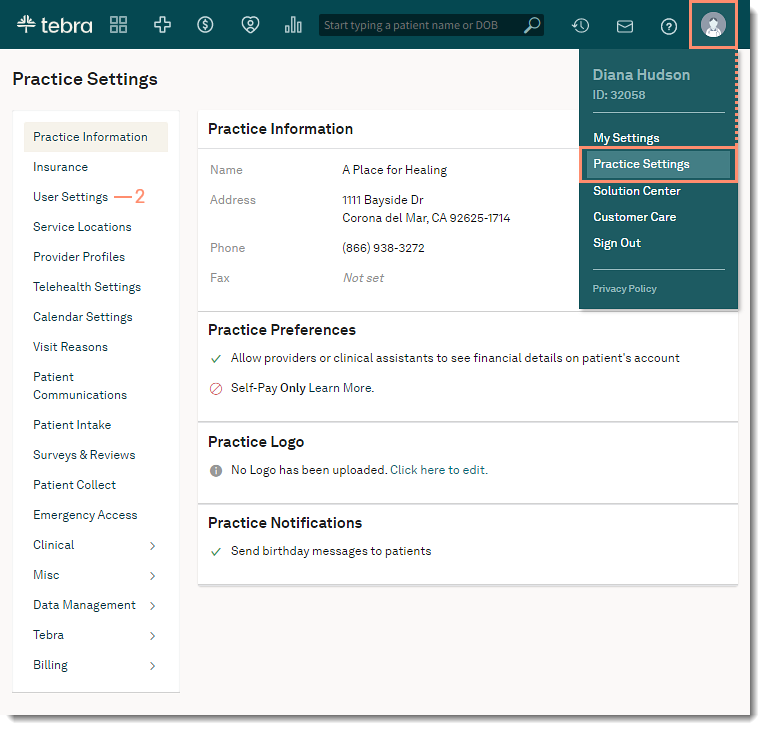
- Hover over the User icon and click on Practice Settings. The Practice Settings page opens.
- Click User Settings. The User Settings page opens.
|
 |
Add Non-Provider User Account
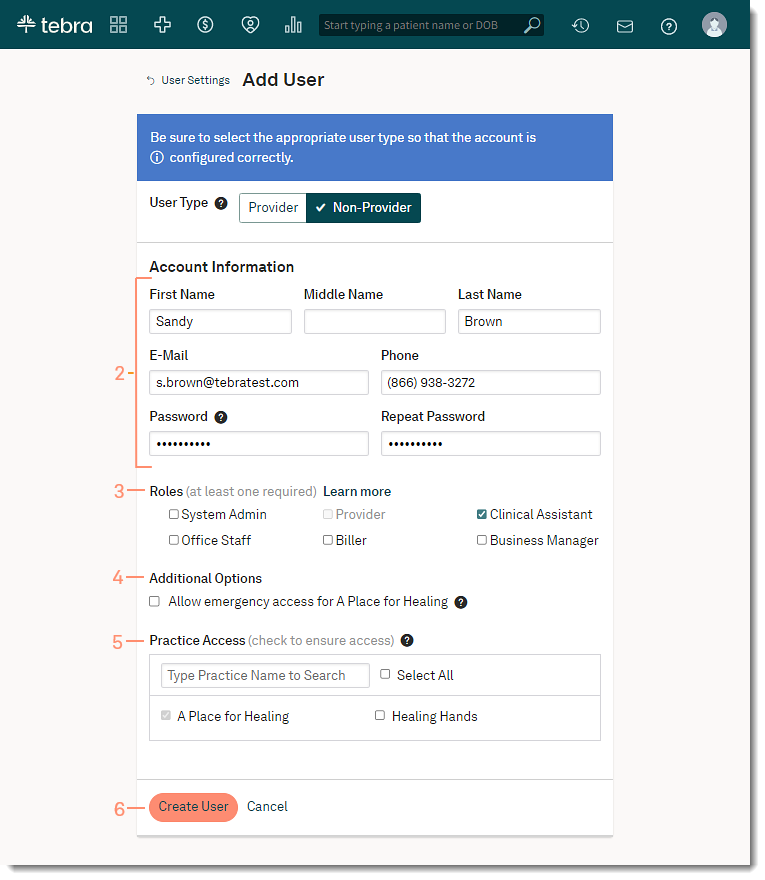
- Click + New User. The Add User page opens.
- Enter the user's account information:
- Name: Enter the user's name.
- E-mail: Enter the user's email address.
- Phone: Enter a contact phone number.
- Password: Enter a temporary password that the user can change.
- Roles: Click to select one or more Roles for the user. Click the Learn More to view descriptions and permissions.
- Additional Options: Optionally, click to select "Allow emergency access for (Practice)". This allows the user to give themselves or other staff members administrator permissions in the event of an emergency.
- Practice Access: If applicable, click to assign the user access to additional practice(s) in the account.
Note: System Administrators can only grant users Practice Access to practices they themselves can access.
- Click Create User. The new user displays under User Settings.
|
 |
Add Provider User Account
- Click + New User. The Add User page opens.
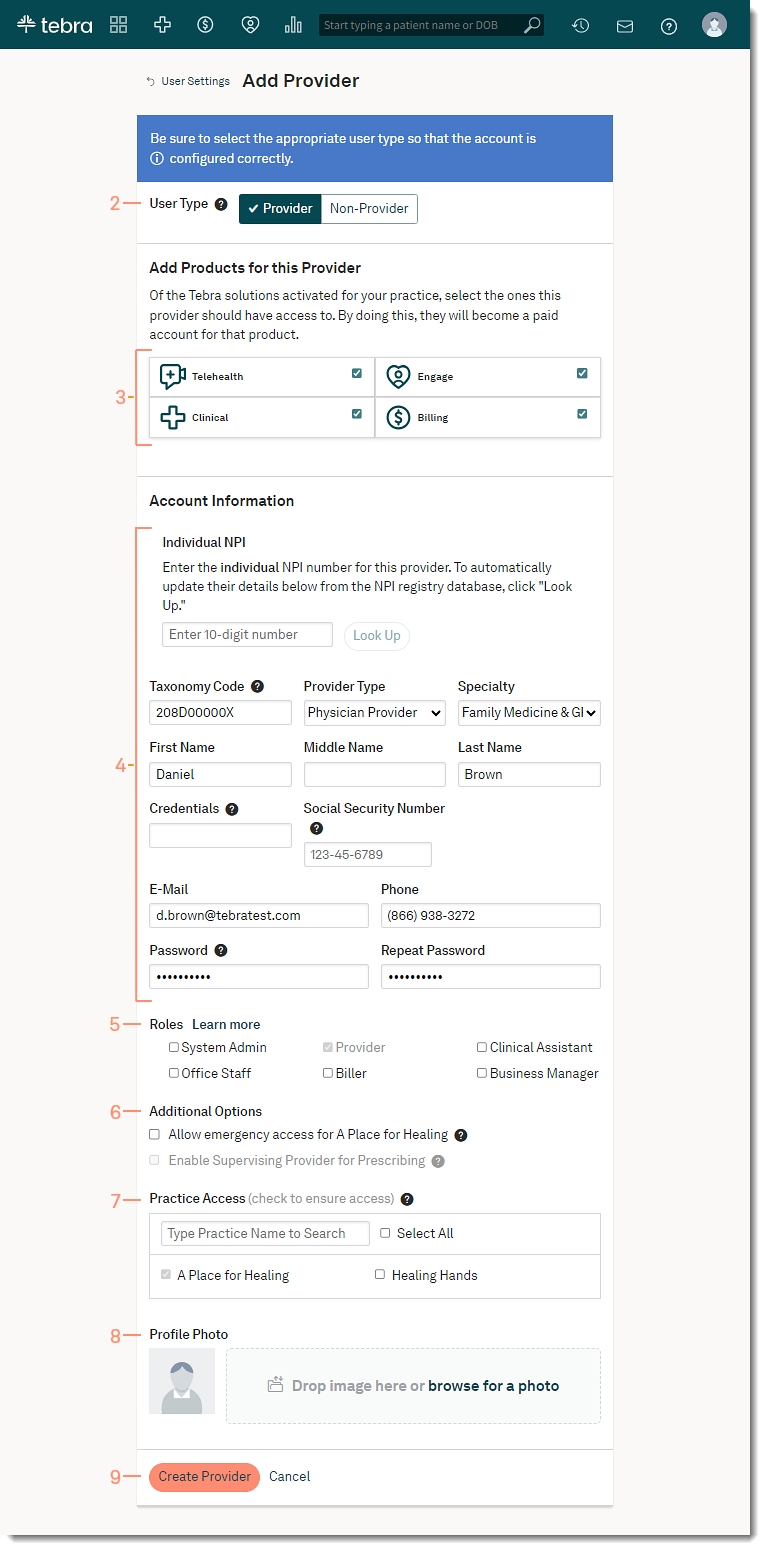
- Click Provider. A list of available modules activated for your practice displays.
- Click to select the Product module(s) to activate for the provider.
- Enter the following account information for the provider:
- Individual NPI (optional): Enter the provider's 10-digit NPI number and click Look up to auto-populate additional account details.
- Taxonomy Code: Enter the provider's taxonomy code number.
- Provider Type and Specialty: Click to select from the menu options.
- Name: Enter the provider's name.
- Credentials: Enter the provider's credentials (e.g., MD).
- Social Security Number: If applicable, enter the provider's Social Security Number for claims billing.
Note: This field only displays when "Billing" is selected as a Product.
- E-mail: Enter the provider's email address.
Note: Do not use a staff member's email address for providers.
- Phone: Enter a contact phone number.
- Password: Enter a temporary password that the provider can change.
- Roles: Click to select additional Roles for the provider.
- Click Learn More to view descriptions and permissions.
- Additional Options:
- To allow the provider to give themselves or other staff members administrator permission in the event of an emergency, click to select "Allow emergency access for (Practice)".
- To allow prescribers to select this provider as a supervising provider on ePrescriptions, click to select "Enable Supervising Provider for Prescribing".
Note: This option is enabled for eRx enrolled providers only.
- Practice Access: If applicable, click to assign the user access to additional practice(s) in the account.
Note: System Administrators can only grant users Practice Access to practices they themselves can access.
- If desired, upload a photo of the provider. Drag and drop an image or click browse to search for a photo.
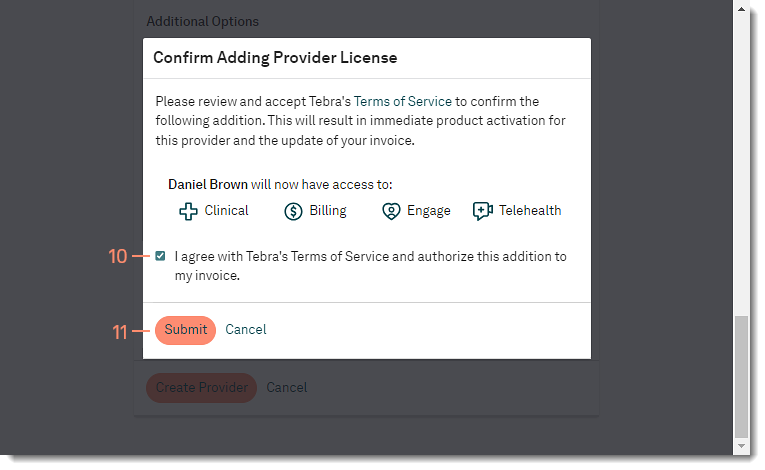
- Click Create Provider. The Confirm Adding Provider License pop-up window opens.
|
 |
- Review the Terms of Service. To accept the terms, click to select “I agree with Terms of Service and authorize this addition to my invoice.”.
- Click Submit. The provider user account displays in the active user account list under User Settings.
|
 |