Import Patient Demographics
Tebra provides an easy way to import your patient demographic data. The import process involves preparing a data file, uploading it, matching field labels, and validating the import results.
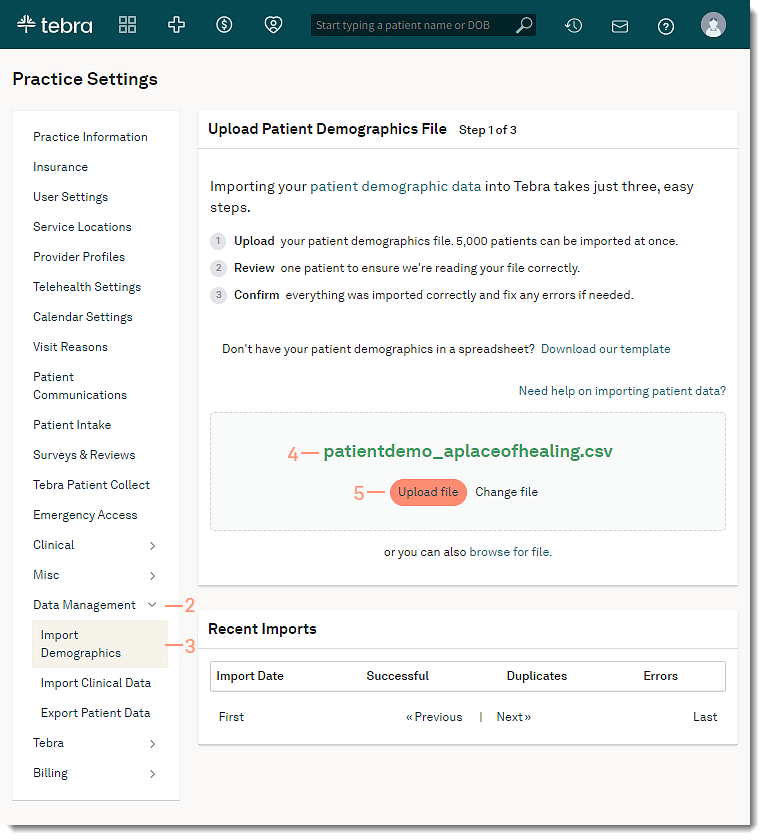
Step 1: Prepare your import fileTo upload patient demographic data, you must first prepare the import file.
|
|
Step 2: Import your fileWhen your file has been created, you'll be ready to import the patient demographic data into Clinical.
|
 |
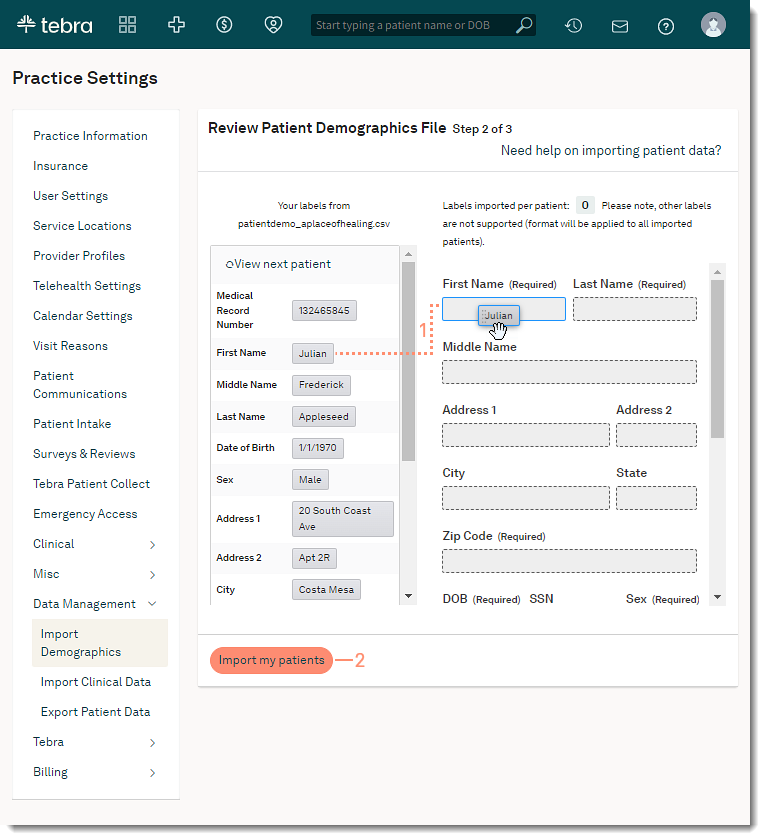
Review Patient Demographics FileTo properly import your patient data, your data categories must match the Tebra categories. This ensures your patient data is populated in the correct sections of the patient chart.
|
 |
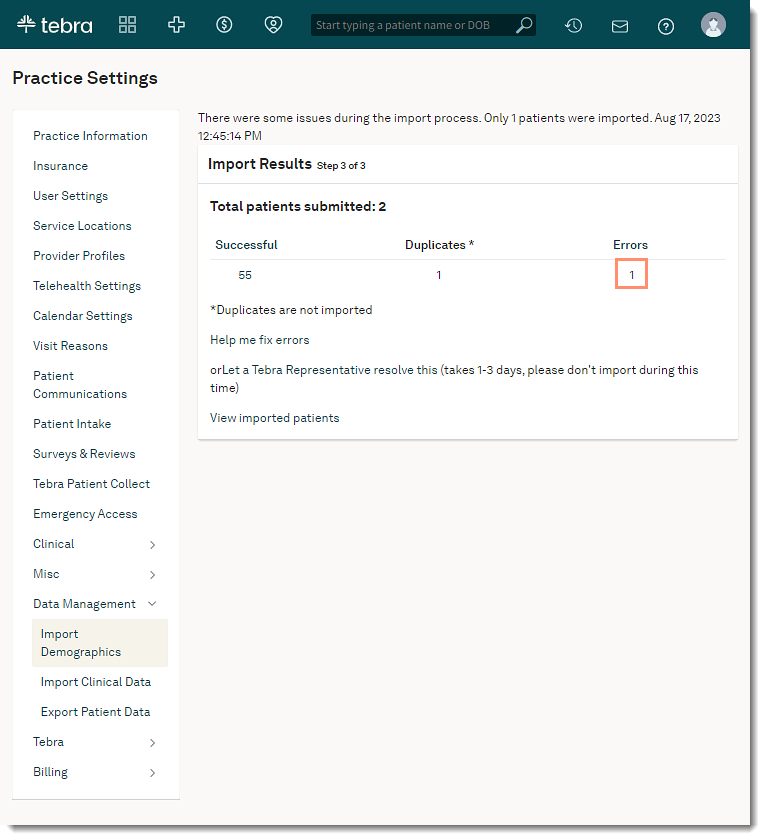
Step 3: Correct patient data with errorsAfter each import, the Import Patient Demographics page displays a table with import history information on import date/time, a link to a list of successfully imported records, a link to a list of any duplicate records, and a link to a list of any errors. Note: Large imports taking more than two minutes to process are marked as "Pending" in the table until the import is complete.
|
 |
|
 |
Having Problems?
If you’ve confirmed that your demographic data file conforms to our required specifications and are still having problems, contact our Customer Care Team for further assistance.
Patient Demographics
| Column Header Field | Format | Example |
| Medical Record Number (MRN) | Medical Record Number (MRN) must be 25 characters or fewer and can contain numbers, letters or special characters. | 168ADE2961 |
| *First Name | First Name cannot contain special characters other than commas, hyphens, periods, apostrophes, parentheses, or quotes. | John |
| Middle Name | Middle Name cannot contain special characters other than commas, hyphens, periods, apostrophes, parentheses, or quotes. | Jackson |
| *Last Name | Last Name cannot contain special characters other than commas, hyphens, periods, apostrophes, parentheses, or quotes. | Doe |
| *Date of Birth | Date of Birth must be formatted as: MM/DD/YYYY, no future dates, and no dates that don't exist. | 07/06/2000 |
| *Sex | Sex must be formatted as: Male or M, Female or F, Undifferentiated or U. | F |
| Address 1 | Address 1 cannot contain quotes. | 1100 Park Place |
| Address 2 | Address 2 cannot contain quotes. | Apt 300 |
| City | City cannot have quotes or commas. | Irvine |
| State | State must be two letters or full state name. | CA |
| *Zip Code | Zip Code must be 5 or 9 digits in length. | 94403-0300 |
| *Home Phone | Home phone must be 7 or 10 digits, with optional extension up to four digits. | 650-227-1700 |
| Mobile Phone | Mobile phone must be 7 or 10 digits. | 650-227-1700 |
| Work Phone | Work phone must be 7 or 10 digits, with optional extension up to four digits. | 650-227-1700 |
| Personal Email | Email cannot contain spaces, must have @, and must end in a proper email format. | john.doe@email.com |
| SSN | SSN must be numeric and 9 digits only. | 111-22-3333 or 111223333 |
* indicates a required field.