Updated: 01/25/2024 | Views: 579
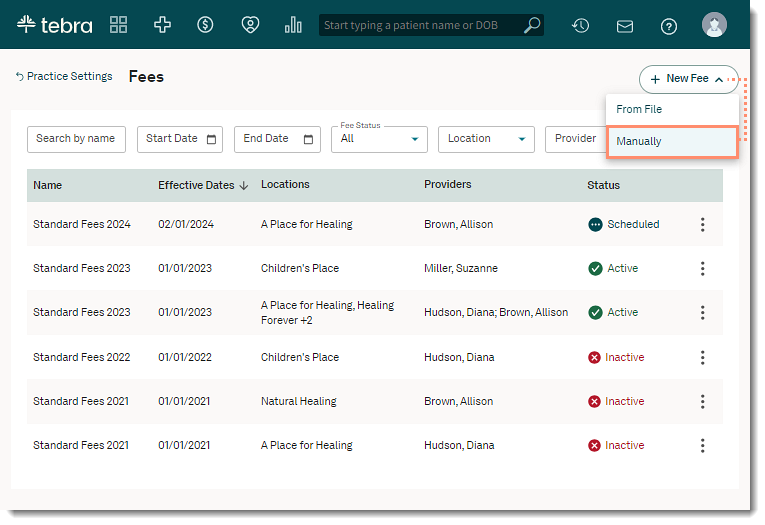
Self-Pay Only enabled practices can create a standard fee schedule to help increase collections by setting the right fees for services. Standard fees are typically the default charges for the practice. You can select to add a new fee schedule either manually, by importing from a CSV file, or by duplicating an existing fee schedule (and editing as needed).
Fees can be set for a specific combination of procedure and modifier. The fee schedule can be set for a specific provider and location or multiple providers and locations with an effective date range for which it applies. Once added, your Fees list includes all fee schedules, the effective dates, locations, providers, and statuses of the fee schedules. Fee schedules can also be edited at any time.
Note: For practices also using the Desktop Application (PM), standard fee schedules created in the Desktop Application (PM) will automatically display on the Fees page. Any additions or modifications made on the Fees page will also reflect in the Desktop Application (PM).
Access Fees
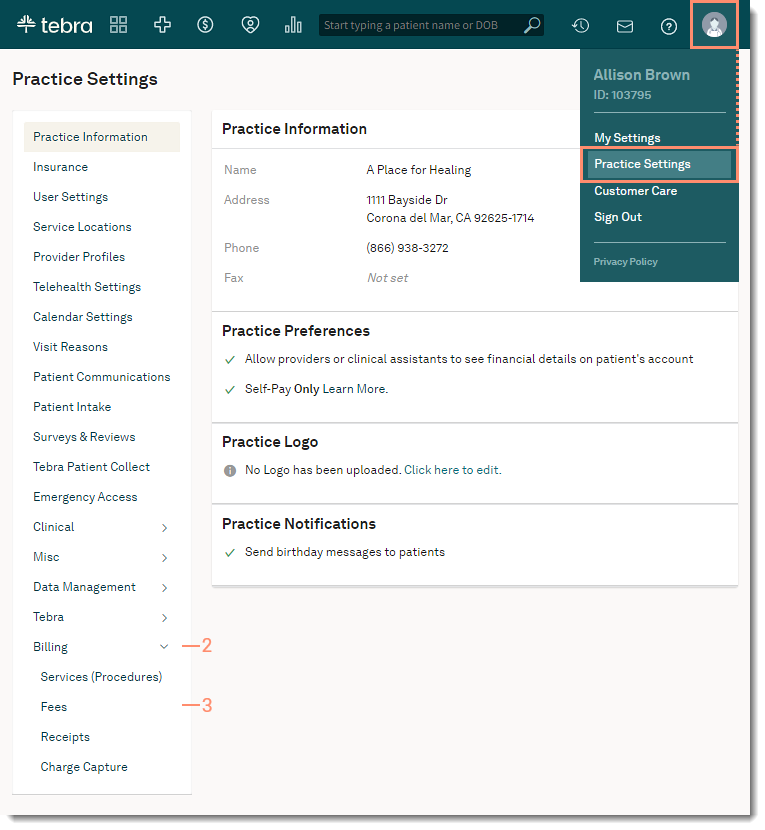
- Hover over the User icon and click on Practice Settings. The Practice Settings page opens.
- Click Billing. Additional setting options expands.
- Click Fees. The Fees page opens.
|
 |
Manually Add New Fee
- Click + New Fee drop-down arrow and select Manually. The new Fees page opens.
|
 |
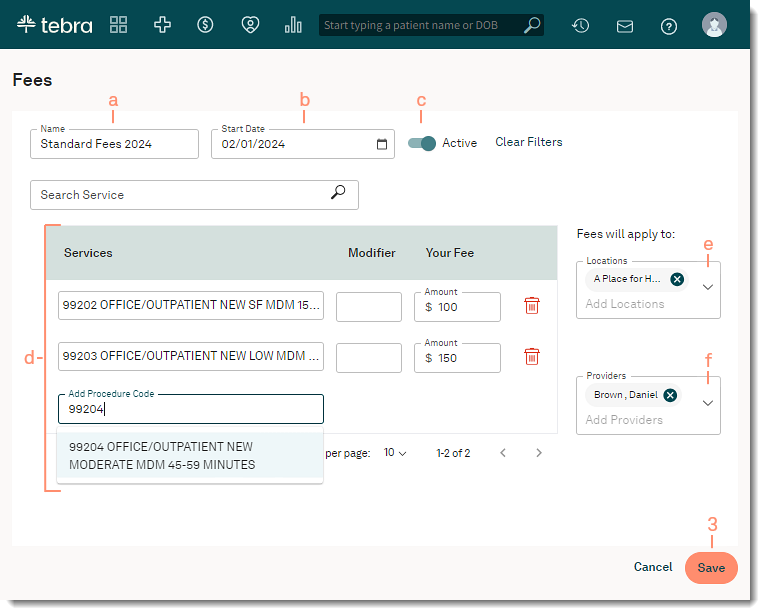
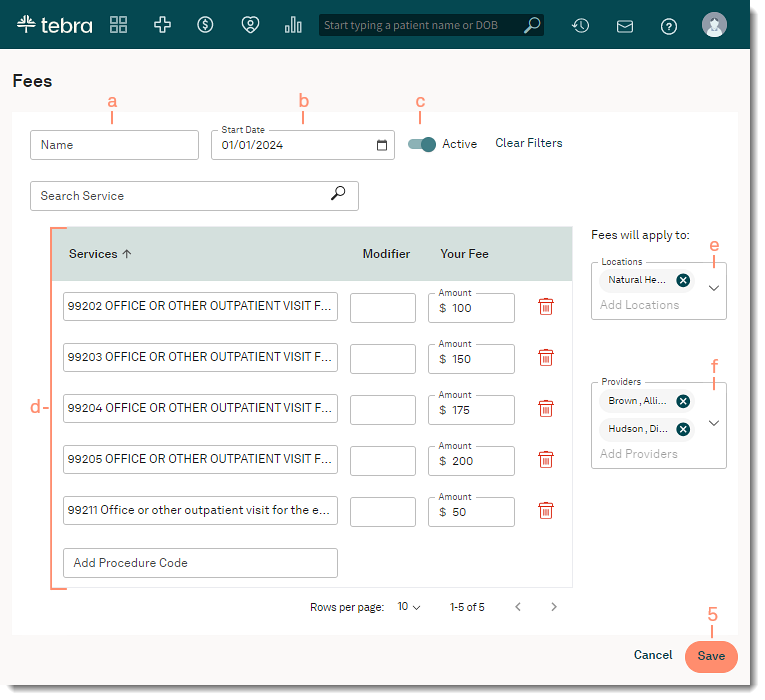
- Enter the information:
- Name: The name for the fee schedule.
- Start Date: The effective start date for the fee schedule.
- Active: Toggle is on by default. To make the fee schedule inactive, click the Active toggle to turn off.
- Service line details:
- Services: Type at least three characters and then select the appropriate procedure code from the results drop-down list.
- Modifier: If applicable, type at least one character then select the appropriate modifier code from the results drop-down list.
- Your Fee: The fee amount for the service.
- To remove a service line, click the trash icon.
- Locations: Click to select the service location(s) where this fee schedule is used.
- Providers: Click to select the provider(s) that use the fee schedule.
- Click Save when finished.
|
 |
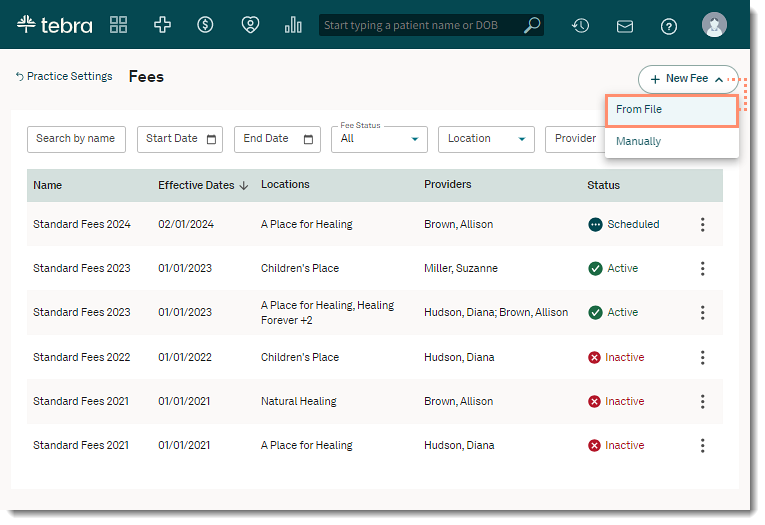
Add New Fee From File
- Click + New Fee drop-down arrow and select From File. The upload file pop-up window opens.
|
 |
- Click Download Template. Open the downloaded file and enter the procedures, optional modifiers, and fee amounts in the required CSV format. Save the file when finished.
- If the file was already created in the required CSV format, proceed to step 3.
- Drag and drop the saved file into the box or click browse to select the file and upload. The services, optional modifiers, and fee amounts populate.
|
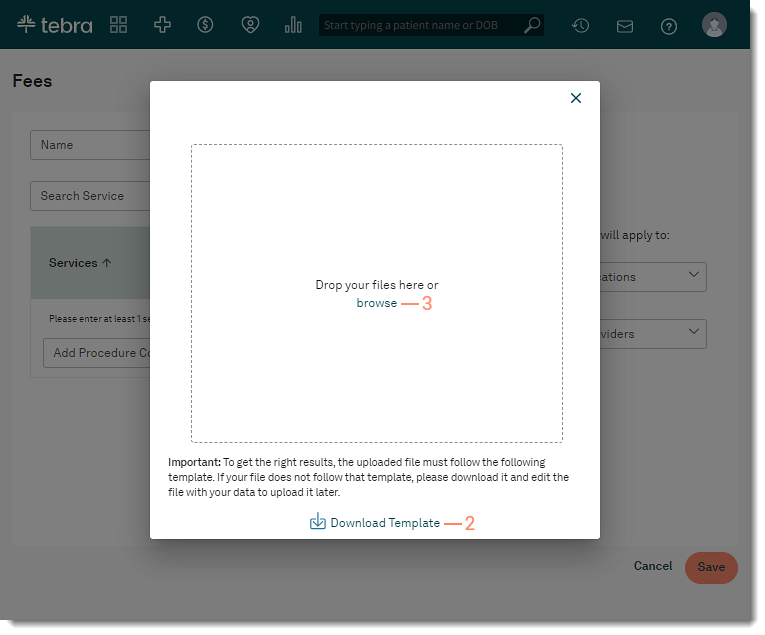 |
- Enter the information:
- Name: The name for the fee schedule.
- Start Date: The effective start date for the fee schedule.
- Active: Toggle is on by default. To make the fee schedule inactive, click the Active toggle to turn off.
- Review the service line details for accuracy and edit information as necessary.
- To add more service lines:
- Services: Type at least three characters and then select the appropriate procedure code from the results drop-down list.
- Modifier: If applicable, type at least one character then select the appropriate modifier code from the results drop-down list.
- Your Fee: The fee amount for the service.
- To remove a service line, click the trash icon.
- Locations: Click to select the service location(s) where this fee schedule is used.
- Providers: Click to select the provider(s) that use the fee schedule.
- Click Save when finished.
|
 |
Duplicate Fee
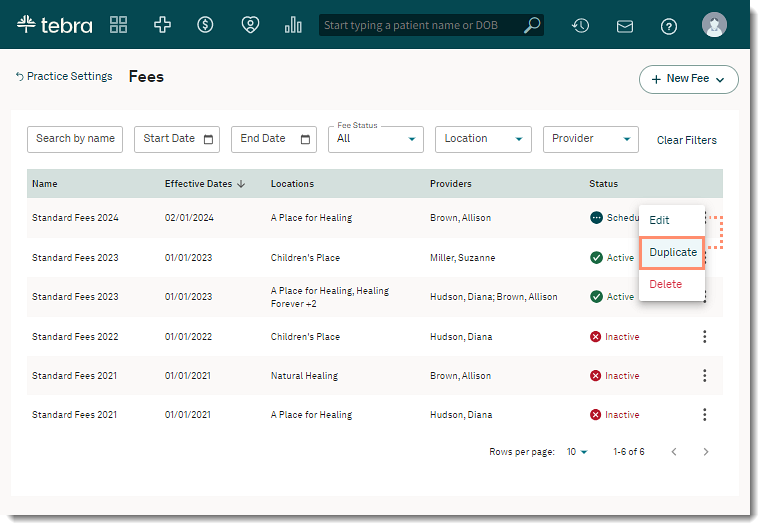
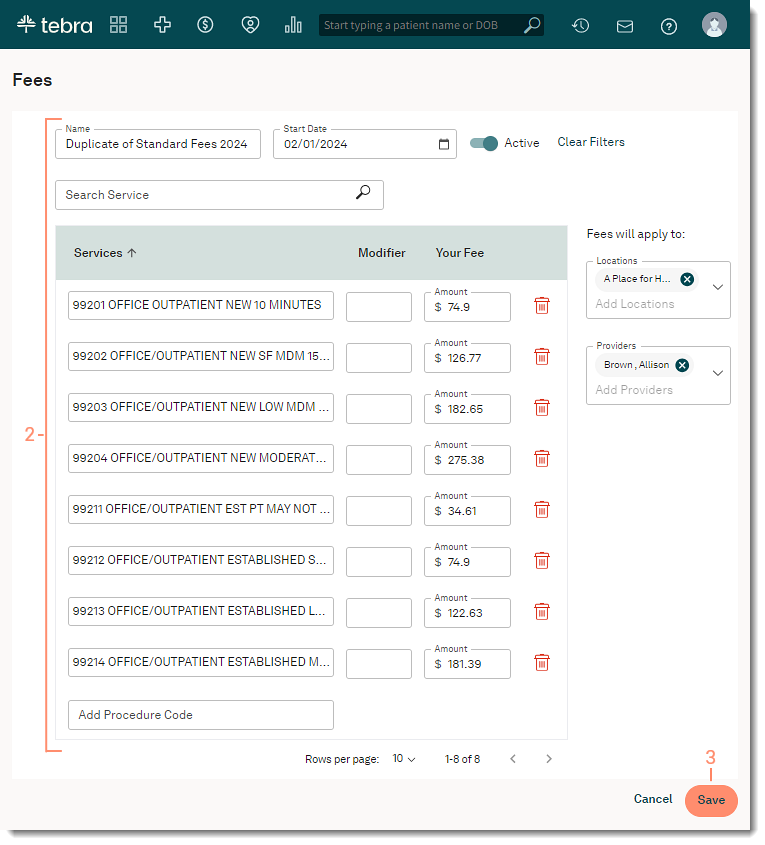
- Click the more options icon and select Duplicate. The duplicate Fees page opens.
|
 |
- Edit the duplicated fee schedule information as necessary.
- Click Save when finished.
|
 |
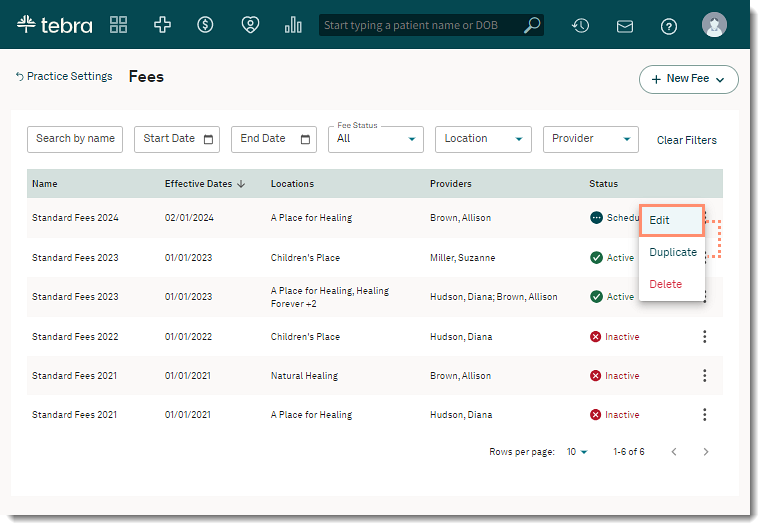
Edit or Deactivate Fee
- Click the more options icon and select Edit. The edit Fees page opens.
|
 |
- Edit the fee schedule information as necessary.
- To search for a specific service fee to edit, use the Search Service search box and enter at least the first three characters of the code or name to display results. To clear the search box, click X.
- To deactivate the fee schedule, click the Active toggle to turn off and update to Inactive.
- To remove a service line, click the trash icon.
- Click Save when finished.
|
 |
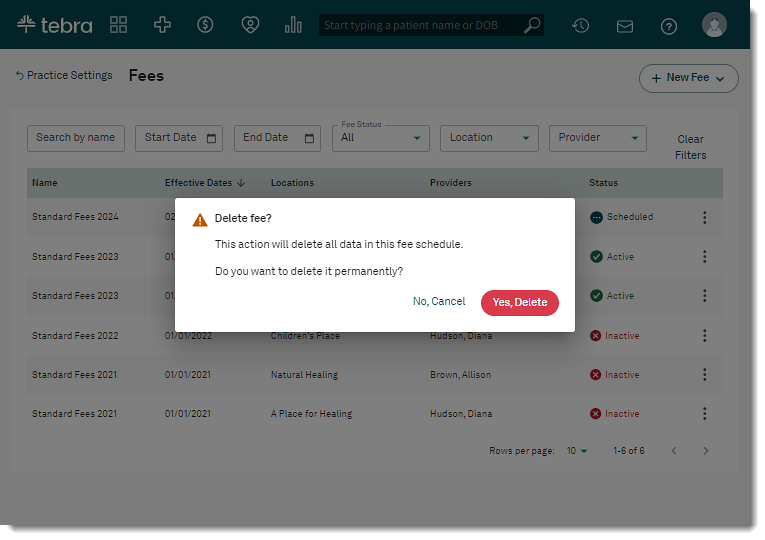
Delete Fee
- Click the more options icon and select Delete. The Delete fee? confirmation pop-up window opens.
|
 |
- To permanently delete the fee schedule and its data. Click Yes, Delete.
|
 |