Updated: 06/23/2023 | Views: 2226
The Day-of Reminder is part of the Patient Communications feature. This message is sent to patients via email and text message to remind them about their appointment and provide a link to get directions to your office. You can set the number of minutes before an appointment that this reminder is sent.
In order for a patient to receive patient communications:
- Automated patient communication preferences must be set on the Profile tab of the patient's Demographics page.
- An email address and mobile phone number must be entered on the Profile tab of the patient's Demographics page.
Access Day-of Appointment Reminder
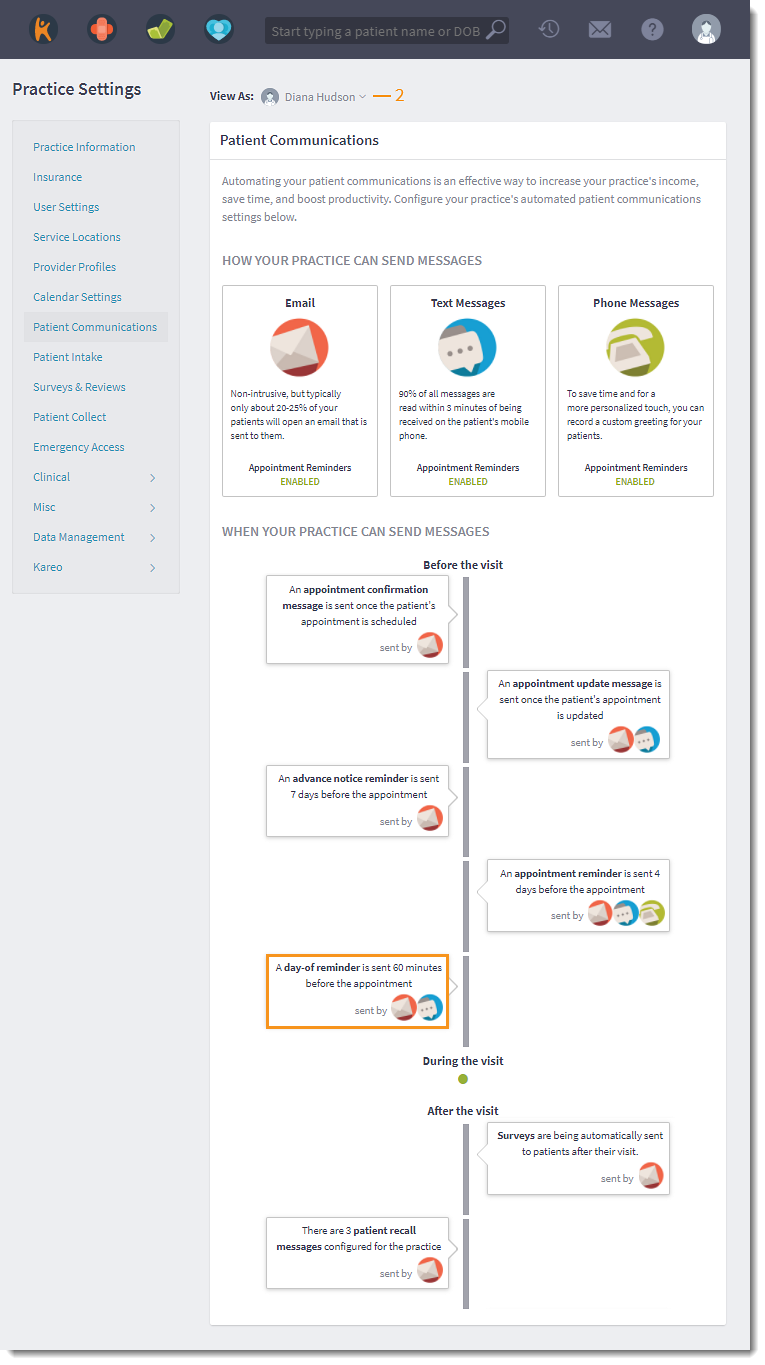
- Hover over the Platform icon and click on Patient Communications. The Patient Communications page opens.
- Click the drop-down arrow to select the provider these settings apply to.
- If applicable, click Turn on patient communications to activate Patient Communications for the provider.
- Click the Day-of Appointment Reminder card. The Day-of Appointment Reminder page opens.
|
 |
Configure Day-of Reminder
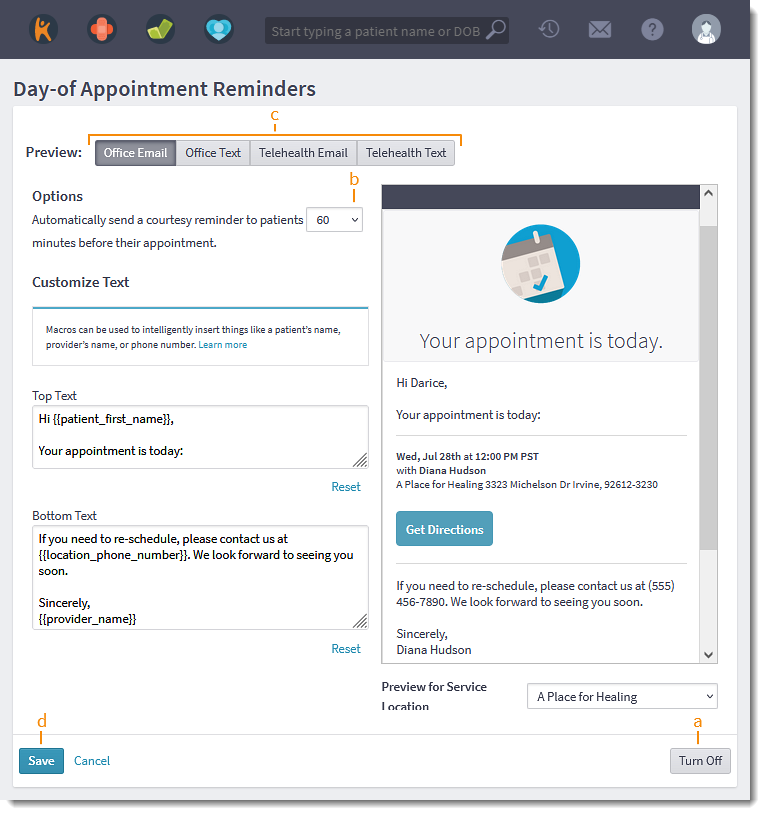
- To disable this reminder, click Turn off.
- Configure Options for the appointment reminder:
- By default, the reminder is set to send 60 minutes before the appointment. If desired, select a different amount of minutes (from 30–120) to send the reminder prior to an appointment.
- If desired, tailor the Office Email or Office Text specifically to the practice. Telehealth subscribers can also tailor the Telehealth Email or Telehealth Text to customize the patient experience.
Note: Patient Communication Customization is only available for Engage Subscribers.
- Click Save when finished.
|
 |
Customize Office Email
- If applicable, click Office Email. The Email Customization displays.
- Edit the Top Text and/or Bottom Text message. The new message displays in the email preview.
- Use a macro to insert the patient name, provider name, service location phone number, or option to send a message in the desired place.
- To preview the message for a specific service location, click the Preview for Service Location drop-down and select the service location.
- To restore the default message, click Reset. Then, click OK on the confirmation pop-up window.
- Click Save when finished or customize the Office Text reminder.
|
 |
Customize Office Text
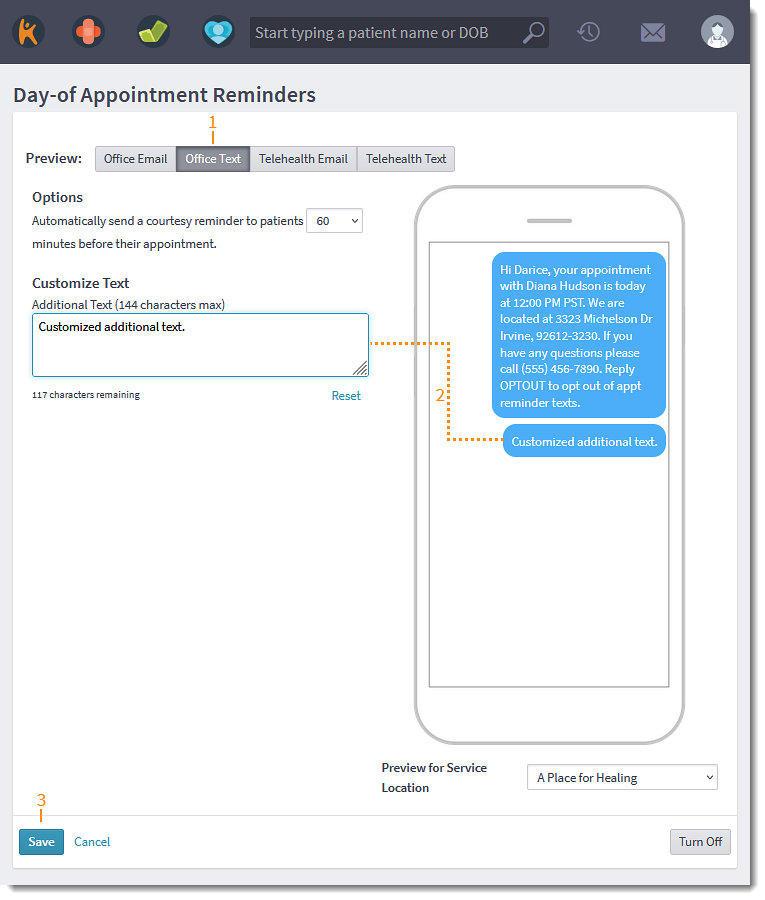
- Click Office Text. The Text Customization displays.
- Enter an additional message (144 characters max) to send with the appointment reminder. The message displays in the text preview.
- To preview the message for a specific service location, click the Preview for Service Location drop-down and select the service location.
- To remove the additional message, click Reset. Then, click OK on the confirmation pop-up window.
- Click Save when finished or if applicable, customize the Telehealth Email and Telehealth Text.
|
 |
Customize Telehealth Email
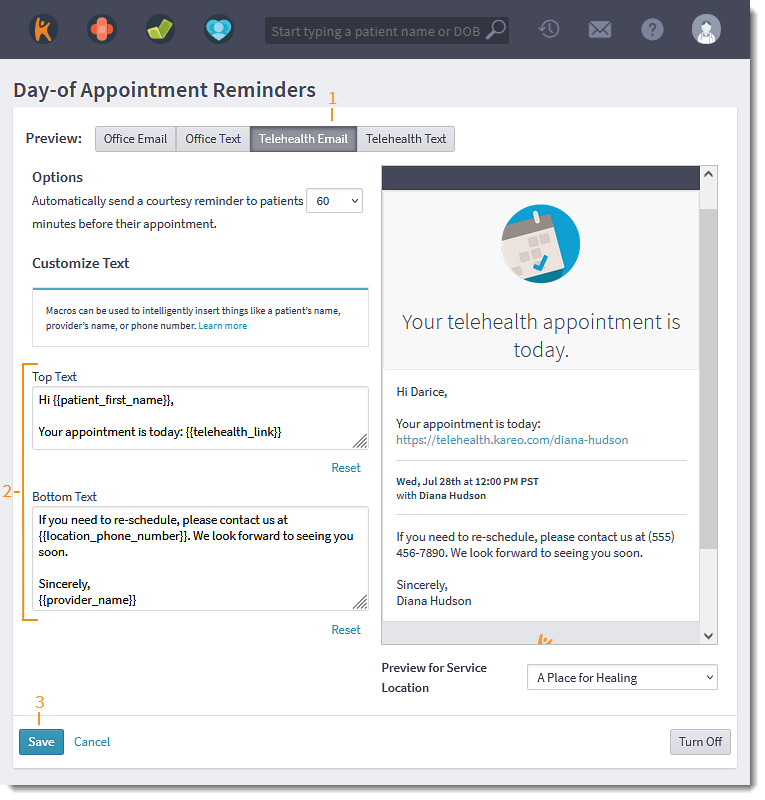
- If applicable, click Telehealth Email. The Email Customization displays.
- Edit the Top Text and/or Bottom Text message. The new message displays in the email preview.
- Use a macro to insert the patient name, provider name, link to the video visit, or option to send a message in the desired place.
- To preview the message for a specific service location, click the Preview for Service Location drop-down and select the service location.
- To restore the default message, click Reset. Then, click OK on the confirmation pop-up window.
- Click Save when finished or customize the Telehealth Text reminder.
|
 |
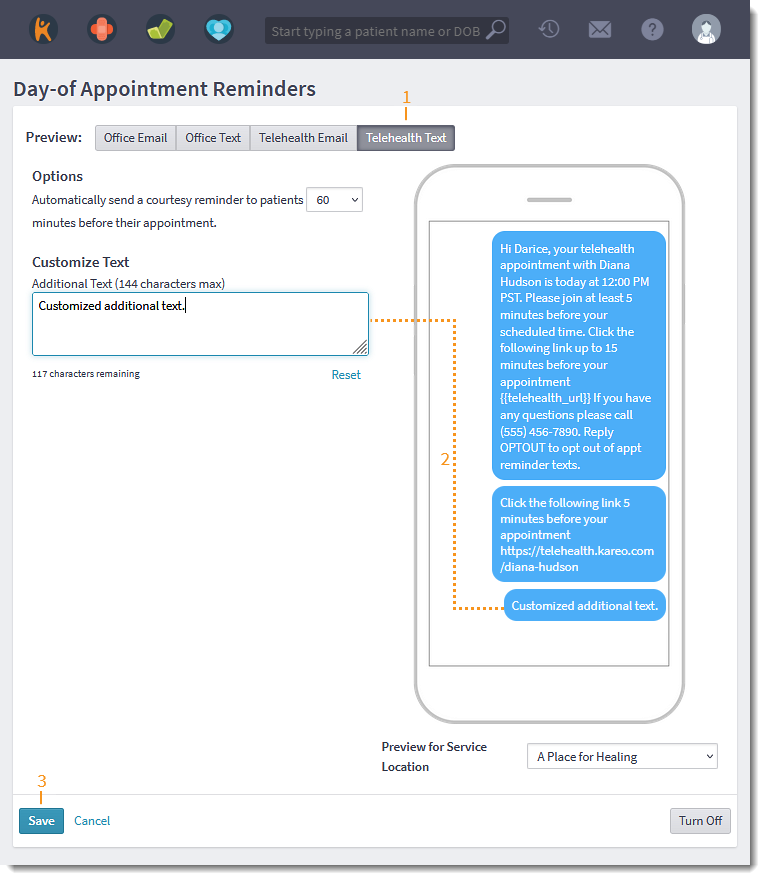
Customize Telehealth Text
- Click Telehealth Text. The Text Customization displays.
- Enter an additional message (144 characters max) to send with the appointment reminder. The message displays in the text preview.
- To preview the message for a specific service location, click the Preview for Service Location drop-down and select the service location.
- To remove the custom text, click Reset. Then, click OK on the confirmation pop-up window.
- Click Save when finished.
|
 |