Updated: 06/23/2023 | Views: 3092
Advance Notice Reminders are part of the Patient Communications feature and is emailed to patients to remind them of an upcoming appointment. You can specify how many days before the appointment to send the reminder.
In order for a patient to receive patient communications:
- Automated patient communication preferences must be set on the Profile tab of the patient's Demographics page.
- An email address and mobile phone number must be entered on the Profile tab of the patient's Demographics page.
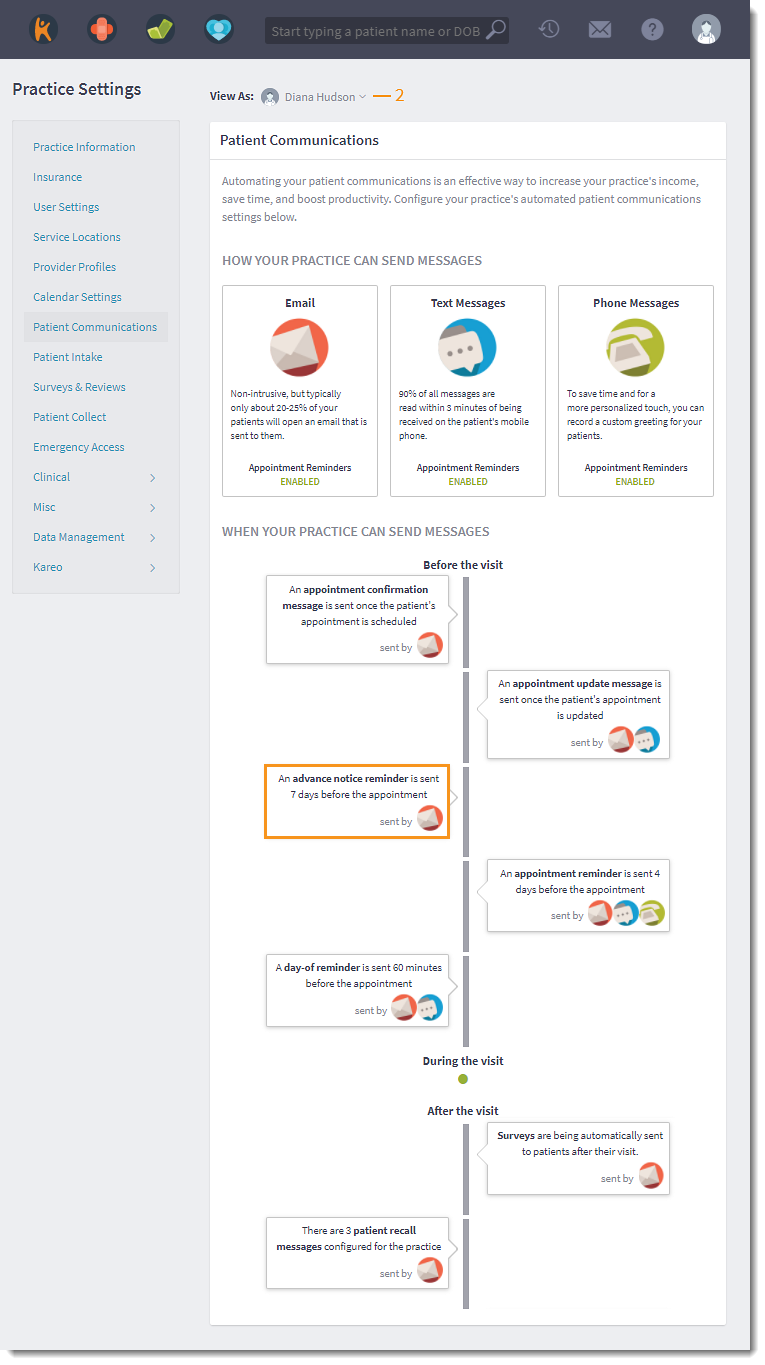
Access Advance Notice Reminder
- Hover over the Platform icon and click on Patient Communications. The Patient Communications page opens.
- Click the drop-down arrow to select the provider these settings apply to.
- If applicable, click Turn on patient communications to activate Patient Communications for the provider.
- Click the Advance Notice Reminder card. The Appointment Update Messages page opens.
|
 |
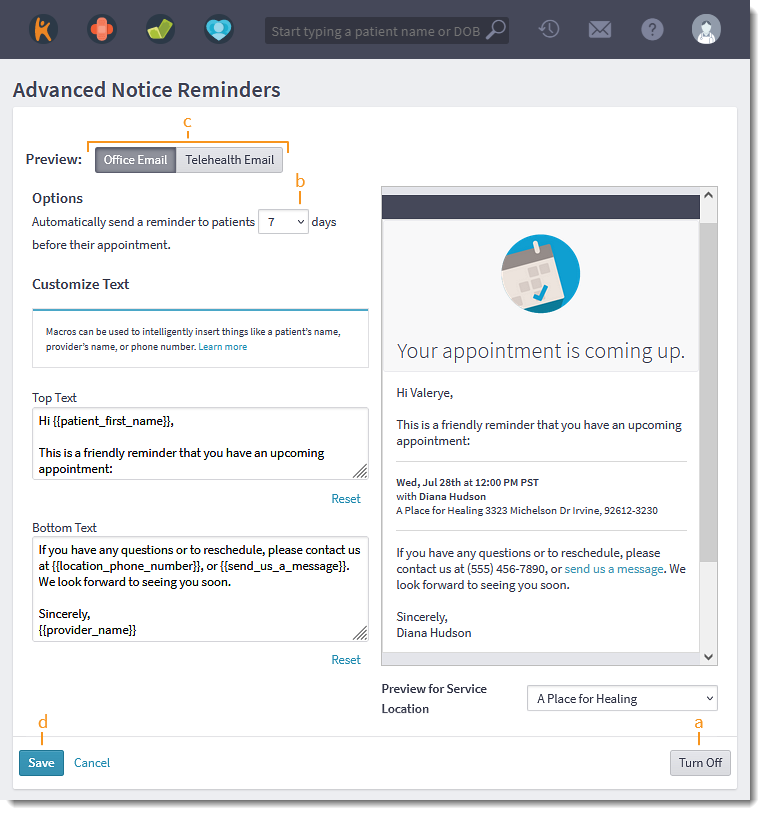
Configure Advance Notice Reminder
- To disable this reminder, click Turn off.
- Configure Options for the appointment reminder:
- By default, the reminder is set to send 7 days before the appointment. If desired, select a different amount of days (from 7 - 14) to send the reminder prior to an appointment.
- If desired, tailor the Office Email specifically to the practice. Telehealth subscribers can also tailor the Telehealth Email to customize the patient experience.
Note: Patient Communication Customization is only available for Engage Subscribers.
- Click Save when finished.
|
 |
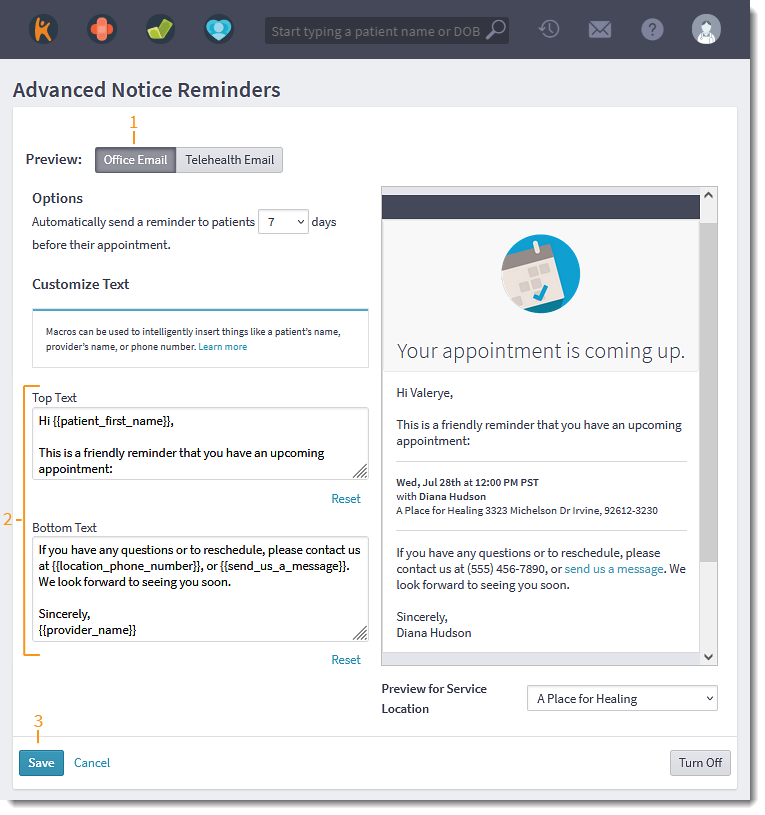
Customize Office Email
- If applicable, click Office Email. The Email Customization displays.
- Edit the Top Text and/or Bottom Text message. The new message displays in the email preview.
- Use a macro to insert the patient name, provider name, service location phone number, or option to send a message in the desired place.
- To preview the message for a specific service location, click the Preview for Service Location drop-down and select the service location.
- To restore the default message, click Reset. Then, click OK on the confirmation pop-up window.
- Click Save when finished or if applicable, customize the Telehealth Email.
|
 |
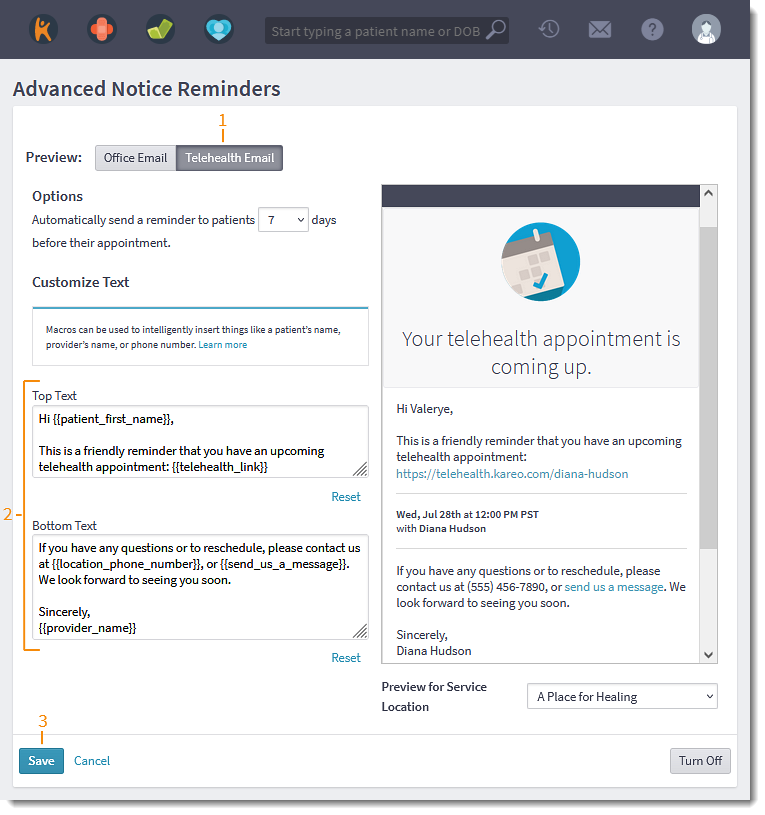
Customize Telehealth Email
- Click Telehealth Office. The Email Customization displays.
- If desired, customize the Telehealth Email. Edit the Top Text and/or Bottom Text message. The new message displays in the email preview.
Note: Patient Communication Customization is only available for Engage Subscribers.
- Use a macro to insert the patient name, provider name, link to the video visit, or option to send a message in the desired place.
- To exclude the link to the telehealth video visit for this appointment reminder, remove the "telehealth_link" macro from the Top Text.
- To preview the message for a specific service location, click the Preview for Service Location drop-down and select the service location.
- To restore the default message, click Reset. Then, click OK on the confirmation pop-up window.
- Click Save when finished.
|
 |