Configure Online Appointment Booking
- Last updated
-
-
Save as PDF
Updated: 02/02/2024 | Views: 11625
For Engage subscribers, your Provider Profile includes online appointment scheduling. Patients can easily schedule an appointment from your profile page that integrates directly with your calendar. Customization options allow you to set the time interval between appointments, the minimum notice time between the current time and requested appointment time, specific times for appointment scheduling, and office locations for each day of the week.
For Engage and Telehealth subscribers, the online scheduler has the option for patients to request an in-office appointment or telehealth appointment. Once the online scheduler is enabled, patients will automatically have the option to select a telehealth appointment.
Available for Engage subscribers.
 Important Note: Allow 24-48 hours for saved changes to take effect.
Access Provider Profile Editor
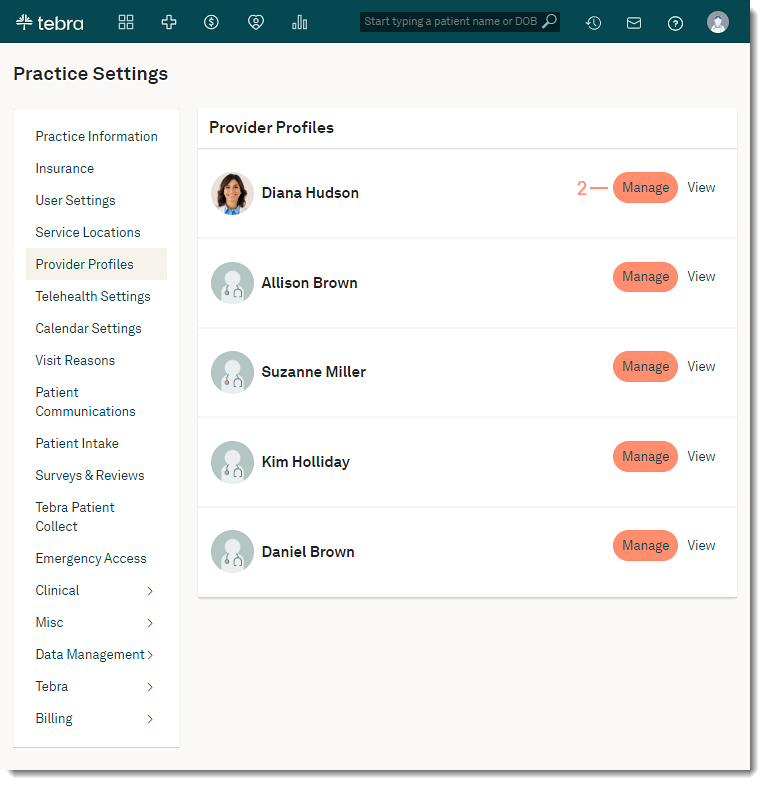
- Hover over the Platform icon and click on Provider Profiles. The Provider Profiles page opens.
- Click Manage on the right of the provider name. The Provider Profile page opens.
- Scroll to the Online Booking section of the Provider Profile.
|
 |
Enable Online Booking
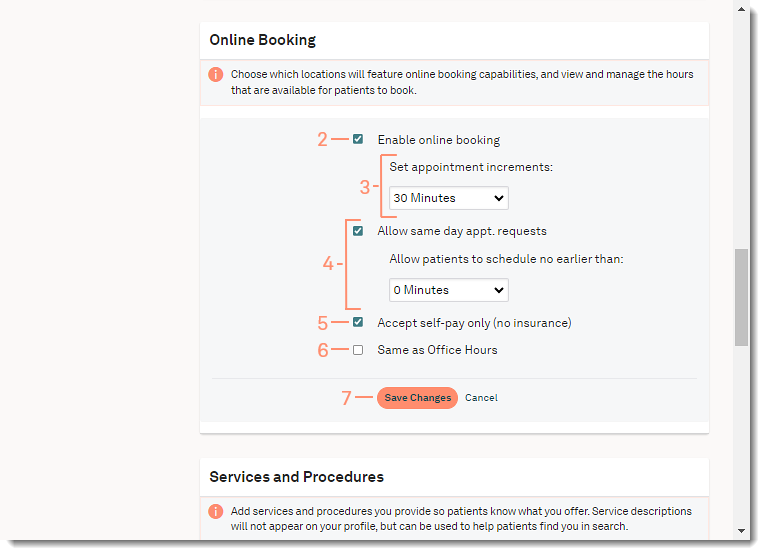
- Click Edit. The editor opens.
- Click to select "Enable online booking".
- By default, the appointment increment is set to 30 minutes.
- To set a different appointment increment between appointments, click the Set Appointment Increment drop-down arrow and select an interval. Available options: 5, 10, 15, 20, 30, 45, 60, or 90 minutes.
- By default, the option to allow patients to request same day appointments is disabled.
- To allow same day requests, click to select "Allow same day appt requests". Then, select the minimum notice time between the current time and the requested appointment time.
- By default, patients can schedule appointments immediately. To set a different minimum notice time, click the Allow patients to schedule no earlier than drop-down arrow and select an interval. Available options: 0 minutes, 30 minutes, 1 hour, 2 hours, 3 hours, 4 hours, 5 hours, 6 hours, 7 hours, or 8 hours.
- By default, the option to accept self-pay only patients is disabled. This indicates the provider accepts insurance and self-pay patients.
- To indicate the provider only accepts self-pay patients, click to select "Accept self-pay only (no insurance)".
- By default, the option to use the same office hours set in Calendar Settings to set online appointments times is disabled. Leave this option disabled to set custom online appointment booking times.
- To set the same office hours set in Calendar Settings, click to select "Same as Office Hours".
- Click Save Changes when finished.
Note: Allow 24-48 hours for saved changes to take effect.
|
 |
Manage Online Booking Hours
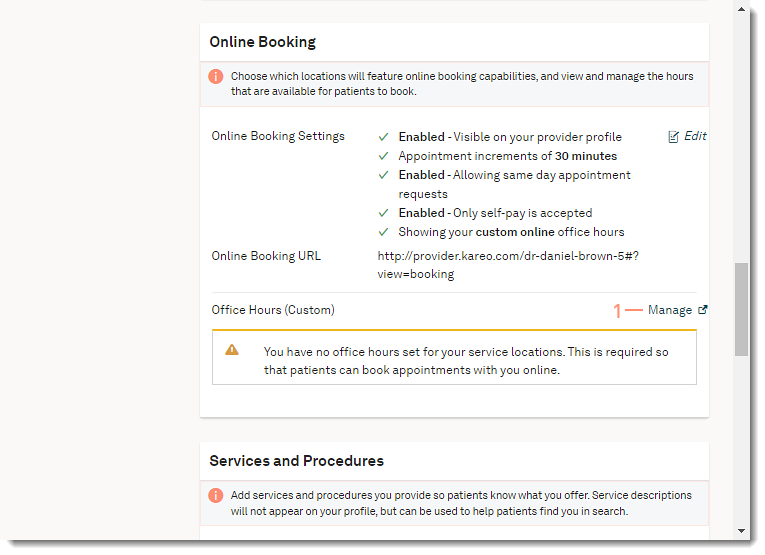
- Click Manage in the Office Hours (Custom) section. The Online Appointment Booking page opens.
- If "Same as Office Hours" is selected when enabling Online Booking, the Office Hours page opens.
|
 |
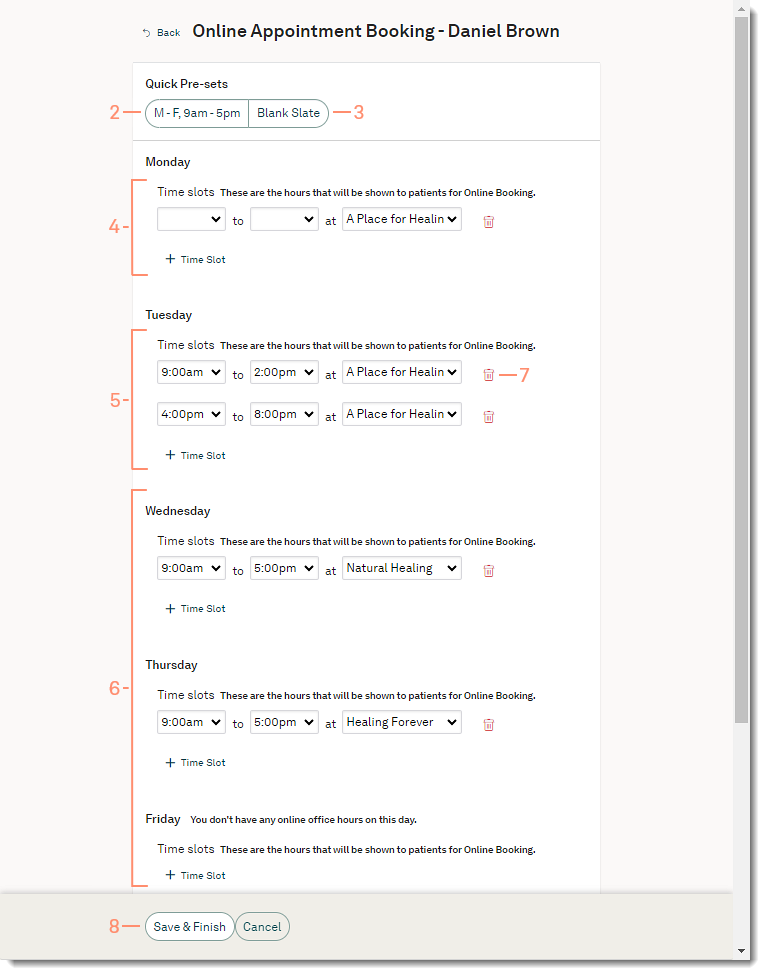
- To quickly auto-set Monday through Friday hours, click M-F, 9am-5pm. The time slots for Monday through Friday populates with 9am - 5pm without a service location selected.
- To clear all appointment hours, click Blank Slate.
- To set custom online appointment booking hours for a day, click +Time Slot.
- Click the drop-down arrows and select a start time, end time, and location.
- To set breaks in appointment hours (e.g., when the practice closes for lunch), add morning hours in one time slot and add a second time slot for the day with afternoon hours.
- Continue to set online appointment booking hours for each day of the week, as applicable.
- To remove a time slot, click the trash icon.
- Click Save & Finished when all online appointment booking hours has been added.
Note: Allow 24-48 hours for saved changes to take effect.
|
 |