Edit or Delete Group Appointment
- Last updated
-
-
Save as PDF
Updated: 09/22/2023 | Views: 1972
Once you've created a group appointment, you can edit the details, resources, and attendees. Group appointments can be easily deleted if the appointment was made in error or is no longer needed.
Edit Group Appointment
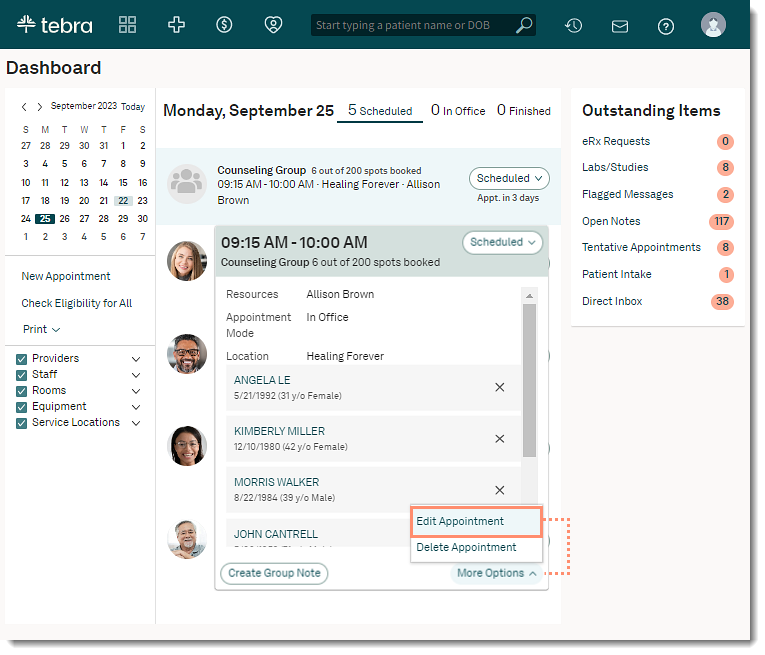
- Click on the appointment to view the Appointment Card.
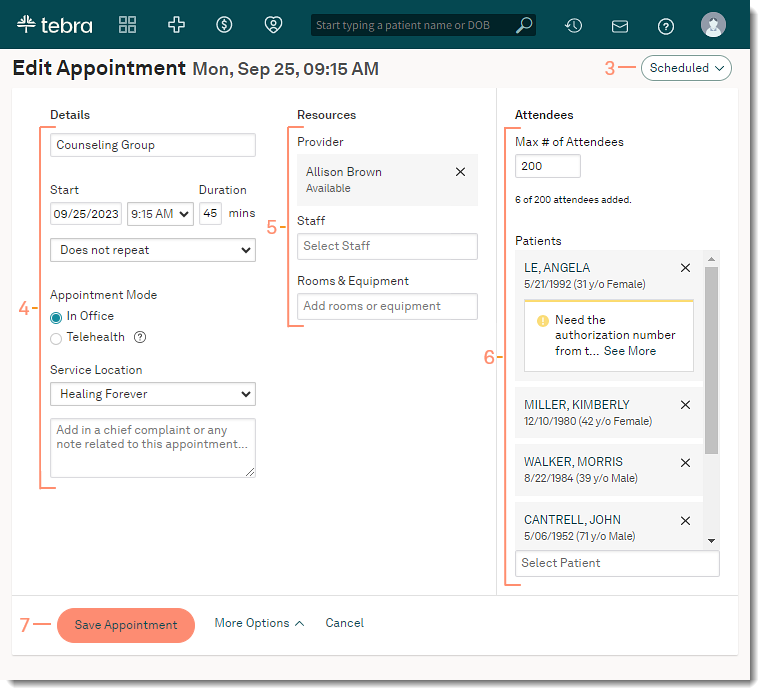
- Click More Options and select Edit Appointment. The Edit Appointment page.
|
 |
- Click the drop-down arrow to change the status of the appointment.
- Make applicable changes to the Details.
- Edit the Group Name, if necessary. This name will appear on the appointment when it's displayed in the Calendar time slot and on the Dashboard at the time of the group appointment.
- Adjust the appointment Duration, if necessary.
- Select a pre-set or custom recurring appointment option, if necessary.
- Change the Appointment Mode, if applicable. The "Telehealth" option is only available for Telehealth subscribers.
- If the practice has multiple locations, select a different Service Location from the drop-down menu.
- Add an optional note about the appointment. Notes will populate the Appointment Notes section of the group note (Clinical subscribers only).
- Make applicable changes to the Resources.
- To remove a resource, click X next to the resource.
- To add new resources, search for and select the resource.
- Make applicable changes to the Attendees.
- To remove an attendee, click X next to the patient's name.
- To add an attendee, search for a patient.
- Existing Patient: Begin entering the patient's name and click on the patient's name when it appears.
- New Patient: If the patient record is not found, select Click to create new patient record to add a patient record.
- To collect a payment or create a charge, hover over the patient's name.
- Click Save Appointment when finished.
|
 |
Delete Group Appointment
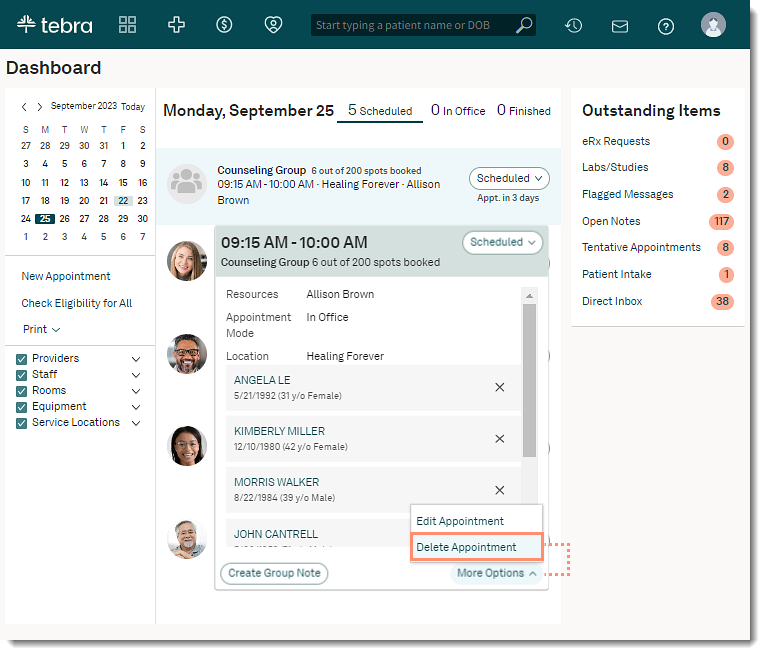
- Click on the appointment to view the Appointment Card.
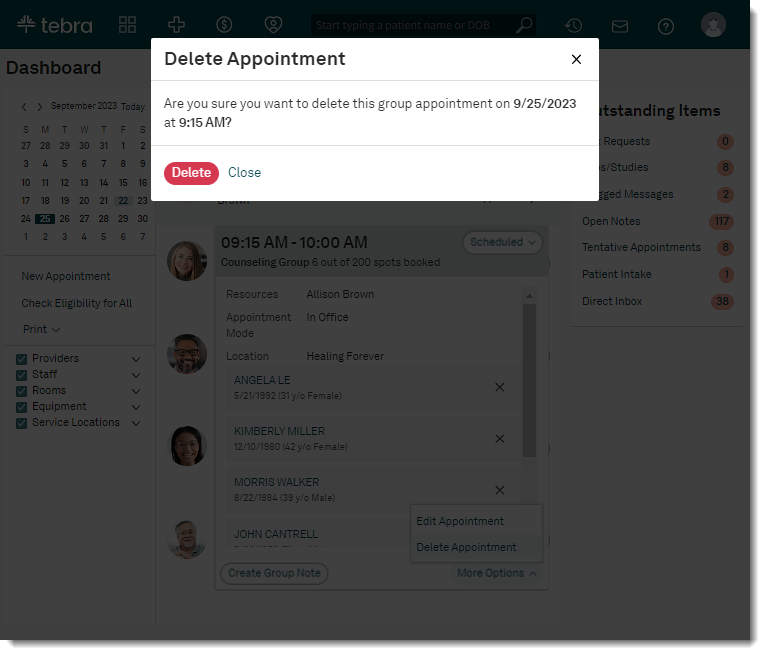
- Click More Options and select Delete Appointment. The Delete Appointment pop-up window opens.
|
 |
- Click Delete to confirm. The appointment is removed from the Dashboard and calendar.
|
 |