Apply, Edit, or Disable Patient Recall Message
- Last updated
-
-
Save as PDF
Updated: 08/21/2023 | Views: 4335
Automated recall messages support return business for your practice by reminding patients when they are due for continuing care. Once a recall message has been created, it can be enabled for patients.
In order for a patient to receive patient communications:
- Automated patient communication preferences must be set on the Profile tab of the patient's Demographics page.
- An email address must be entered on the Profile tab of the patient's Demographics page.
Available for Engage subscribers.
Access Patient Recall
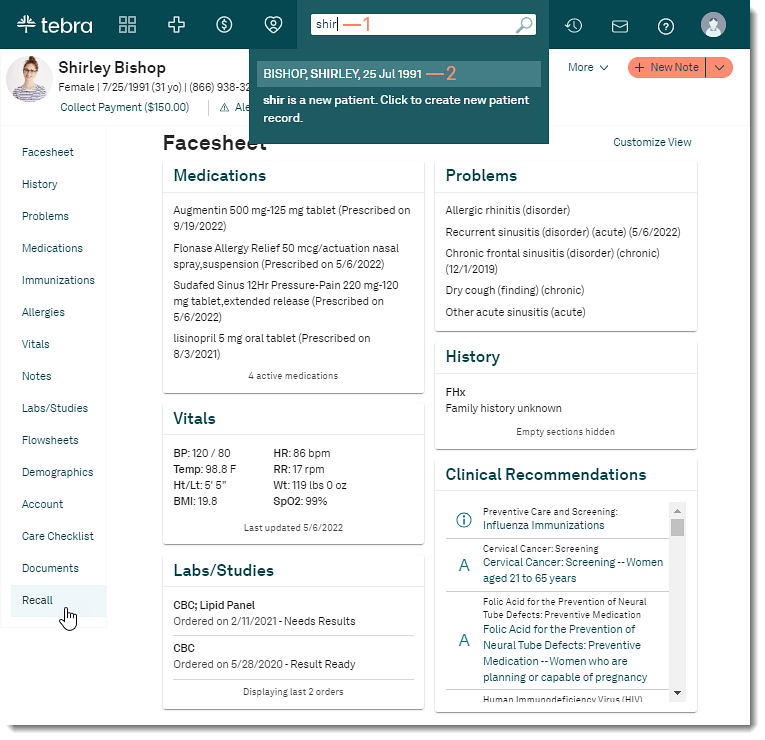
- Enter the first 2–3 letters of the patient's name or date of birth (mm/dd/yyyy) in the top navigation bar search box.
- Click to select the patient from the auto-populated results. The patient's Facesheet page opens.
- Click Recall. The Recall page opens.
|
 |
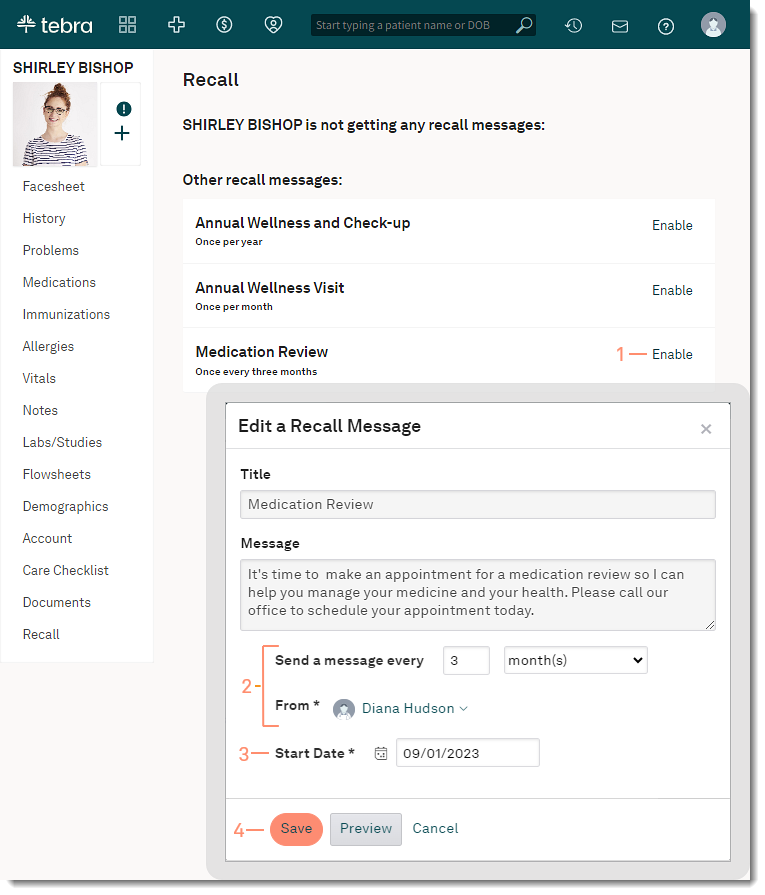
Apply Recall Message
- Click Enable on the right of the desired Recall message. The Edit a Recall Message pop-up window opens.
- Change the message delivery recurrence options and the provider the message is sent from, if necessary.
- Select a Start Date to begin sending the Recall message.
- Click Save when finished. The recall message is added to the patient's Recall message list.
- To preview the recall message sent to the patient, click Preview.
|
 |
Edit Recall Message Schedule
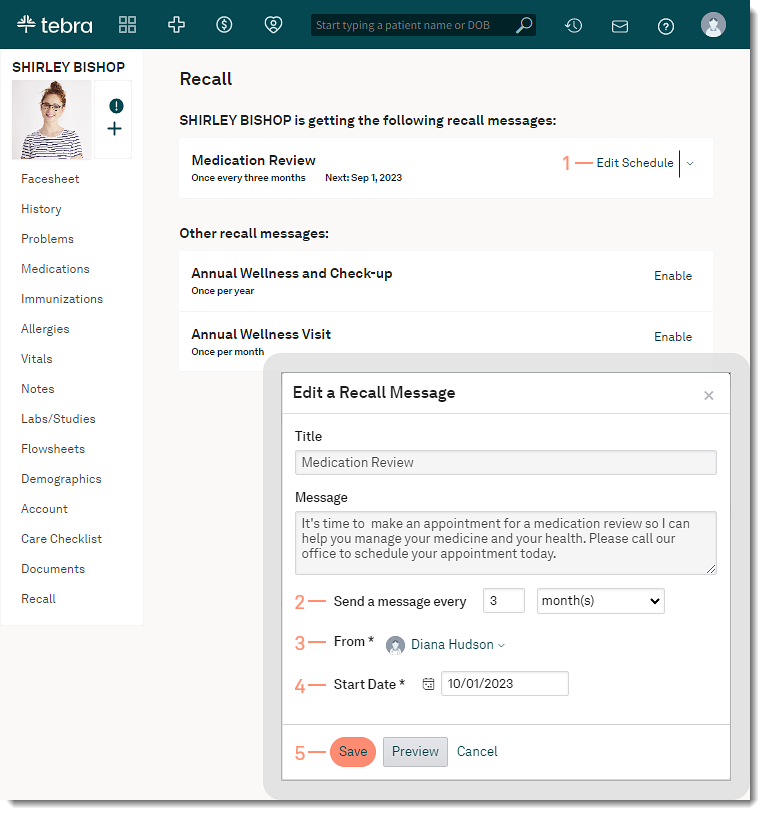
Follow these steps to edit the recall message scheduled for the patient.
- Click Edit Schedule. The Edit a Recall Message pop-up window opens.
- To change the message delivery schedule, enter how often the appointment occurs and select if the appointment occurs every Week(s), Month(s), or Year(s).
- To changed which provider the message is sent from, click the From drop-down and select a different provider.
- To change the Start Date, click the date picker and select a new date.
- Click Save when finished. The recall message schedule is updated.
|
 |
Disable Recall Message
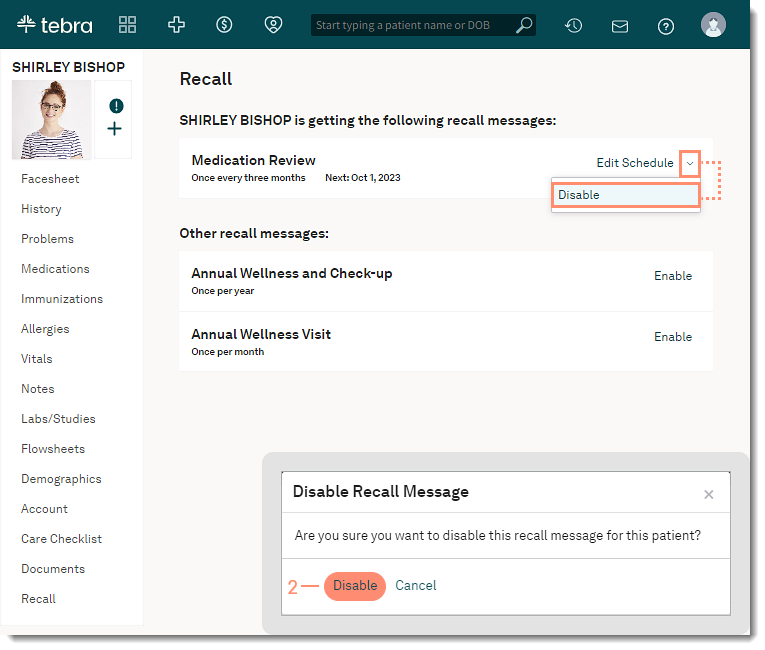
Follow these steps to remove a scheduled recall message for the patient.
- Click the down arrow and select Disable. The Disable Recall Message pop-up window opens.
- Click Disable. The recall message is removed from the patient's Recall message list.
|
 |