Kareo and PatientPop are now Tebra. Becoming Tebra will take time and we appreciate your patience as we transition to the new brand experience.Learn More
Tebra Help Center

Add New Patient

Updated: 08/18/2023|Views: 21954

Patient records (charts) are used to schedule appointments and manage patient information, including demographics, contacts, insurance, and appointments. It is recommended to populate the patient's email address and full address in their chart to prevent delays with sending patient communication, patient intake, billing statements, and more.

icon_warning.png Important Notes: Patient records cannot be deleted in the web platform. Verify the patient record is not a duplicate before saving. Patients created in error with no clinical data can be deleted via the Desktop Application. If the patient has clinical data, it is recommended to deactivate the patient chart to preserve historical data.

Access Create Patient
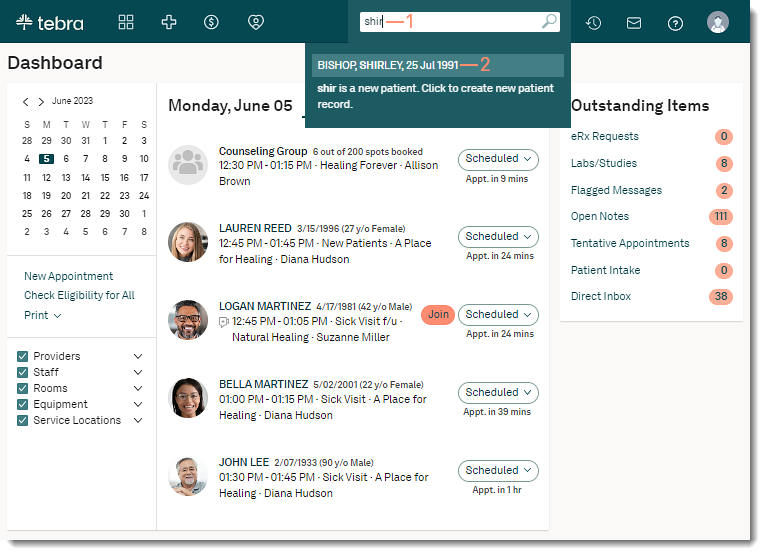
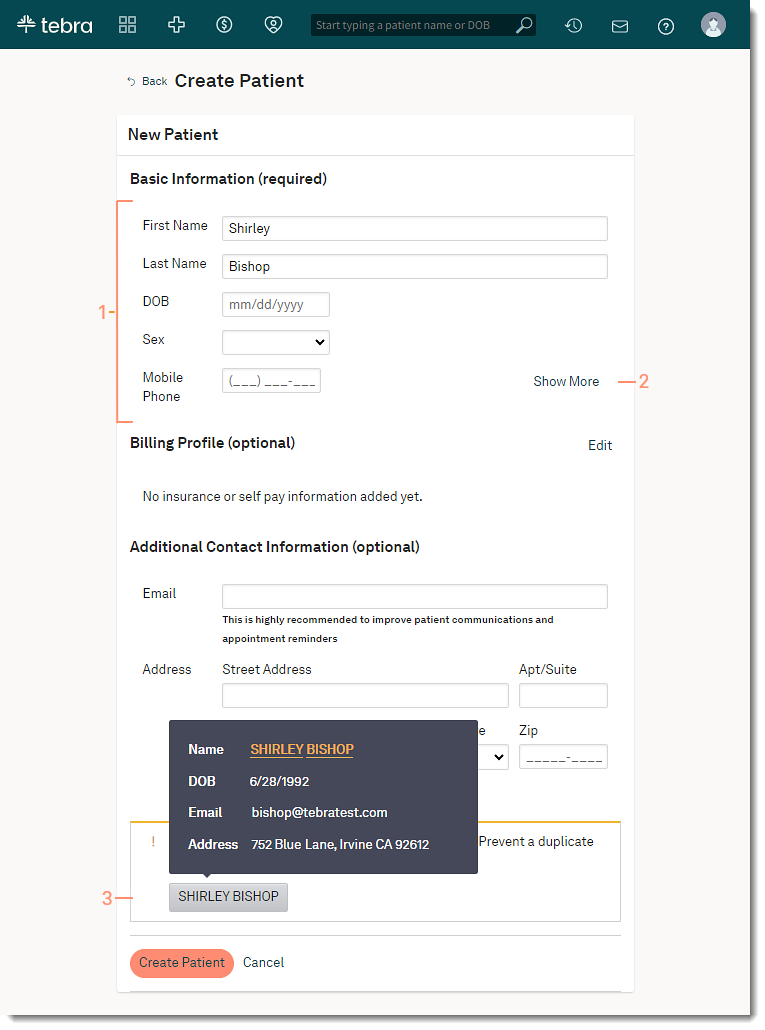
  1. Enter the first 2–3 letters of the patient's name or date of birth (mm/dd/yyyy) in the top navigation bar search box.
  2. If the patient does not appear in the auto-populated results, click the link to create a new patient record. The Create Patient page opens.
Platform_Dashboard_PatientSearch.png

Basic Information

When entering a new patient into the system, Tebra automatically begins checking the database for possible duplication of a patient record and presents a warning message if any are found. Tebra uses the following information to search for duplicates: first name, last name, date of birth, or phone number.
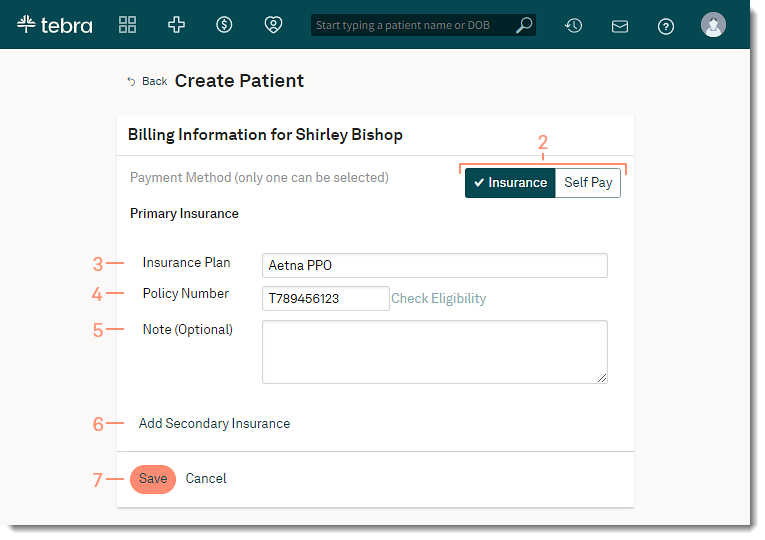
  1. Enter the patient's information:
    • First Name
    • Last Name
    • DOB (date of birth)
    • Sex
    • Mobile Phone number
  2. Optionally, click Show More to enter a Home or Work phone number.
  3. If a duplicate patient warning message appears, hover over the patient name(s) to view more information to help determine if the patient is a duplicate. Verify the patient record is not a duplicate before saving as patient records cannot be deleted.
Platform_NewPatient_Basic.png

Billing Profile

Enter the patient's insurance information to determine eligibility and to prevent billing delays.

Note: For Self-Pay Only enables practices, the Billing Profile section is hidden. Instead, a self-pay insurance case will  automatically be created after the patient is saved.
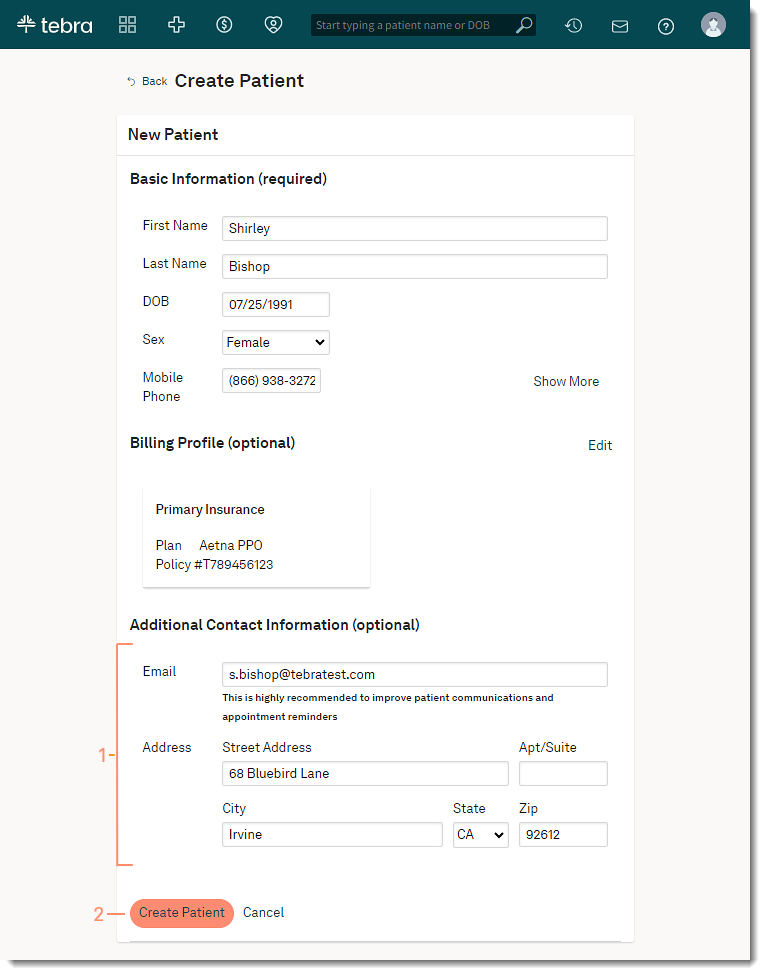
  1. Click Edit. The Billing Information page opens.
  2. By default, Insurance is selected as the Payment Method.
    • If the patient does not have insurance, click Self Pay. Then, click Save. The Create Patient page opens.
  3. Begin entering the primary insurance plan name in the Insurance Plan field and select the plan from the auto-populated results.
  4. Enter the Policy Number as shown on the patient's insurance card.
    • If applicable, click Check Eligibility.
      1. Click the drop-down arrow and choose the appropriate provider from the list.
      2. Click Run Eligibility Check. The Billing Information window opens and eligibility status displays under the policy number.
  5. Enter optional notes in the Note field.
  6. Click Add Secondary Insurance to enter secondary plan and policy number, if applicable.
  7. Click Save. The Create Patient page opens and the billing information displays in the Billing Profile section.
Platform_NewPatient_Billing.png

Additional Contact information

It is recommended to populate the patient's email and address to send patient communication, patient intake, billing statements, and more.

Tip_Icon.png Tip: Populate the patient's email and address to prevent delays with patient communication, eLab orders (Clinical subscribers), and patient statement billing (Billing subscribers).

  1. Enter the patient's contact information:
    • Email
    • Address
  2. Click Create Patient. The patient record is created and the patient's Demographics page opens.
Platform_NewPatient_Additional.png
  • Was this article helpful?