Enter Patient Additional Information
- Last updated
-
-
Save as PDF
Updated: 06/23/2023 | Views: 6795
The majority of the information on the Additional Information tab is used for identification purposes. The front office can add a patient's preferred pharmacies, which are then available for the provider when ePrescribing.
If your practice is maintaining immunization records and plans to send them to the Immunization Registry, enter the required fields: Mother's First Name, Mother's Maiden Name, Birth Order, Multiple Birth Member, and Birth City.
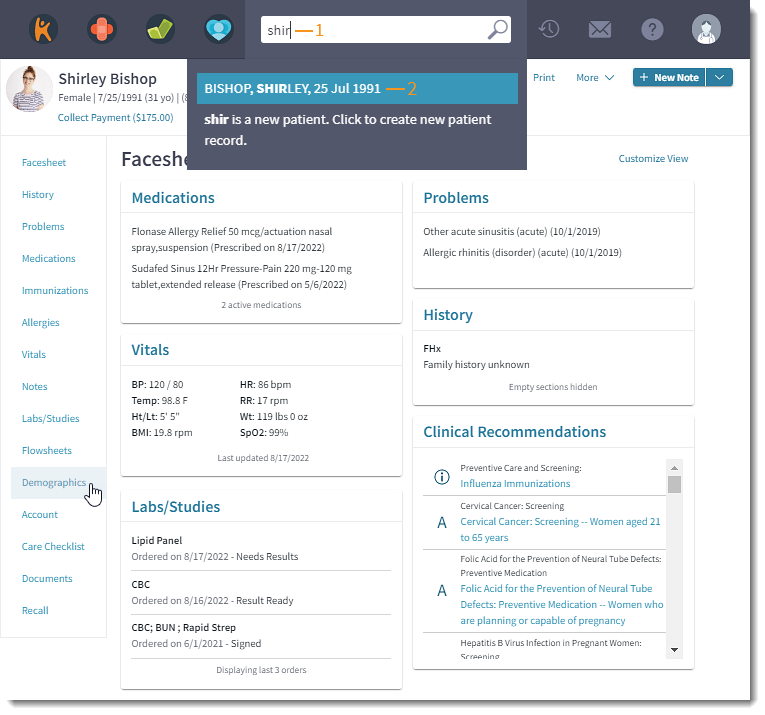
Access Demographics
- Enter the first 2–3 letters of the patient's name or date of birth (mm/dd/yyyy) in the top navigation bar search box.
- Click to select the patient from the auto-populated results. The patient's Facesheet page opens.
- Click Demographics. The Demographics page opens.
|
 |
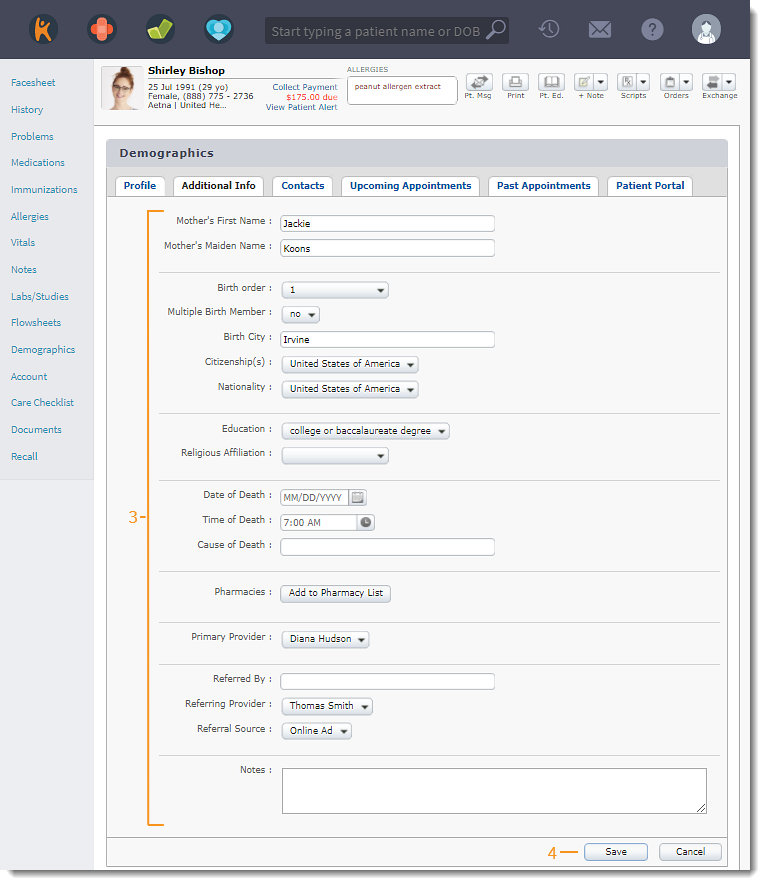
Enter Additional Information
- Click the Additional Info tab. The Additional Info page opens.
- Click Edit. The Additional Info editor opens.
- Populate fields if available or applicable:
- Mother: Enter the patient's mother's first name and/or maiden name.
- Birth: Select the patient's birth order, whether the patient is a multiple birth member (e.g., twins), their birth city, citizenship status, and nationality.
- Education: Select the patient's highest level of education.
- Religious Affiliation: Select the patient's religious affiliation.
- Patient Death: In case of the patient's death, populate the patient's Date of Death, Time of Death, and Cause of Death.
- Pharmacies: Add the patient's preferred pharmacies. Review Add Pharmacy for instructions.
- Primary Provider: Select the patient's provider.
- Referring Provider: Select a referring provider from the drop-down list.
- Referral Source: Select a referral source from the drop-down list.
- Notes: Enter any applicable notes about the patient.
- Click Save when finished.
|
 |
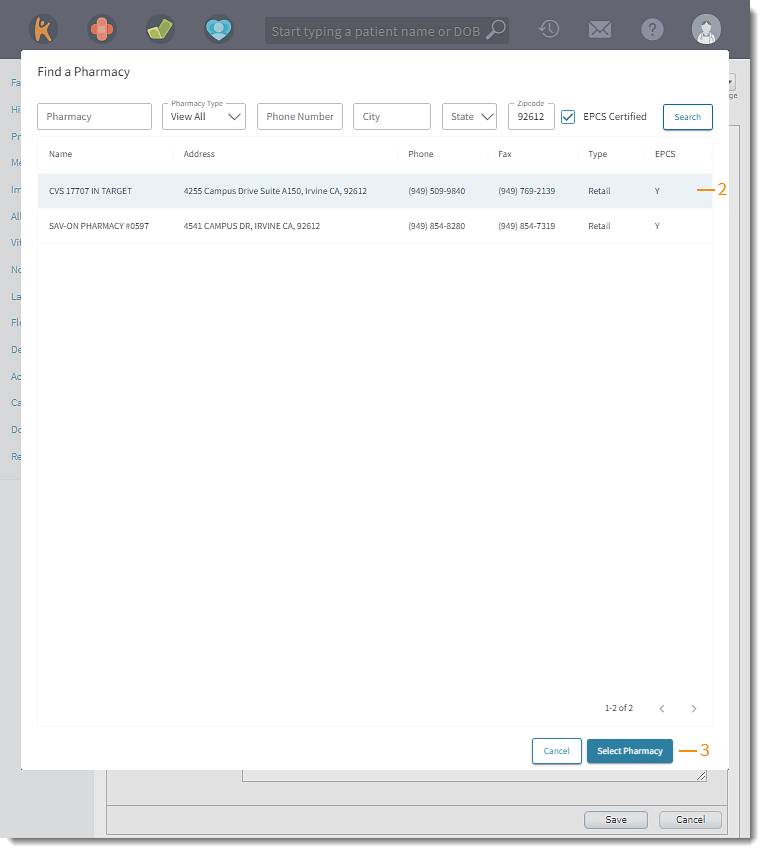
Add Pharmacy
- Click Add to Pharmacy List. The Find a Pharmacy pop-up window opens.
- Click to select a pharmacy from the auto generated results based on the patient's zip code or search for a pharmacy.
- To search for a pharmacy, remove the zip code and enter any of the following search criteria. Then, click Search and click to select the pharmacy from the results.
 Tip: Search by a city name or zip code only for broader results. Tip: Search by a city name or zip code only for broader results.
- Pharmacy: Enter the first 2–3 letters of the pharmacy's name, the whole pharmacy's name, or store number (e.g., CVS, 4825).
- Pharmacy Type: By default, View All is selected. To filter by a pharmacy type, click the drop-down to select Retail, Mail Order, or In House Dispensing.
- Phone Number: Enter the pharmacy's phone number.
- City: Enter the pharmacy's city.
- State: Select the pharmacy's state.
- Zip: Enter the pharmacy's zip code.
- EPCS Certified: By default, pharmacies that are certified for electronic prescriptions for controlled substances (EPCS) displays in the search results. To remove the filter, click to clear the selection.
- Click Select Pharmacy to add to the patient's chart.
- Add additional pharmacies, as necessary.
- If multiple pharmacies were added, click the ranking arrow to move pharmacies in order of preference. Or click Make favorite to place a star next to the most preferred pharmacy and to indicate the pharmacy is a favorite when prescribing a medication.
|
 |