Enter Profile Information
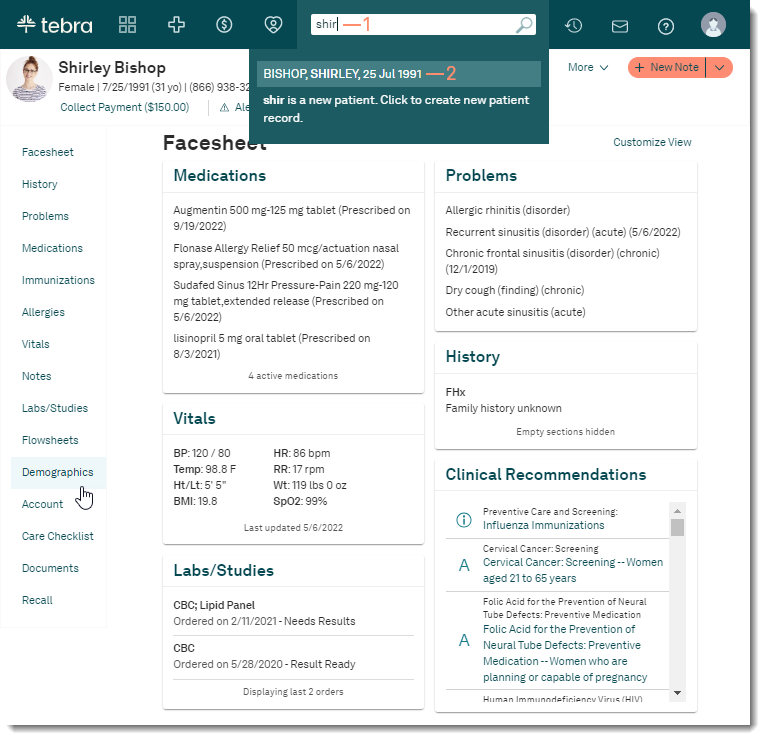
- Click Edit. The Profile editor opens.
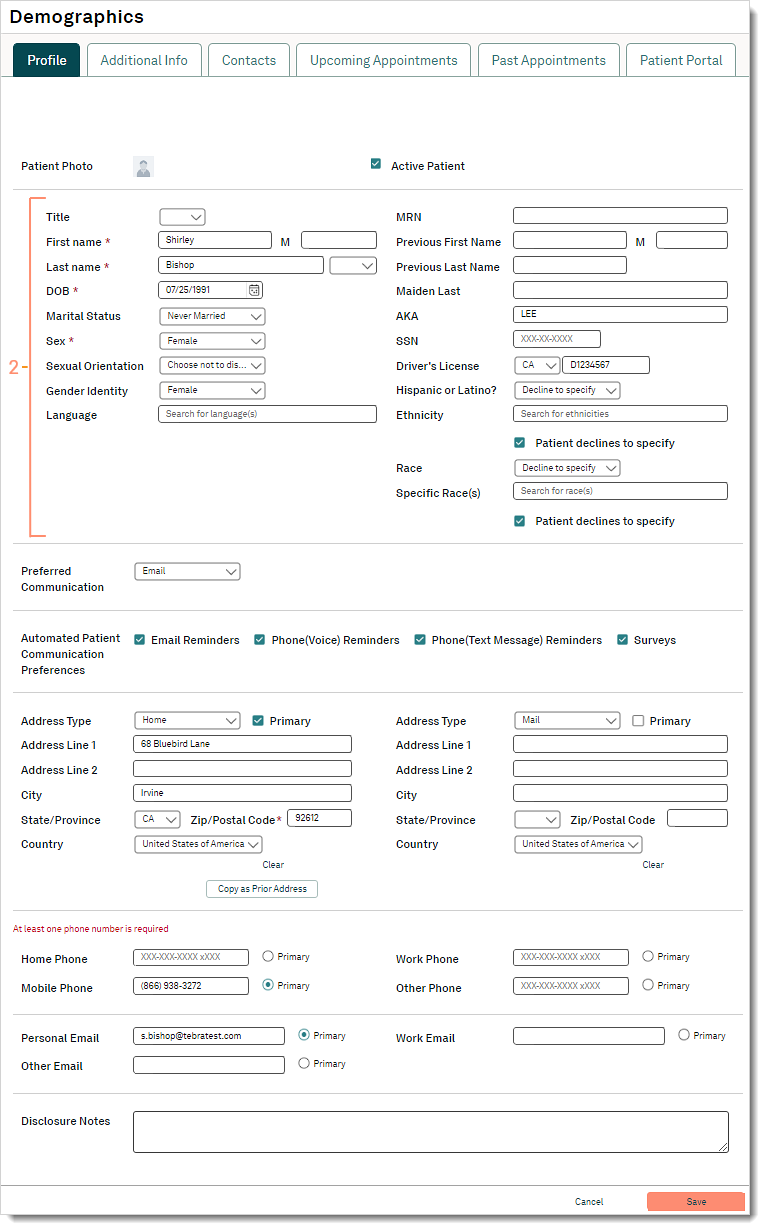
- Populate patient identifying information:
- Title: Select the patient's name prefix from the drop-down list. Available options: Mr., Mrs., Ms., Miss, Dr., Prof., or Rev.
- Patient Name: Enter the patient's First, Middle, and Last name. If applicable, select a suffix from the drop-down list. Available options: Jr., Sr., I, II, III, IV, or V.
- DOB: Enter the patient's date of birth (DOB) or click the calendar icon to select from the date picker.
- Marital Status: Select a martial status from the drop-down list. Available options: Annulled, Divorced, Interlocutory, Legally Separated, Married, Polygamous, Never Married, Domestic partner, or Widowed.
- Sex: Select the patient's sex from the drop-down list. Available options: Male, Female, or Unknown.
- Sexual Orientation: Select the patient's sex orientation from the drop-down list. Available options: Bisexual, Choose not to disclose, Don't know, Lesbian, gay or homosexual, Something else, please describe, or Straight or heterosexual.
- If Something else, please describe was selected, a Comments field displays. Enter applicable notes.
- Gender Identity: Select the patient's gender identity from the drop-down list. Available options: Additional gender category or other, please specify, Choose not to disclose, Female, Female-to-male (FTM)/Transgender Male/ Trans Man, Genderqueer, neither exclusively male nor female, Male, or Male-to-Female (MTF)/Transgender Female/Trans Woman.
- If Additional gender category or other, please specify was selected, a Comments field displays. Enter applicable notes.
- Language: Enter the first 2–3 letters of the language and select from the auto-populated results.
 Tip: Click the star icon to indicate the language is commonly used. For future entries, click the Language field and the language displays first for selection. Tip: Click the star icon to indicate the language is commonly used. For future entries, click the Language field and the language displays first for selection.
- MRN: Enter the patient's Medical Record Number (MRN).
- Previous Name: Enter the patient's previous first and last name, if applicable.
- Maiden Last: Enter the patient's maiden last name, if applicable.
- AKA: Enter the patient's nickname or preferred name. The nickname displays next to the patient's name in the Profile page.
- SSN: Enter the patient's Social Security Number (SSN).
- Driver's License: Select the driver license state from the drop-down list and enter the license number.
- Hispanic or Latino: Select an answer from the drop-down list. Available options: Yes, No, or Decline to specify.
- Ethnicity: Enter the first 2–3 letters of the patient's ethnicity and select from the auto-populated results. If the patient did not provide an answer, click to select, "Patient declines to specify".
Tip: Click the star icon to indicate the ethnicity is commonly used. For future entries, click the Ethnicity field and the ethnicity displays first for selection.
- Race: Enter the first 2–3 letters of the patient's race and select from the auto-populated results. If the patient did not provide an answer, click to select, "Patient declines to specify".
Tip: Click the star icon to indicate the race is commonly used. For future entries, click the Race field and the race displays first for selection.
|
 |
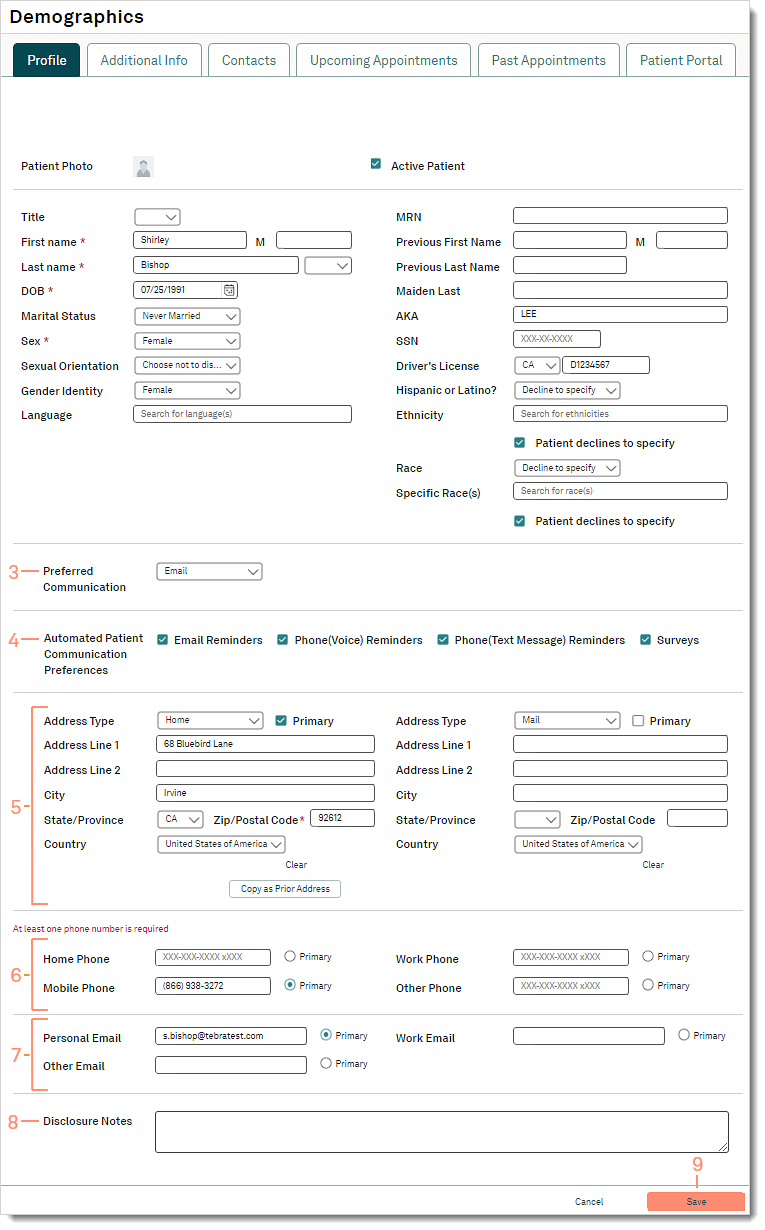
- Preferred Communication: Select the patient's preferred method of contact. Available options: Unknown, Mail, Phone, Email, or Patient Portal.
- Automated Patient Communication Preference: Select one or more methods that the patient prefers to receive communications. Available options: Email Reminders, Phone (Voice) Reminders, Phone (Text Message) Reminders, and Surveys.
- Address: Enter the patient's address and select if this address is a physical location or mailing address. If more than one address is populated, click to select "Primary" to indicate the address is the patient's main location.
- Prior Address: If the patient has a new home address, click Copy as Prior Address to indicate the address is a Prior Address. The Home address fields are cleared for users to enter the patient's new address.
Note: The option to copy a prior address is only available when the patient has a Home address populated.
- Phone Number: Enter at least one phone number for the patient. If multiple numbers are entered, click to select the "Primary" to indicate the number is the main contact number.
Tip: Populate the patient's mobile number to prevent delays with patient communication and patient statement billing (Billing subscribers).
- Email address: Enter one or more email addresses for the patient. If multiple emails are entered, click to select the "Primary" to indicate the email is the main contact email.
Tip: Populate the patient's email address to prevent delays with patient communication, eLab orders (Clinical subscribers), and patient statement billing (Billing subscribers).
- Disclosure Notes: Enter any applicable notes.
- Click Save when finished.
|
 |