Add New Insurance Case and Policy
- Last updated
-
-
Save as PDF
Updated: 03/29/2024 | Views: 17239
Patient cases are created to manage insurance policy selection as well as the order in which two or more insurance plans are billed. Separate cases (e.g., Commercial, Self Pay, Workers' Compensation, Auto) should be created for each policy type. For example, you may have a patient that is being treated for injuries sustained from an auto accident that is covered under one insurance policy; yet that patient may receive treatment during the same visit for a condition unrelated to the auto accident and for which a different policy is billed.
In addition to the policy information, create an insurance case to manage case conditions, authorizations, drug formulary, and check eligibility.
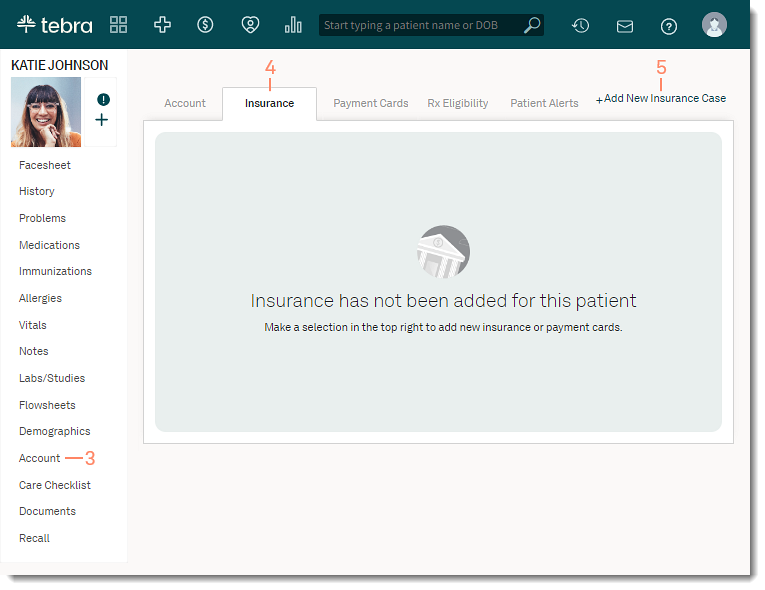
Access Patient Insurance
- Enter the first 2–3 letters of the patient's name or date of birth (mm/dd/yyyy) in the top navigation bar search box.
- Click to select the patient from the auto-populated results. The patient's Facesheet page opens.
- Click Account. The Account page opens.
- Click the Insurance tab. The Insurance page opens.
- Click + Add New Insurance Case. The Add Insurance Case page opens.
|
 |
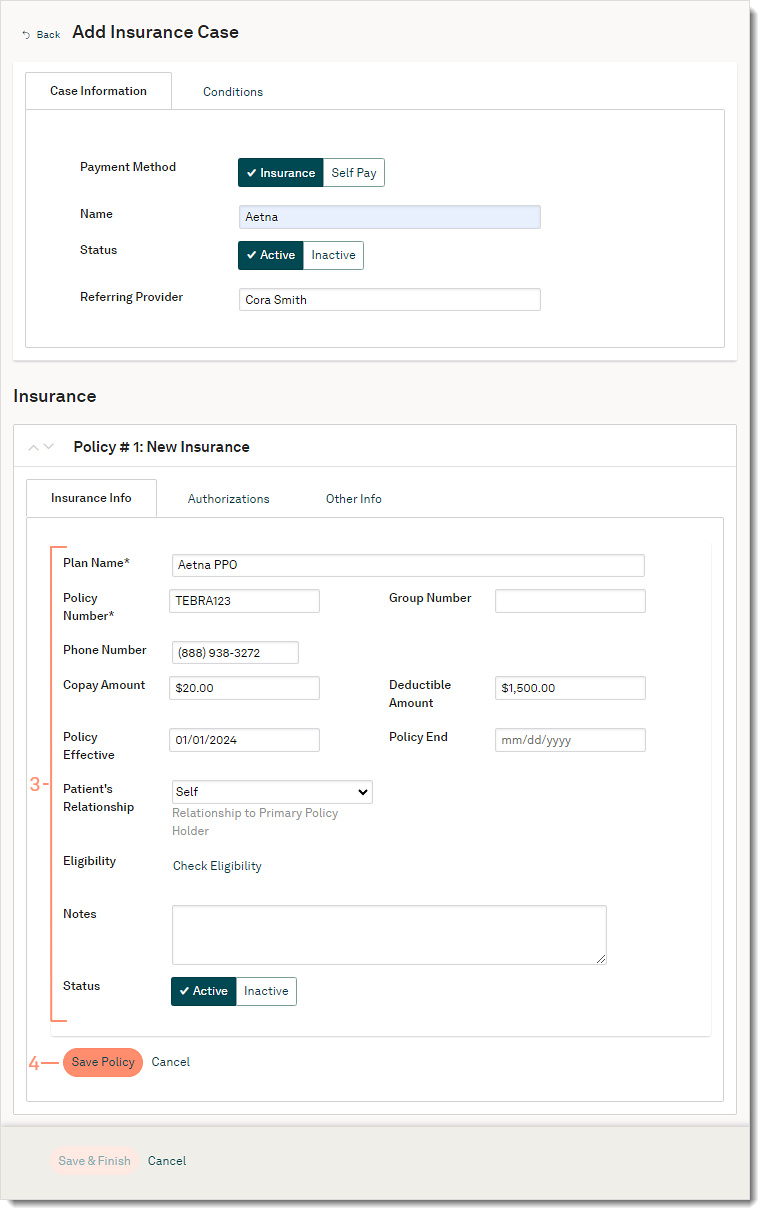
Add Insurance Case
- Enter Case Information:
- Payment Method: By default, Insurance is selected. If necessary, click Self Pay to indicate a patient is paying out of pocket instead of billing an insurance company.
- Name: Enter a name to identify the insurance case.
- Status: The case status is set to Active by default.
- Referring Provider: If applicable, begin typing the name of the Referring Provider and select it from the auto-populated results.
- If applicable, click Conditions to enter information about the cause that prompted treatment.
|
 |
Add Insurance Policy
- Enter Insurance Information:
- Plan Name: Enter the first 2-3 letters of the insurance plan name in the field provided and select it from the auto-populated list.
- Populate the Policy Number, Group Number, insurance plan Phone Number, Copay Amount, and Deductible Amount as shown on the patient's insurance card.
- If available, select the Policy Effective and Policy End dates.
- Patient's Relationship: The relationship is set to Self by default. If the patient's relationship to the primary policy holder is other than Self, click to select the relationship to the policy holder. Then, enter the insured's information in the fields provided.
- Eligibility: Click to check the patient's eligibility with the payer (Billing Subscribers). The Check Eligibility pop-up window opens. Select the patient's provider and click Run Eligibility Check. The pop-up window closes and the current status displays next to Eligibility.
Note: Some payers may require enrollment to check eligibility.
- Add applicable Notes about the policy (optional).
- Status: The policy status is set to Active by default.
- Click Save Policy. The insurance policy saves.
|
 |
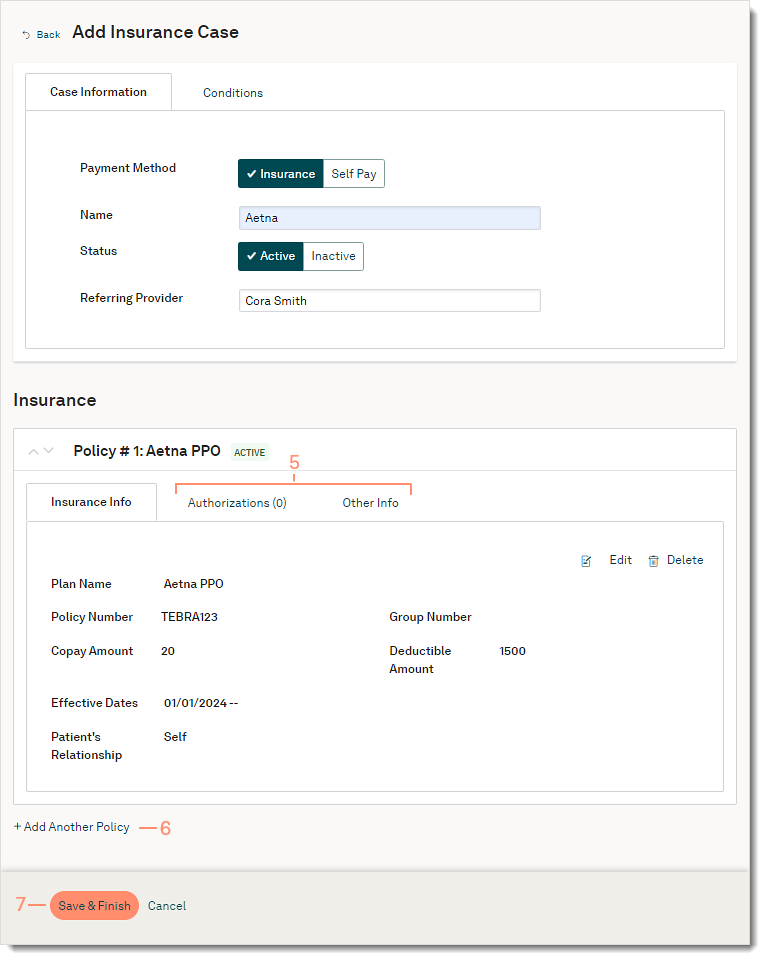
- If applicable, enter additional information:
- To add authorization information from the insurance that documents approval for medical services, click Authorizations.
- To add a drug formulary plan, click Other Info.
- To add additional policies, click + Add Another Policy.
- Click Save & Finish when all insurance information is populated.
Note: The insurance policy must be saved first to enable this option.
|
 |