Kareo and PatientPop are now Tebra. Becoming Tebra will take time and we appreciate your patience as we transition to the new brand experience.Learn More
Tebra Help Center

Add, Edit, or Remove Insurance Authorization

Updated: 06/23/2023|Views: 4066

Insurance authorizations can be easily added to the patient's existing insurance policy. Edit or remove the authorization from the patient's policy if the information is incorrect.

Access Insurance Case
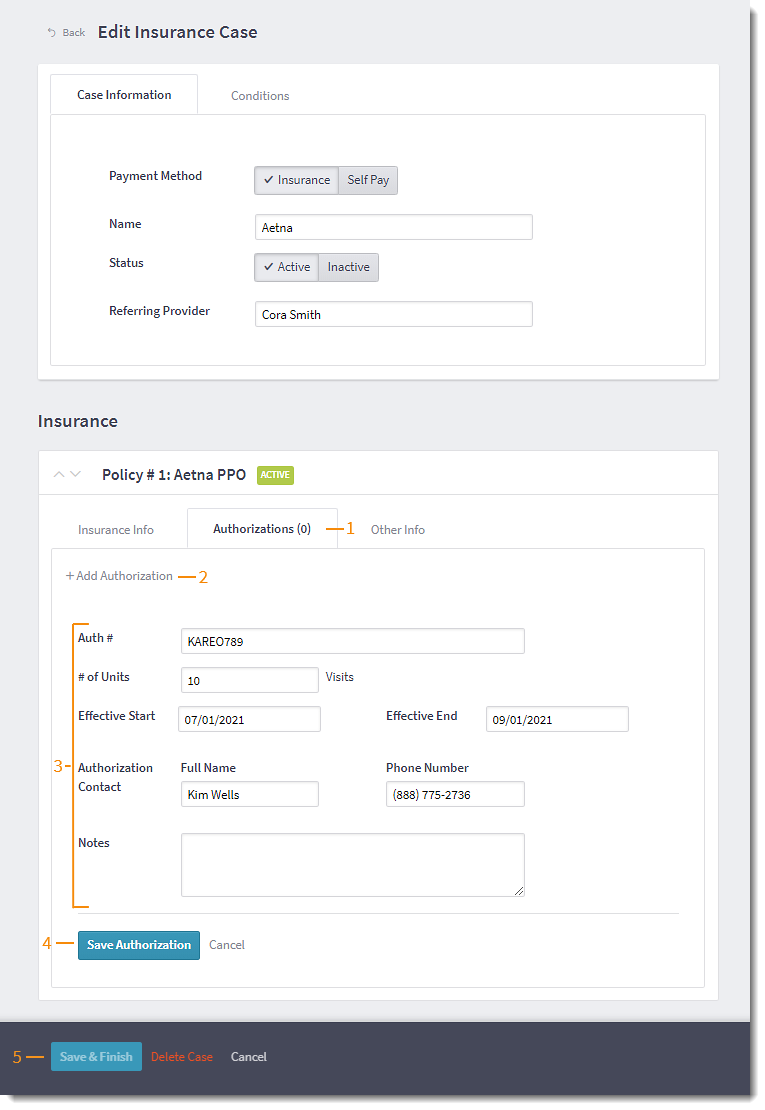
  1. Enter the first 2–3 letters of the patient's name or date of birth (mm/dd/yyyy) in the top navigation bar search box.
  2. Click to select the patient from the auto-populated results. The patient's Facesheet page opens.
  3. Click Account. The Account page opens.
  4. Click the Insurance tab. The Insurance page opens.
  5. Click Edit. The Edit Insurance Case page opens.
Platform_InsuranceCase_Edit.png

Add Authorization

  1. Click the Authorizations tab under the policy.
  2. Click + Add Authorization. The Add Authorization editor opens.
  3. Enter authorization details:
    • Auth #: The authorization number provided by the insurance company.
    • # of Units: The total number of visits authorized by the insurance company. If the visits are unlimited, enter a high amount (e.g., 100).
    • Effective Start and Effective End: If applicable, enter the dates for the authorization period.
    • Authorization Contact: Optionally, enter the Full Name and Phone Number for the person to reach regarding the authorization.
    • Notes (Optional): Notes related to the authorization.
  4. Click Save Authorization. The authorization details displays.
  5. Click Save & Finish when done.
Platform_Authorizations_Add.png

Edit Authorization

  1. Click the Authorizations tab under the policy.
  2. Click Edit. The Add Authorization editor opens.
  3. Make necessary edits to the authorization details:
    • Auth #: The authorization number provided by the insurance company.
    • # of Units: The total number of visits authorized by the insurance company. If the visits are unlimited, enter a high amount (e.g., 100).
    • Effective Start and Effective End: If applicable, enter the dates for the authorization period.
    • Authorization Contact: Optionally, enter the Full Name and Phone Number for the person to reach regarding the authorization.
    • Notes (Optional): Notes related to the authorization.
  4. Click Save Authorization. The authorization details are updated.
  5. Click Save & Finish when done.
Platform_Authorizations_Edit.png

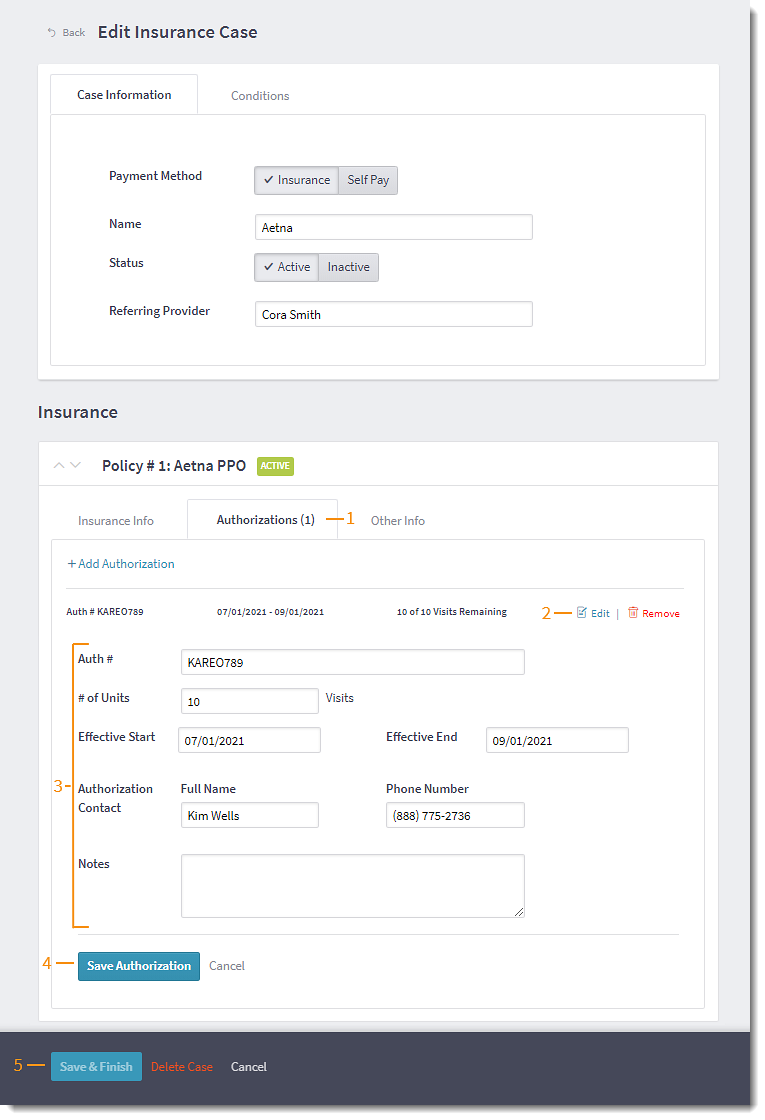
Remove Authorization

  1. Click the Authorizations tab under the policy.
  2. Click Remove. The authorization is removed from the policy.
  3. Click Save & Finish when done.
Platform_Authorizations_Remove.png