Change Patient Appointment Status
- Last updated
-
-
Save as PDF
Updated: 06/23/2023 | Views: 17704
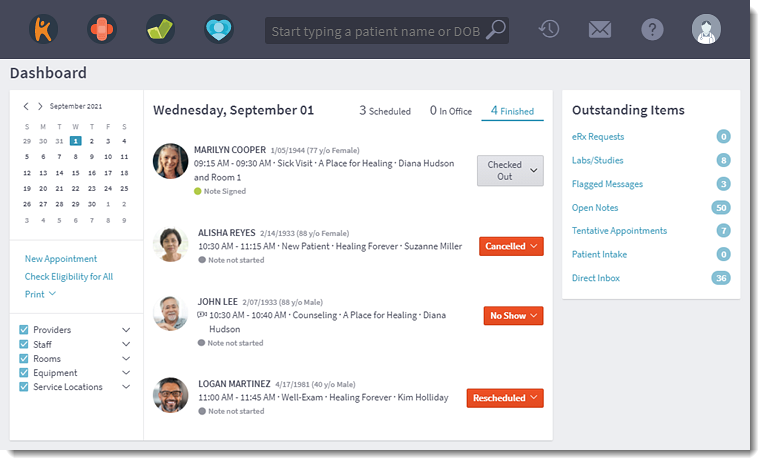
The Dashboard provides an efficient process for managing and tracking patients throughout the office visit after scheduling a patient appointment.
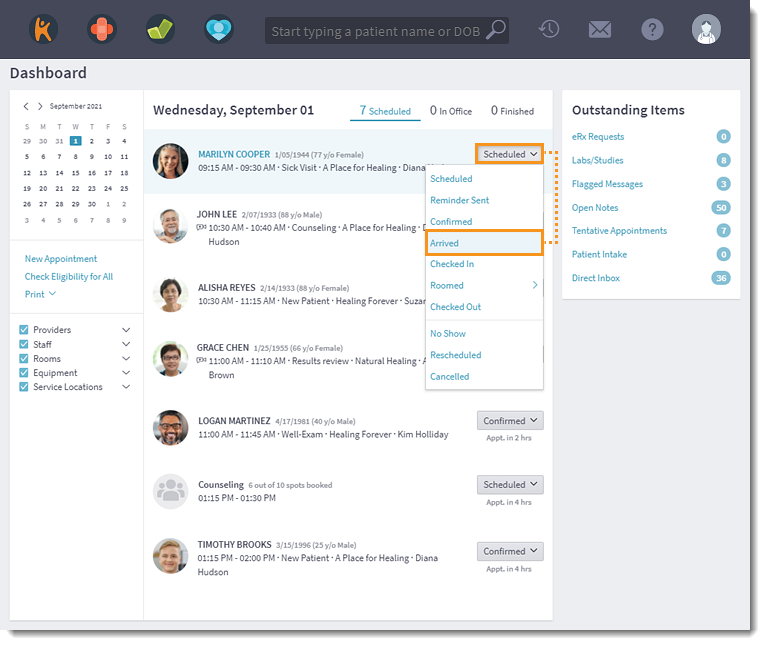
Mark Patient as Arrived
When a patient arrives for an appointment, initiate the check-in process.
- Click the Scheduled tab on the Dashboard. Patient appointments for the day that are not checked in displays.
- Click the drop-down arrow and select Arrived. The appointment moves to the In Office tab.
|
 |
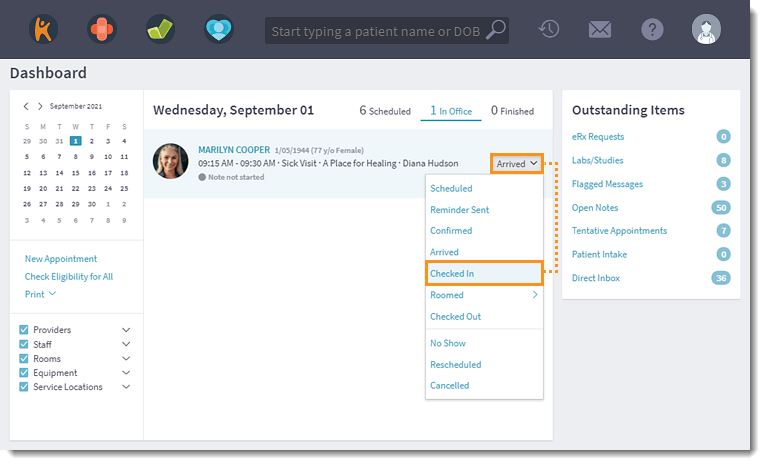
Mark Patient as Checked In
When a patient has been marked as Arrived and the front office check-in process is complete, change the appointment status to Checked In.
- Click the In Office tab on the Dashboard. All patients scheduled for the day who have an in-office status displays.
- Click the drop-down arrow and select Checked In. The appointment stays in the In Office tab.
|
 |
Room Patient
Patients can be assigned to an exam room.
- Click the In Office tab on the Dashboard. All patients scheduled for the day who have an in-office status displays.
- Click the drop-down arrow and select Roomed. Then, select a room. The appointment stays in the In Office tab and status updates to Roomed.
Clinical staff can now create a note from the appointment. Once the note is created, the status updates to Note in progress.
|
 |
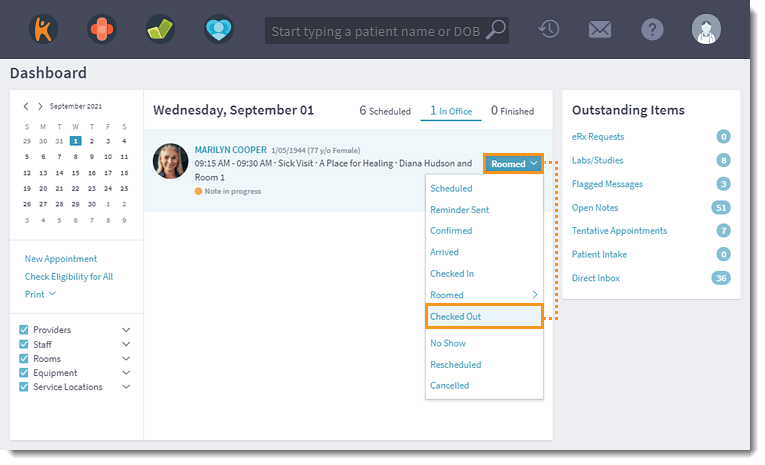
Check Out Patient
Once the patient visit is complete, mark the patient as checked out.
- Click the In Office tab on the Dashboard. All patients scheduled for the day who have an in-office status displays.
- Click the drop-down arrow and select Checked Out. The appointment moves to the Finished tab. When necessary, schedule a follow-up appointment for the patient.
Once the note for the appointment is signed, the status updates to Note Signed.
|
 |
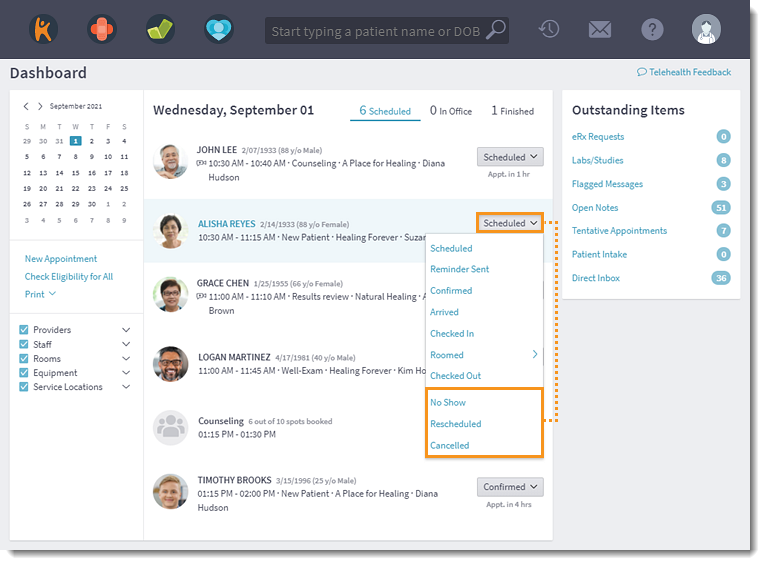
Mark Patient as No Show, Rescheduled, or Cancelled
- Click the Scheduled tab on the Dashboard. Patient appointments for the day that are not checked in displays.
- Click the drop-down arrow and select No Show, Rescheduled, or Cancelled. The appointment moves to the Finished tab.
|
 |
- Click the Finished tab. All appointments with the status of Checked Out, No Show, Rescheduled, or Cancelled displays.
|
 |