Updated: 03/29/2024 | Views: 13845
When the front office reviews a patient's submitted intake form, they will be required to review each of the sections submitted by the patient.
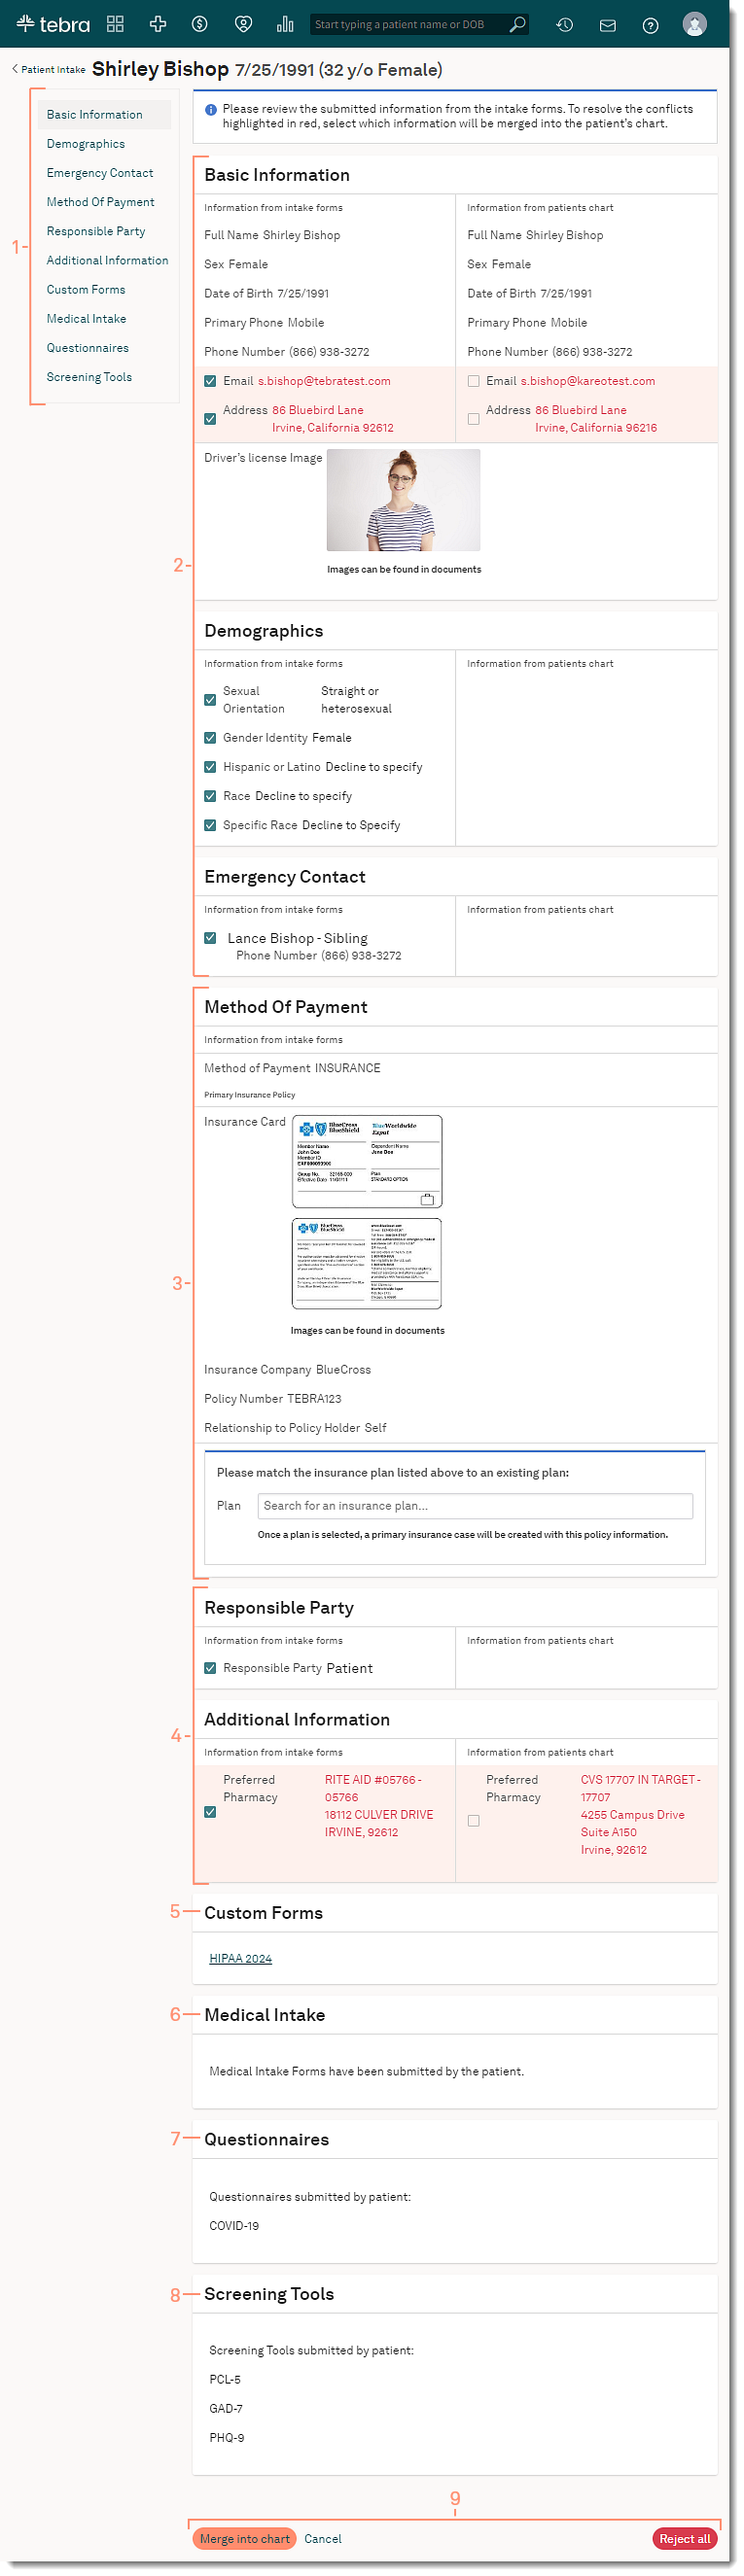
Information on the left-hand column will reflect the information submitted through the patient intake form. Information on the right-hand column reflects any fields in the system that are different than the information provided through the patient intake form. If the right-hand column is blank, the field is not currently populated in the patient chart.
Conflicting information between the patient intake form and the patient's chart is highlighted in red. Review the submitted patient intake form to determine what to merge into the patient chart or reject all submitted information.
If the patient does not fill out the field(s) in the patient intake form, the field(s) will not be displayed for merging.
Available for Engage subscribers.
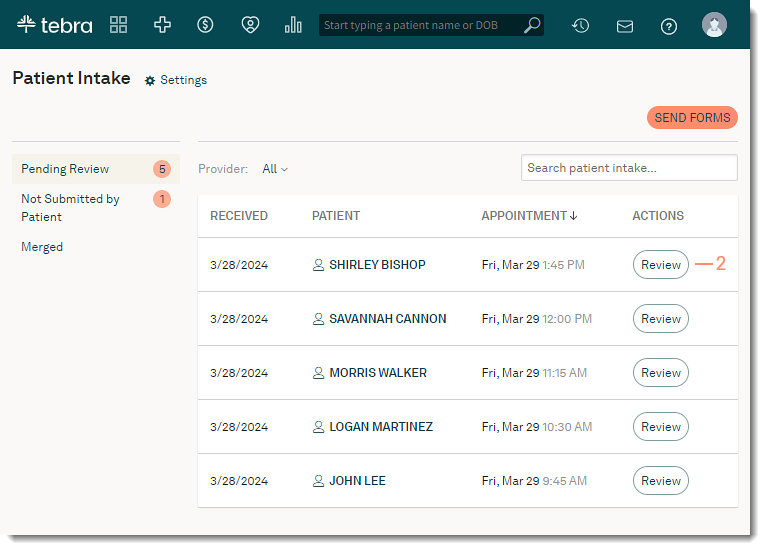
Access Patient Intake
- Hover over the Engage icon and click on Patient Intake. The Patient Intake page opens.
- Click Review. The Patient Intake Review page opens.
|
 |
Review Patient Intake
- Click on the navigation to move to a particular section or scroll down to the next section.
Note: Available sections may vary for each patient.
- Review the Basic Information, Demographics, and Emergency Contact.
- By default, the submitted information from the patient intake form will be selected.
- If applicable, click to select the current information from the patient's chart.
- If applicable, click the image to enlarge.
- Review the Method of Payment.
- Insurance Policy:
- If an Insurance Card was uploaded, click the image to enlarge.
- Practices can select an insurance plan setup on their system based on the information (Insurance Company, Plan, and Address) provided by the patient.
- Merging this information will create a new case labeled "Patient Intake (Date)". Existing cases will not be impacted. Primary insurance will be setup as the first policy in the new case, and if a second insurance is also merged, it will be setup as the second policy in the new case.
- If a practice chooses not to select a plan, once they merge the information, insurance information will not merge into the patient's account.
- Self-pay:
- If a patient selects self pay as their method of payment, merging this information will create a new self-pay case labeled "Patient Intake (Date)".
- Review the Responsible Party and Additional Information.
- If applicable, click to select the current information from the patient's chart.
- If Custom Forms are available, click the form name to review.
- If Medical Intake was submitted, notify the Clinical Assistant or Provider to review the patient's medical history.
- If Questionnaires were submitted, review the complete form in the patient's Document or in a clinical note.
- If Screening Tools were submitted, notify the Provider to review the patient's score.
- Choose to merge or reject the intake form:
- Click Merge into chart to map all the selected information into the patient's chart. The form will move from the Pending Review to the Merged page.
- Click Reject all to disregard all submitted information. Custom Forms and Medical History intake documents will be removed from the patient's documents. The forms will be removed from the Pending Review page.
The practice can access the originally submitted patient intake forms in the patient's document section.
|
 |