Patient Experience: Telehealth Visit
- Last updated
-
-
Save as PDF
Updated: 11/09/2023 | Views: 5269
After a telehealth appointment is scheduled, the patient receives telehealth appointment reminders based on the provider's patient communication cadence with access to the telehealth visit room. They can join the appointment with any mobile, laptop, or desktop device with an internet connected browser, camera, and microphone access.
If the appointment is a group visit, up to 24 participants can join the session with their camera and microphone enabled. The remaining participants can only enable their microphone. If they attempt to enable their camera, they receive a message stating, "Sorry, you can't turn on your cam on at the moment".
Review Breakout Groups to learn more about the patient's view during a breakout session.
Note: Chrome is the preferred browser for optimal use for Telehealth. If you are experiencing issues with the microphone and/or camera, review Telehealth Microphone and Camera Settings in Chrome.
Access Telehealth Visit
Review the patient's experience accessing, knocking, and joining the provider's room for their telehealth visit.
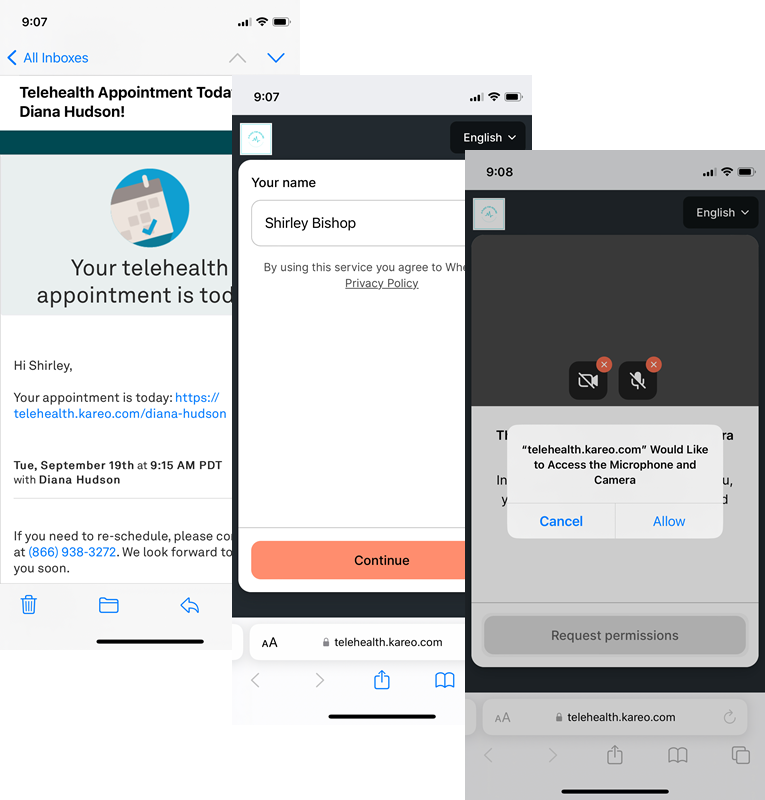
To help the patient visually confirm that they are joining the correct room, the practice's uploaded logo displays at the top left of the screen.
- At the time of the appointment, the patient taps on the telehealth URL in their email or text. The Telehealth page opens in a new browser window.
- The patient enters their name and taps Continue. The Request Permissions page opens.
- Patient taps Request Permissions to activate their camera and microphone.
- Patient taps Allow to use the microphone and camera for the appointment.
|
 |
Pre-Call Test
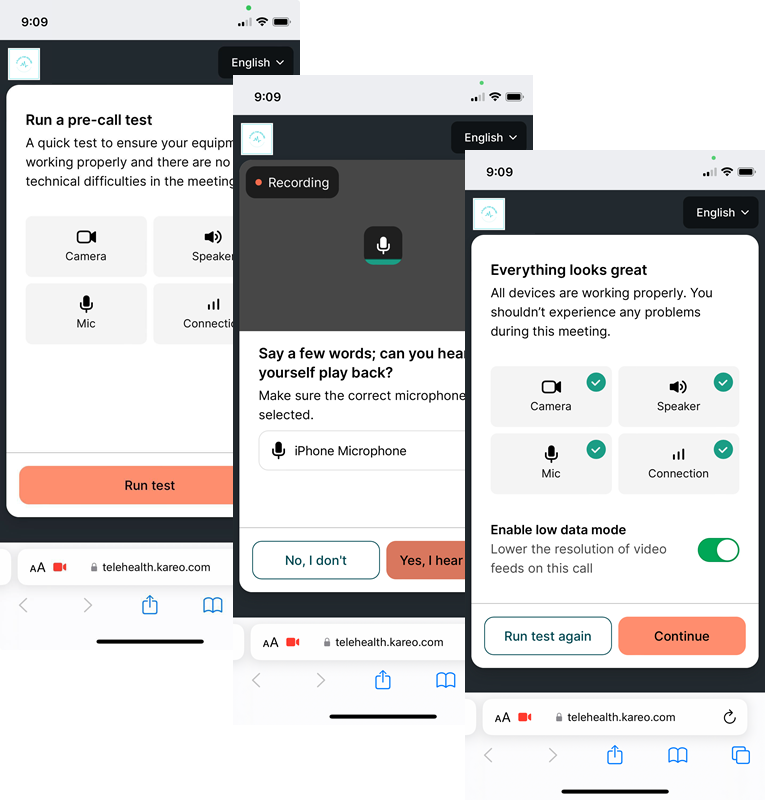
Patients must run the pre-call test before they join the visit to identify any potential technical issues. The pre-call test ensures the patient's camera, speaker, microphone, and network connection is working properly for the visit.
- Patient taps Run test to start the test.
- Verify camera: The patient selects the appropriate video source and the patient verifies they can see themselves. Patient taps Yes, I see myself to continue. If the patient cannot see themselves, they tap No, I don't.
- Verify speaker: The patient selects the appropriate speaker source and the patient verifies they can hear the system generated music. Patient taps Yes, I hear music to continue. If the patient cannot hear the music, they tap No, I don't.
- Verify microphone: The patient select the appropriate microphone source. The patient records a short audio clip and verifies they can hear the playback. Patient taps Yes, I hear myself to continue. If the patient cannot the hear recording, they tap No, I don't.
- Connection: The system automatically tests the network connection speed.
- Review the results: A green check mark icon indicates the equipment is working. A red x icon indicates the equipment may not be working properly. For network connections only, a yellow question icon indicates the network connection may be unstable.
- If all equipment is working properly, proceed to step 7.
- If issues are detected, patient taps Help me fix this to review Telehealth Visit Best Practices and Troubleshooting for best practices and troubleshooting tips.
Note: If necessary, patients can proceed to step 7 without resolving the issues. However, this may impact the visit performance.
- To repeat the test after troubleshooting, patient taps Run test again. Then, proceed to step 7 when the issues are resolved.
- If applicable, patient taps the Enable low data mode toggle to lower the resolution of the videos and improve visit performance.
- Click Continue to join the telehealth visit room.
|
 |
Join Telehealth Visit
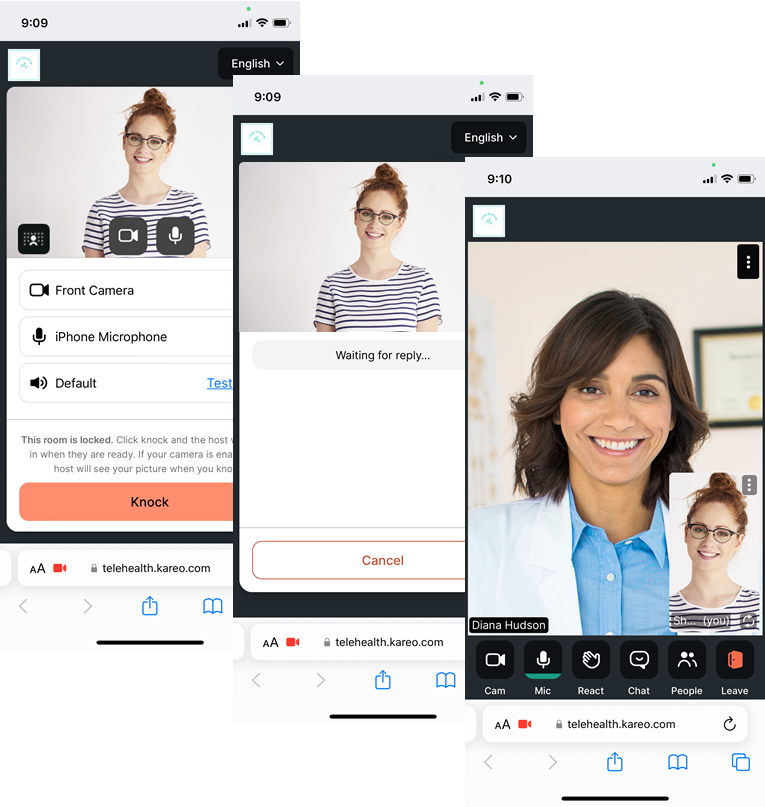
- Patient taps Knock to let the provider know they have arrived for the appointment. An image of the patient is sent to the provider. The Waiting Room opens.
- The patients waits for a reply from the provider or to be let into the visit room in the waiting room.
- The patient is let into the room once the provider is ready to begin the telehealth visit.
- To leave the visit, the patient taps Leave.
|
 |
Virtual Waiting Room
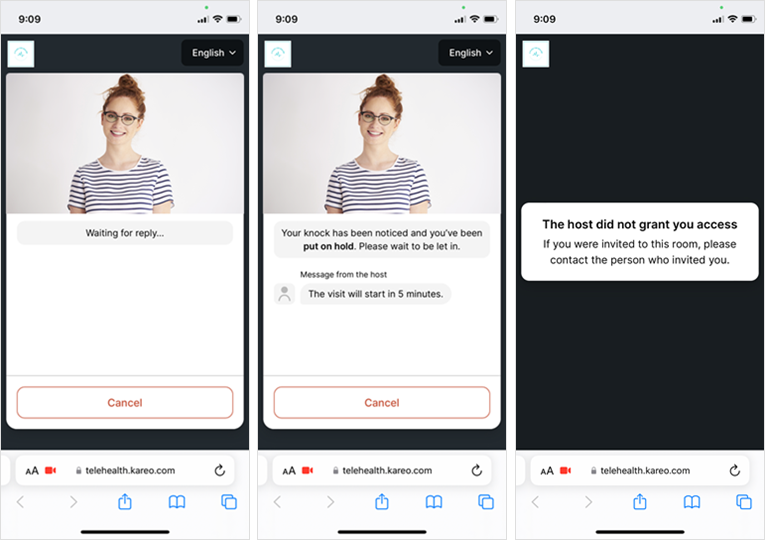
Review examples of the patient's experience in the virtual waiting room after knocking.
- The patient is waiting for a reply from the provider or to be let into the room.
- The provider sent a response and put the patient on hold. The patient can review the message from the provider and continue to wait to be let into the room.
Note: The patient cannot reply to the provider's response.
- The provider denied the patient access to the room. The participant is removed from the waiting room and receives a message stating, "The host did not grant you access. If you were invited to this room, please contact the person who invited you."
Note: If the patient was accidentally denied access, they can refresh the browser page to complete the pre-call test and knock again.
|
 |
Patient View Set Up
Patients can set up their visit room layout when they join the room.
Desktop Layout
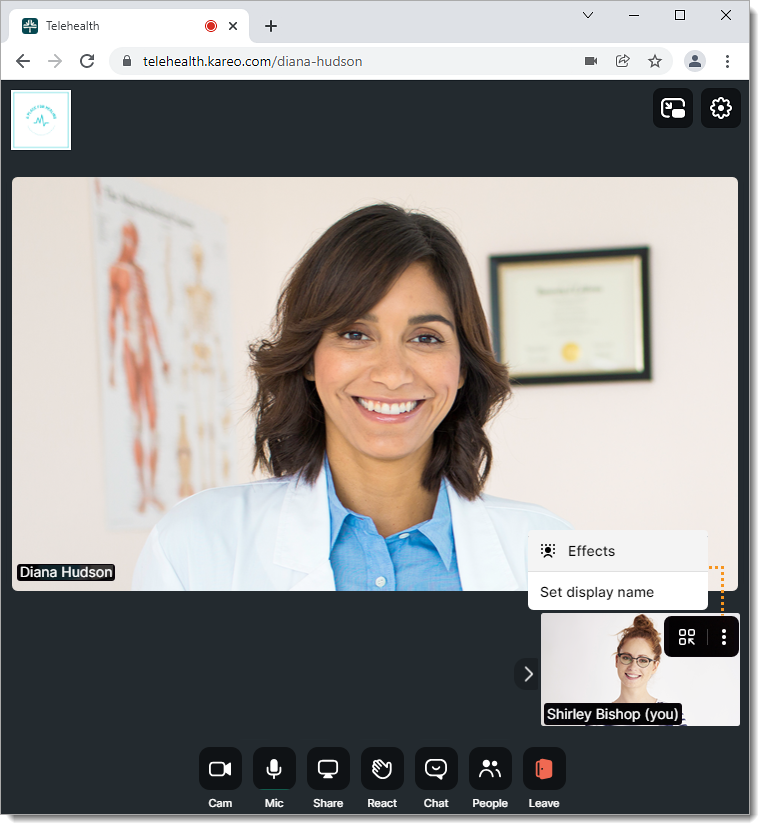
- The patient hovers over their window to see the controls. Depending on the browser, there are several desktop layout options available that includes:
- Hide: Click the right arrow to hide the patient's window. To show the window, click the left arrow.
- Move to Grid: Click to move the patient's window to the grid layout.
- More options: Click the icon to display additional options:
- Effects: Click to set a blurred background or a virtual background.
- Set display name: Click to change the display name shown to everyone in the room.
|
 |
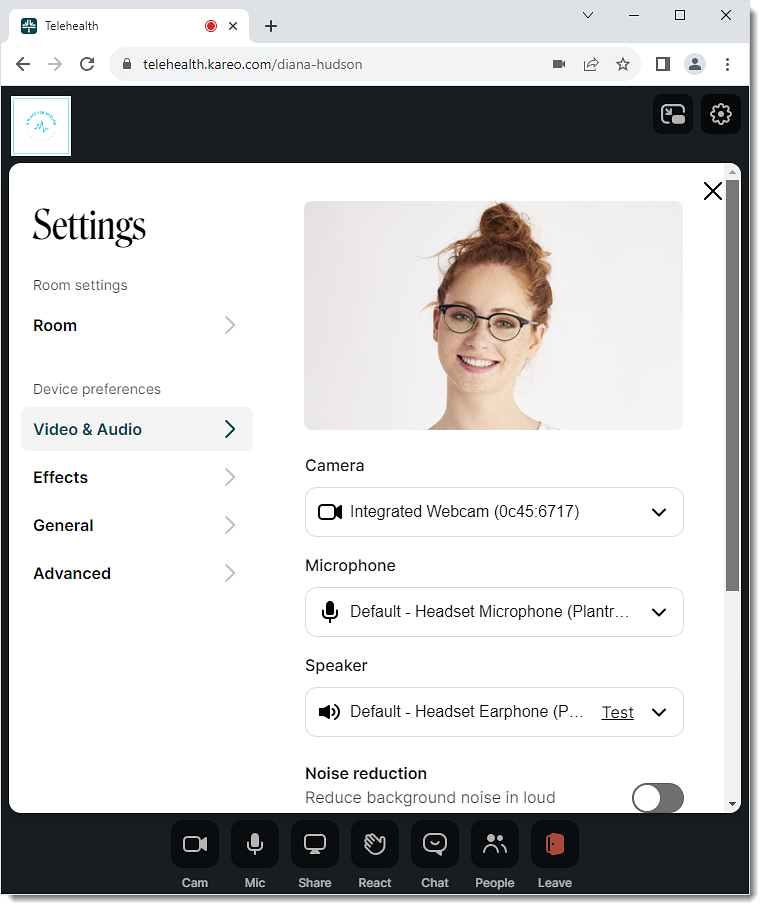
- Click the gear icon on the toolbar to configure the following settings:
- Video and Audio: Set up preferences camera, microphone, speaker, background noise, HD video, widescreen video, and mirror settings
|
 |
- Effects: Click Effects to select a blurred background or a virtual background.
- General: Click General to set language preferences or change the default emoji skin tone.
- Advanced: Click Advanced to set preferences for mobile mode, reduced visual effects, and automatically launching picture-in-picture.
|
 |
Grid Layout
Additional options are available when the patient's window is moved to the grid.
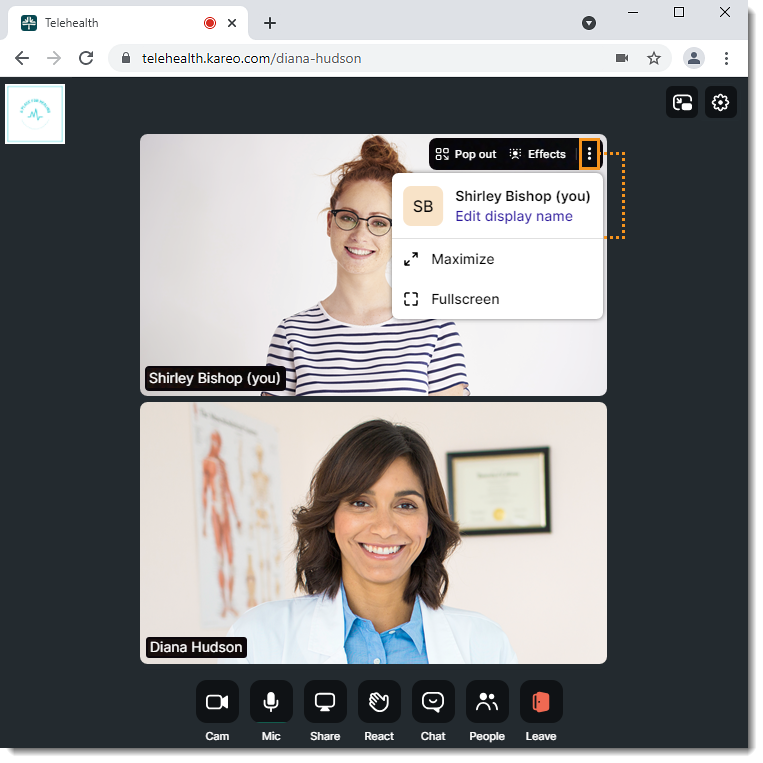
- The patient hovers over their window to see the controls. Depending on the browser, there are several desktop layout options available that includes:
- Pop out: Click to pop the patient's window out of the grid layout and onto the bottom right corner of the room. Click Move to Grid to return the video to the layout.
- Effects: Click to set a blurred background or a virtual background.
- More options: Click the icon to display additional options:
- Edit display name: Click to change the display name shown to everyone in the room.
- Maximize: Click to make the patient's window the largest for the patient only.
- Fullscreen: Click to make the patient's window fill the entire screen for the patient only.
|
 |
Mobile Layout
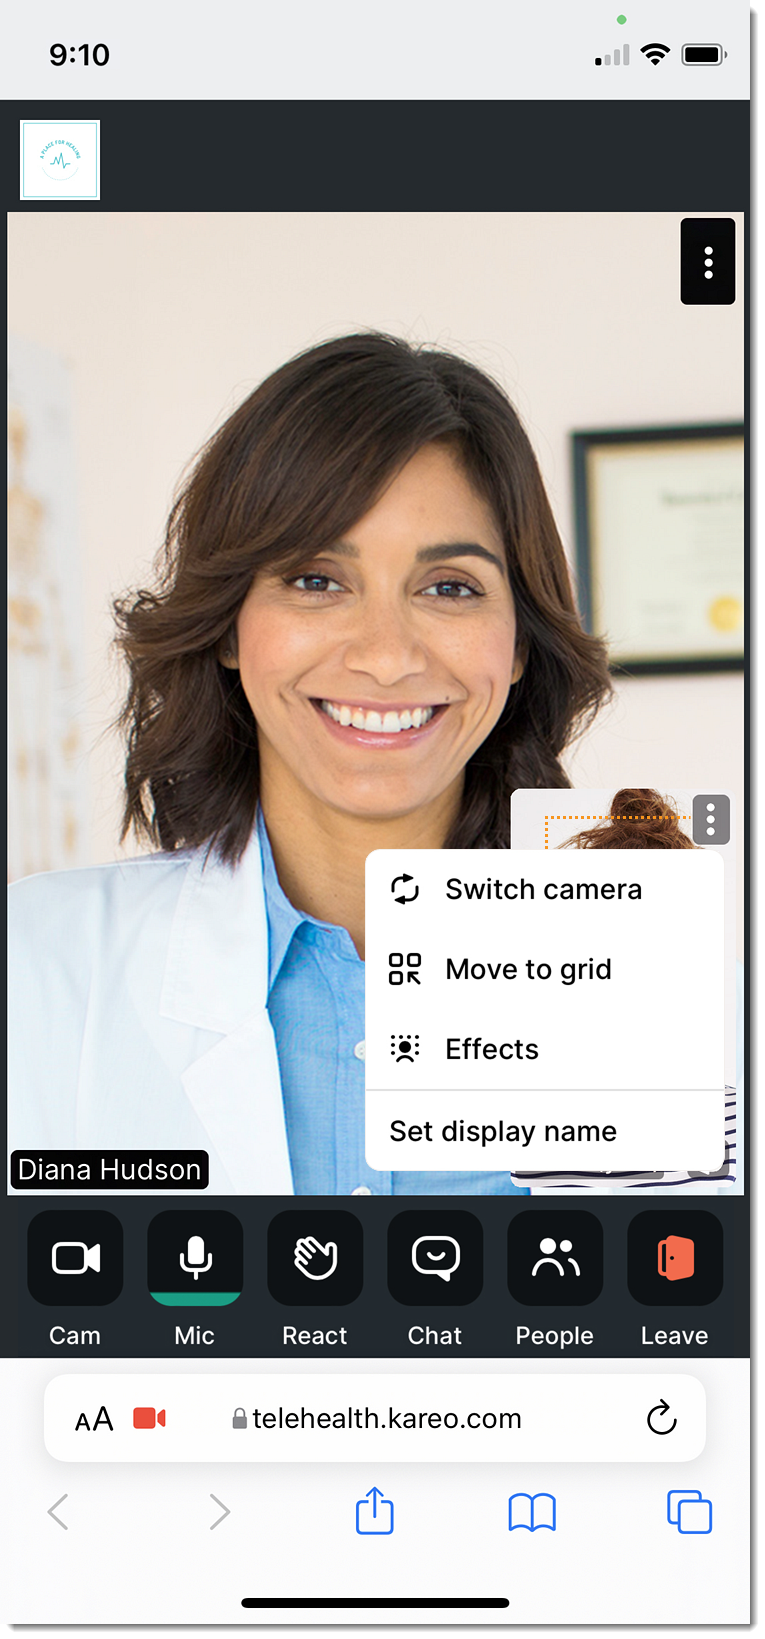
- The patient taps the more options icon on their window. Depending on the device and browser, there are several mobile layout options available that includes:
- Switch Camera: Tap to toggle between the front and rear facing camera.
- Move to grid: Click to move the patient's window to the grid layout.
- Set display name: Click to change the display name shown to everyone in the room.
|
 |
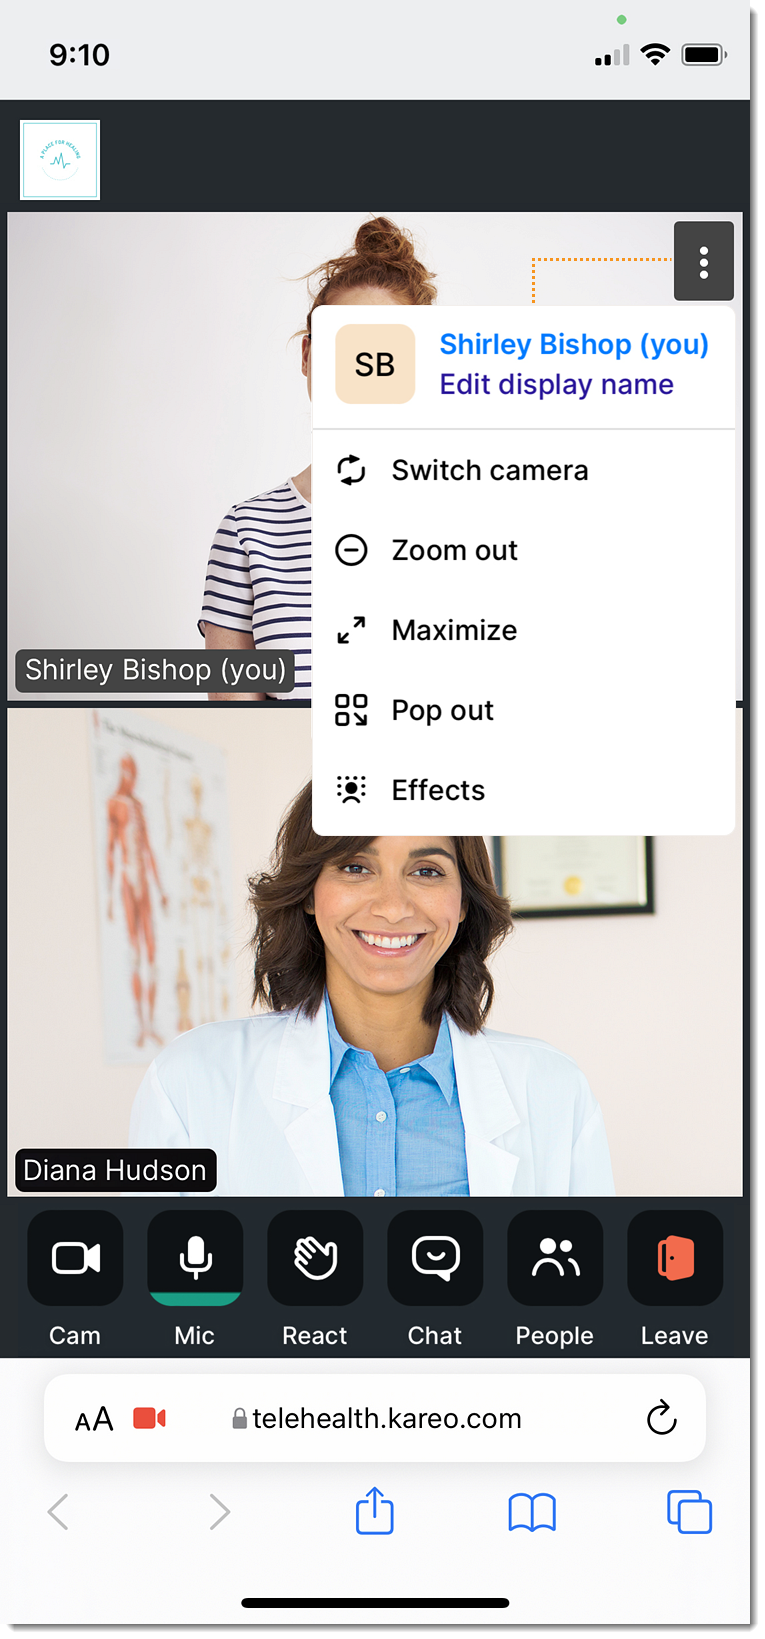
Grid Layout
Additional options are available when the patient's window is moved to the grid.
- The patient taps the more options icon on their window. Depending on the device and browser, there are several mobile layout options available that includes:
- Edit display name: Tap to change the display name shown to everyone in the room.
- Switch Camera: Tap to toggle between the front and rear facing camera.
- Zoom out: Tap to zoom out of the video.
- Maximize: Tap to make the patient's video the largest for the patient only.
- Fullscreen: Tap to make the patient's video fill the entire screen for the patient only.
- Pop out: Tap to pop the video out of the grid layout and onto the bottom right corner of the room. Tap Move to Grid to return the video to the layout.
If another participant shares their screen, the screenshare window is automatically maximized. The patient can hover over the screenshare and tap the more options icon, then select Zoom in, Minimize, or Fullscreen when available.
|
 |