Release Notes March 2021
Views: 1647
On March 18, 2021, your Kareo account will be upgraded to the latest version.
Billing
Billing General Improvements
- Kareo was updated with the new CPT codes for the monoclonal antibody treatment of COVID-19 that go into effect February 9, 2021. Visit the FDA and CMS websites for more information.
- The Patient Portal now supports Apple Pay, Google Pay, and Microsoft Pay for Stripe activated customers. Feature available by the end of March 2021.
Billing Resolved Issues
- Fixed an issue where users received an exception error upon Kareo sign in
- Fixed an issue where claims submitted electronically were missing clearinghouse tracking numbers
- Fixed an issue where users intermittently received an error message logging into or navigating Kareo
- Fixed an issue where users received an error message when attempting to check eligibility
- Fixed an issue where encounters with Office as the POS could not be approved
- Fixed an issue where claims acknowledged and being processed by the clearinghouse were erroneously updated with a rejected status
- Fixed an issue where users experienced intermittent latency and errors in the insurance company settings
- Fixed an issue where superbills sent from Practice Fusion did not create draft encounters in Kareo
Clinical
Quality Measure Reports Archiving Policy
April 16, 2021 Update: The effective date has been moved to May 20, 2021.
Effective April 22, 2021, Quality Measure Reports will archive every night after business hours. The new archiving policy ensures providers are only retaining important versions of the Quality Measure Reports. All archived reports will be removed from the Queued Reports page and access to the report's patient list feature will no longer be available. If necessary, providers can search for and view a summary of the archived report.
The following Quality Measure Reports will not be archived:
- Reports marked as submitted
- Reports with a saved note
- Reports with the status of Running or Waiting
- Three of the most recent report
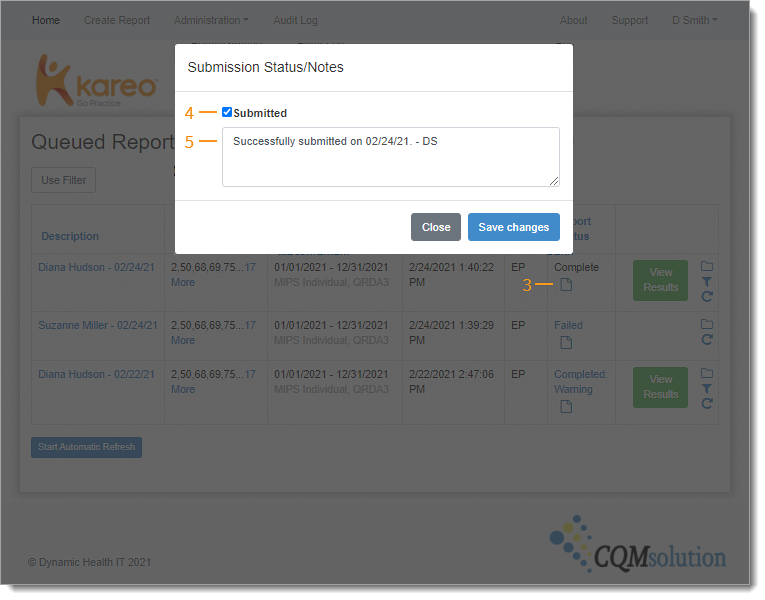
To ensure Quality Measure Report(s) used to attest with qpp.cms.gov is not archived, mark the report(s) as submitted before April 22, 2021. Once marked as submitted, the report(s) will remain on the Queued Reports page and allow providers to continue to view the patient list with additional details.
| Mark as Submitted After the QRDA III file is successfully uploaded using qpp.cms.gov, mark the status of the report as submitted.
|
 |
Treatment Plan: Patient Signature in Patient Portal
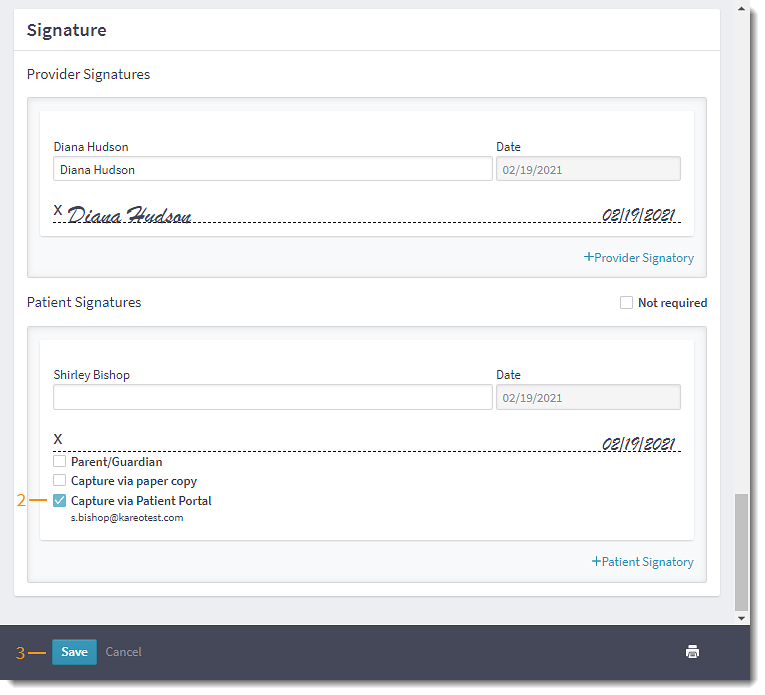
Kareo's Treatment Plans allow providers to build comprehensive treatment plans for their patients and can now capture the patient signature via the Patient Portal. This gives the patient the ability to review and sign their tailored treatment plan at their own pace.
In order for the patient to sign the treatment plan via Patient Portal:
- Invite the patient to the Patient Portal
- The patient must activate the Patient Portal after receiving the email invitation
Create Treatment Plan
|
 |
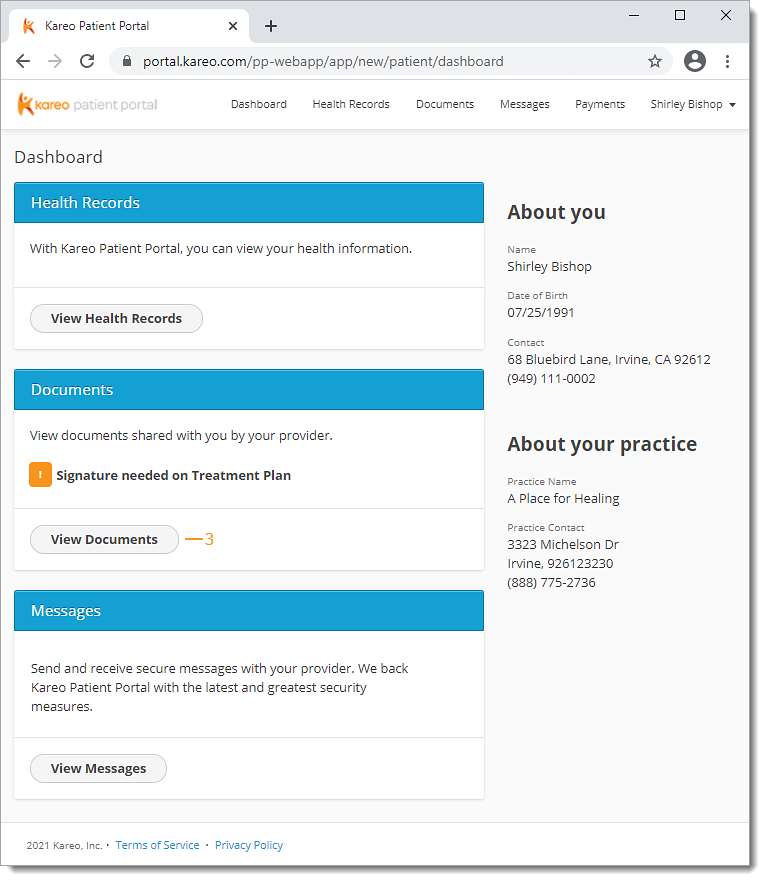
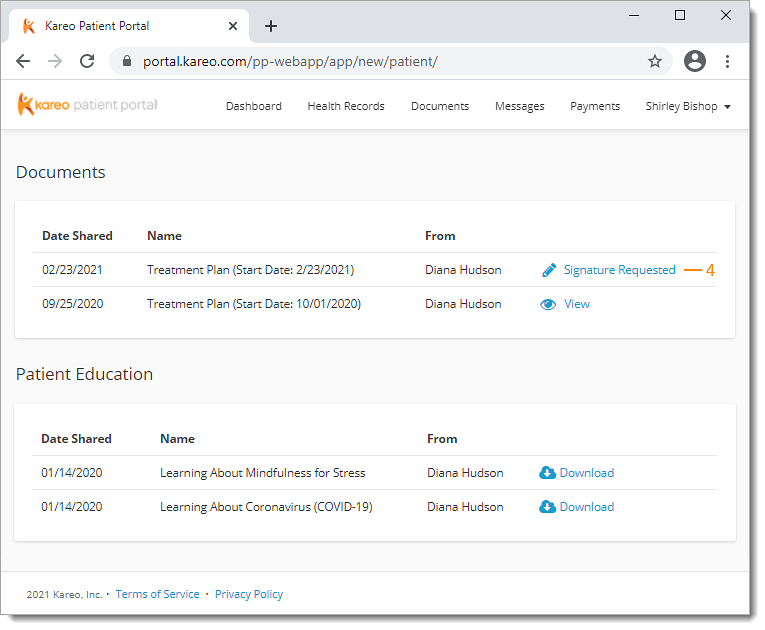
Patient Experience: Sign Treatment Plan
|
 |
|
 |
|
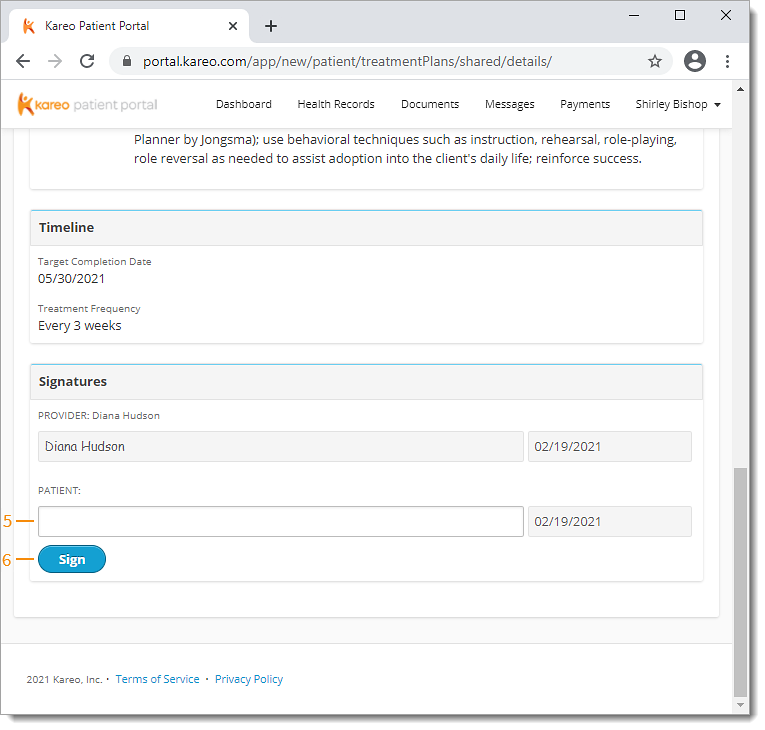 |
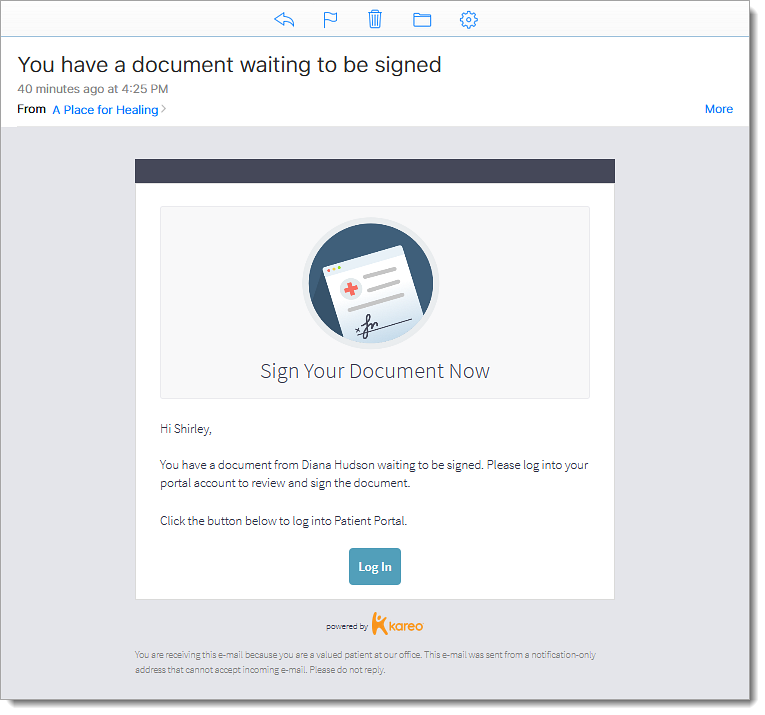
| Email Notification Feature available by the end of March 2021. The patient receives an email notification requesting a signature after the provider saves the treatment plan. |
 |
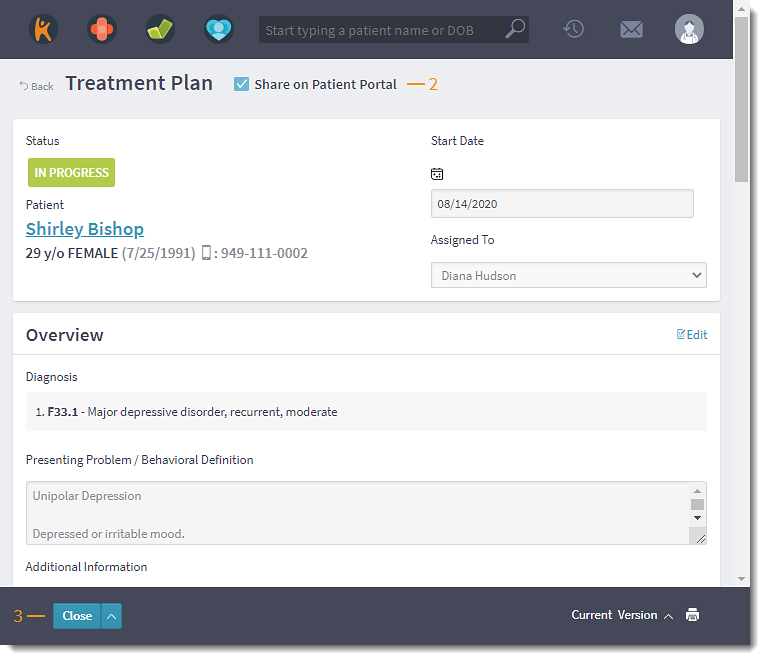
Treatment Plan: Share in Patient Portal
When the patient signature is captured in the Patient Portal, the treatment plan is automatically shared. Providers can choose to share treatment plans that were not automatically shared or remove access to shared treatment plans.
Note: Treatment plans with a Draft status cannot be shared.
Share Treatment Plan
|
 |
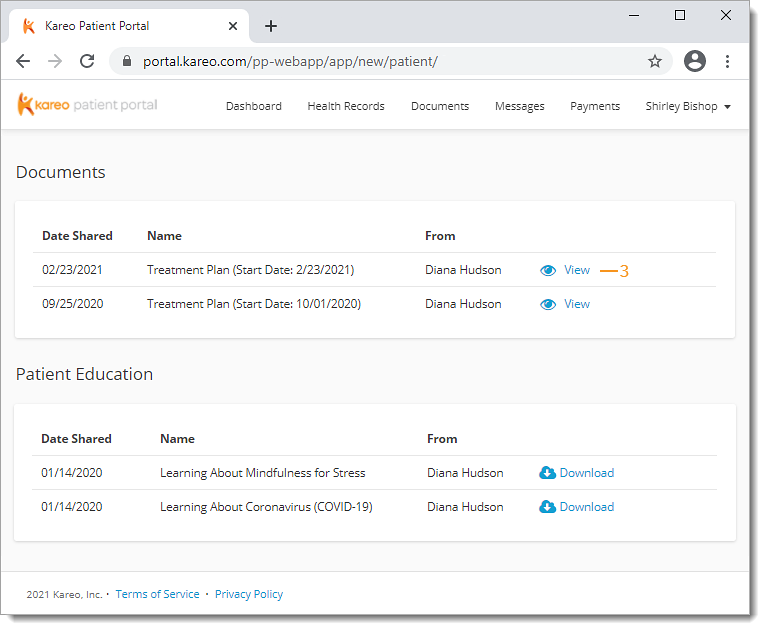
Patient Experience: View Shared Treatment Plan
|
 |
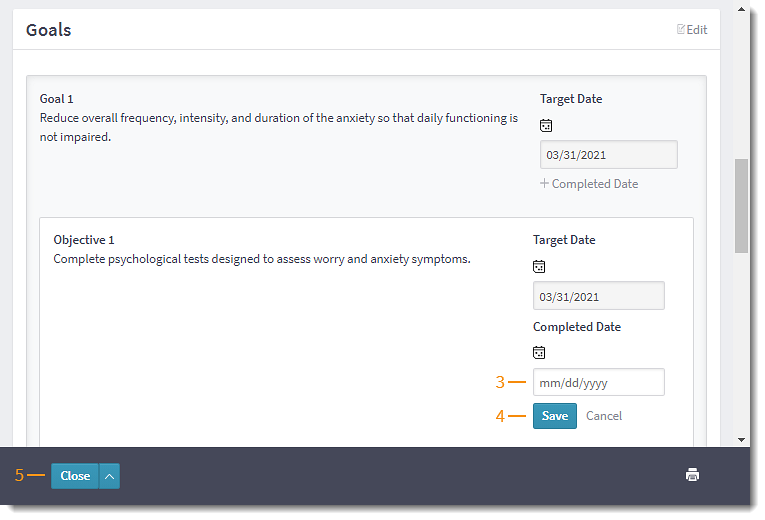
Treatment Plan: Goal and Objective Timeline
Assign a timeline for goals and objectives to create an actionable treatment plan for patients. Providers can add a target date for patients to achieve their goal(s) and objective(s). Once achieved, providers can add the completion date to track the progress of the treatment plan.
Add Target Date
|
 |
Add Completed Date
|
 |
ePrescription: Order Durable Medical Equipment
Providers can now electronically order durable medical equipment (DME) and supplies. In addition to ePrescribing new DME or supplies, providers can electronically process renewals request, cancel orders, respond to change request, create drug favorites, and pull medication history for DME and supplies.
Note: This feature is currently limited to diabetic supplies and equipment. eRx packaged drug classes (e.g., crutches, walkers, and etc) are not available to prescribe electronically.
Feature available by the end of March 2021.
ePrescribe DME or supplies
|
 |
Clinical General Improvements
Clinical Resolved Issues
- Fixed an issue where the effective date of a prescribed controlled substances was one day prior to the written date
- Fixed an issue where providers were unable to select the desired quantities of Zubsolv medication tablets
- Fixed an issue where providers received a drug allergy interaction error message when prescribing medications
- Fixed an issue where users received an error message when attempting to send patient education
- Fixed an issue where users received an error message when attempting to add or remove a problem in the assessment section of a clinical note
- Fixed an issue where users experienced latency when prescribing medications
Engage
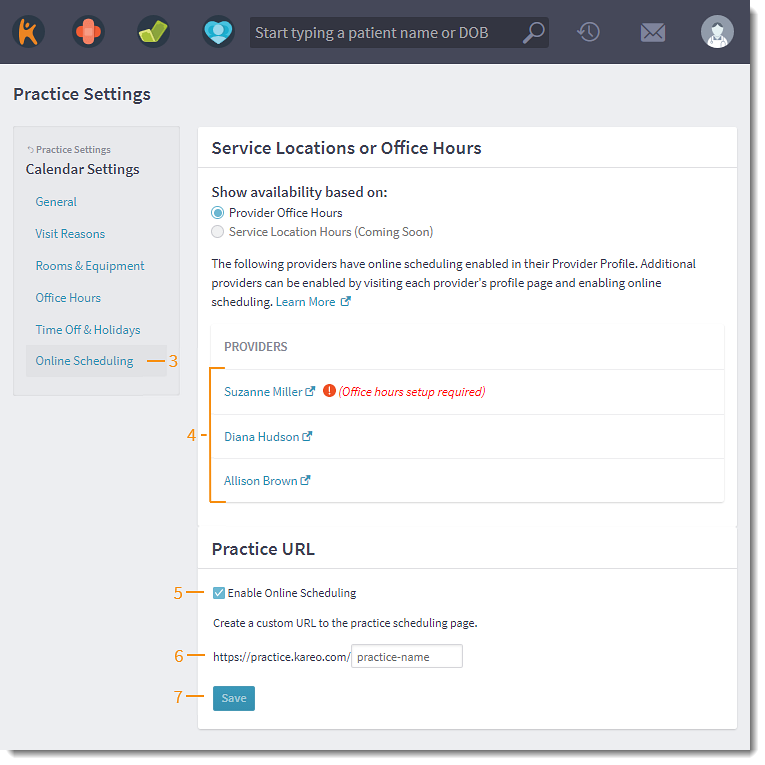
Practice Level Online Appointment Scheduling
Practice level online scheduling allow practices with multiple service locations and providers to enhance their scheduling options. The new online scheduler gives patients the ability to request appointments from the practice page or the provider profile page.
For a provider to be included in the practice level online scheduler, they must be an Engage subscriber and set up the Online Appointment Booking section of their Provider Profile. The practice online schedule will display appointment times based on the set up of the provider(s) online schedule.
Set Up Online Scheduling
|
 |
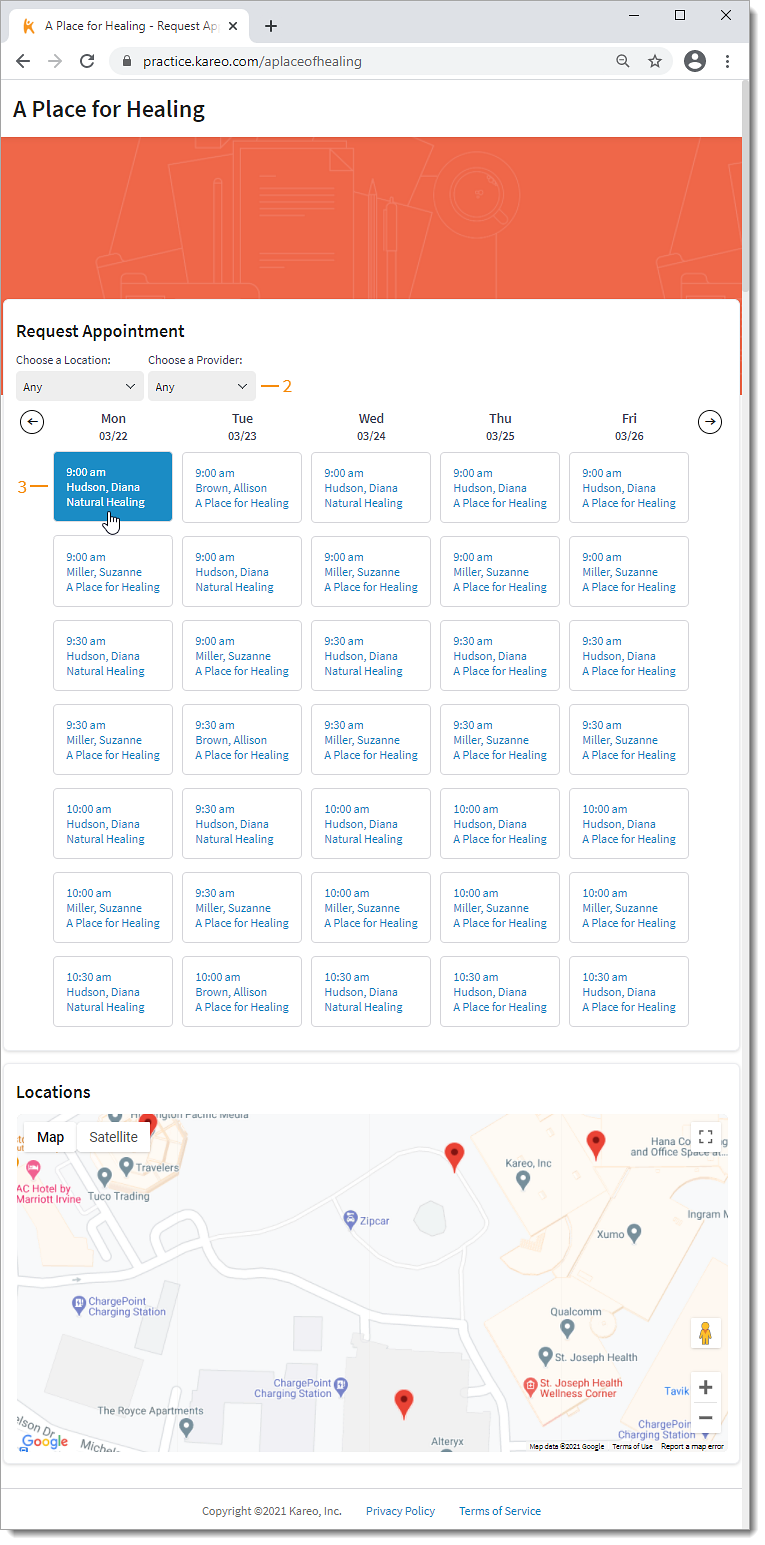
Patient Experience: Request Appointment
|
 |
|
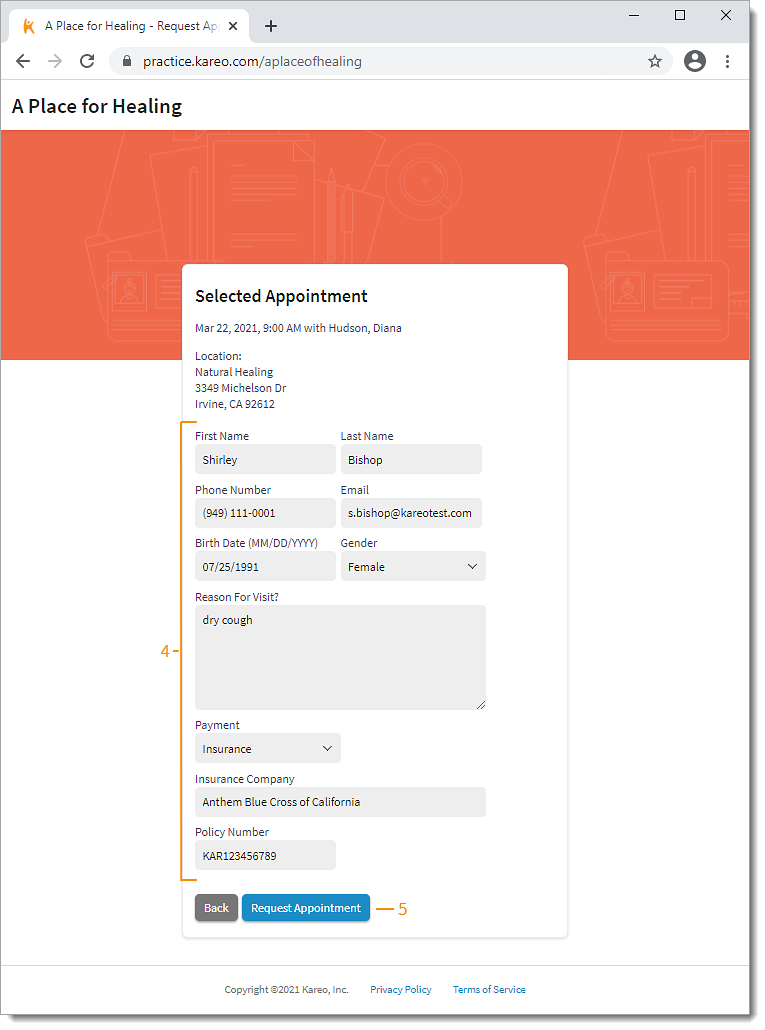 |
Confirm Appointment
|
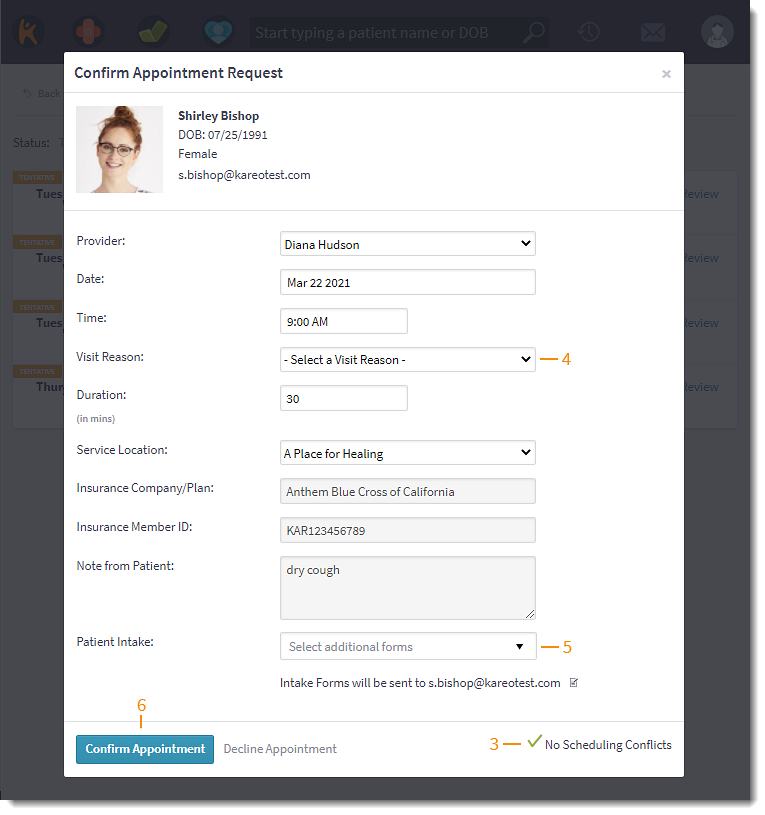 |
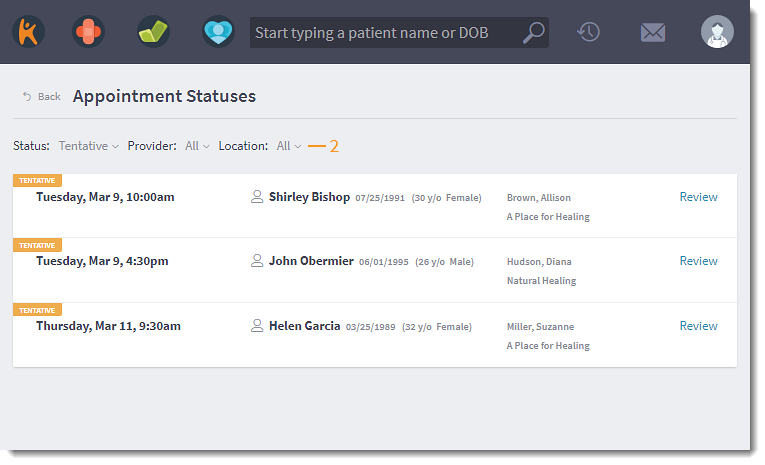
Tentative Appointment Location Filter
Quickly filter tentative appointments by service locations to confirm online appointment requests.
Filter by Location
|
 |
Engage General Improvements
- Stripe activated customers can send a Credit Card Authorization form through Patient Intake. Patients can add, edit, or remove credits card(s) on file and electronically sign the authorization form. Feature available by the end of March 2021.
Engage Resolved Issues
- Fixed an issue where users experience a continuous spinning wheel attempting to view appointment reminders on the tentative appointment page
Platform
Platform General Improvements
- The Patient Portal now supports Apple Pay, Google Pay, and Microsoft Pay for Stripe activated customers. Feature available by the end of March 2021.
Platform Resolved Issues
- Fixed an issue where users received an error message when attempting to access the patient's facesheet