Release Notes June 2021
Views: 1875
On June 24, 2021, your Kareo account will be upgraded to the latest version.
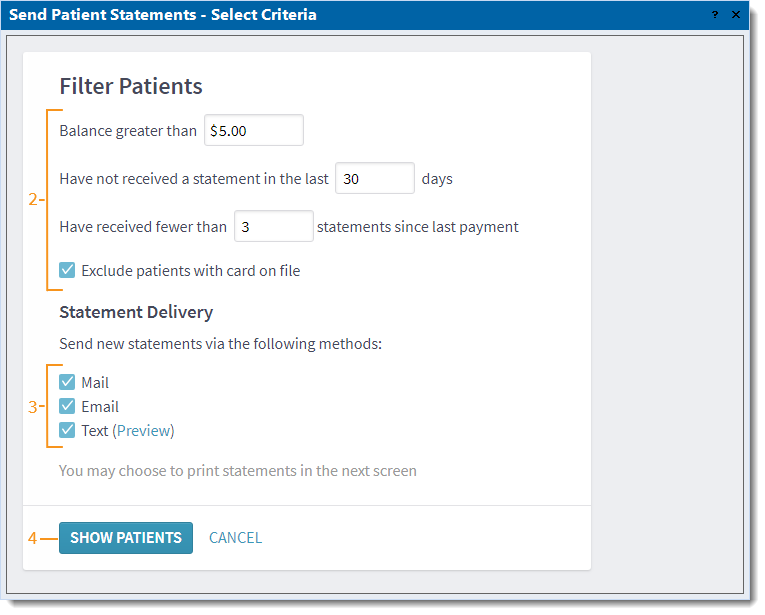
BillingSend Patient Statements: Exclude Patients with Card on FilePatients that have a card on file can now be excluded when sending a batch of patient statements. |
|
|
Exclude Patients with Card on File
|
 |
Billing General Improvements
- To maintain the highest online payment security standards and enhance patient data loss prevention efforts, Kareo is now HITRUST certified. Visit the HITRUST site for more information.
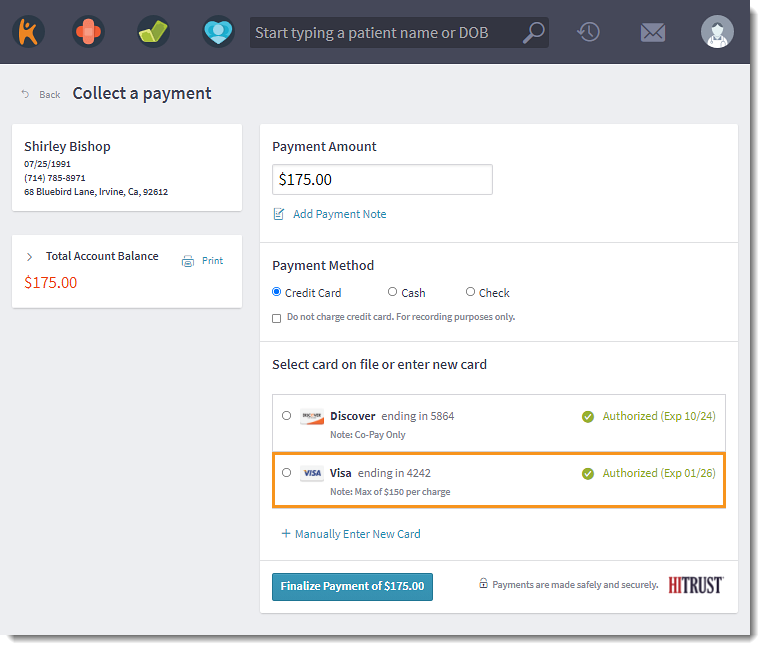
- Patient payment card notes display when collecting a payment.
- Case condition information syncs between the Desktop Application (PM) and the Kareo Platform.
Billing Resolved Issues
- Fixed an issue where users received an exception error upon Kareo sign in
- Fixed an issue where users experienced latency
- Fixed an issue where the validation error did not properly display for duplicated diagnosis codes entered on the same service line
- Fixed an issue where adding a default unit to procedure records caused the description to no longer display in some features
- Fixed an issue where digital wallet payments created duplicate payment records
- Fixed an issue where the patient agreement form could not be downloaded
Clinical
Tailored Patient Chart View
July 7, 2021 Update: The effective date has been moved to July 16, 2021.
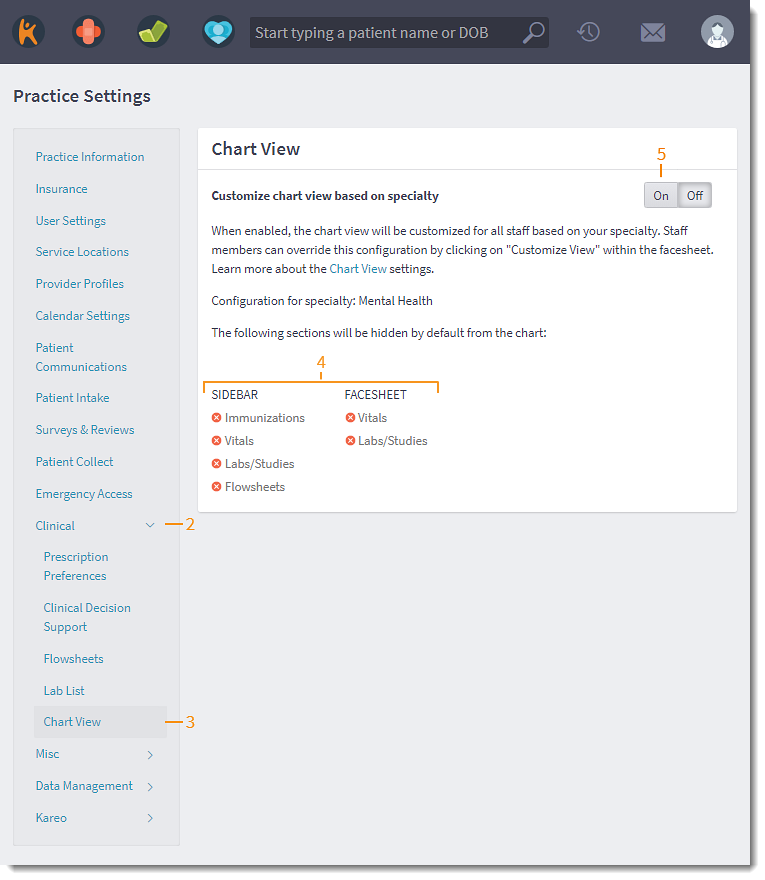
Eliminate irrelevant information on the patient facesheet by tailoring the view specific to the practice's specialty or user's preference. System administrators can enable chart view customization to automatically hide sections of the patient facesheet and sidebar navigation to fit the practice's specialty. Users can override the practice configuration by customizing the patient facesheet to their needs.
Note: The specialty is based on the Practice Specialty selected when completing the practice setup wizard.
Feature available for all customers by July 7, 2021.
Enable Practice Level Configuration
|
 |
| User Level Customization
Users can further customize the patient chart to override the practice's Chart View setting. If the practice's Chart View settings is disabled, users can still customize the patient facesheet to their needs. Note: Chart view customization is user specific and applies to all patient charts.
|
 |
Clinical General Improvements
- Updated the VIS date for Pfizer BioNTech Vaccine EUA, Moderna Vaccine EUA, and Janssen Vaccine EUA to reflect current CDC guidelines.
Clinical Resolved Issues
- Fixed an issue where users received an error message when attempting to document a clinical note
Engage
Patient Communication Customization
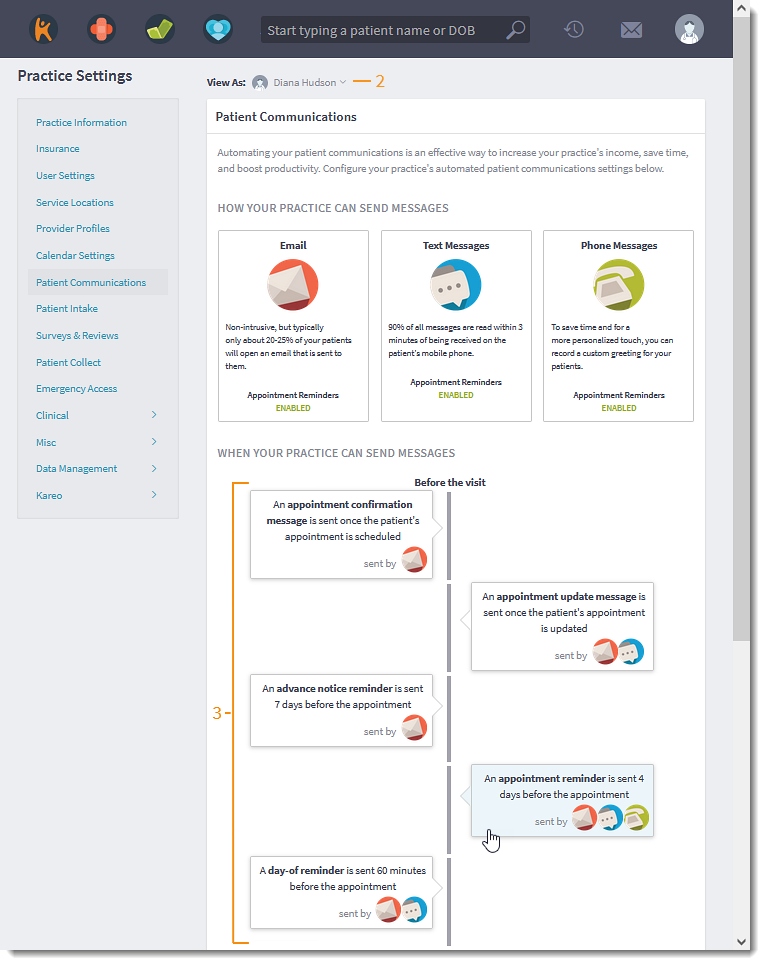
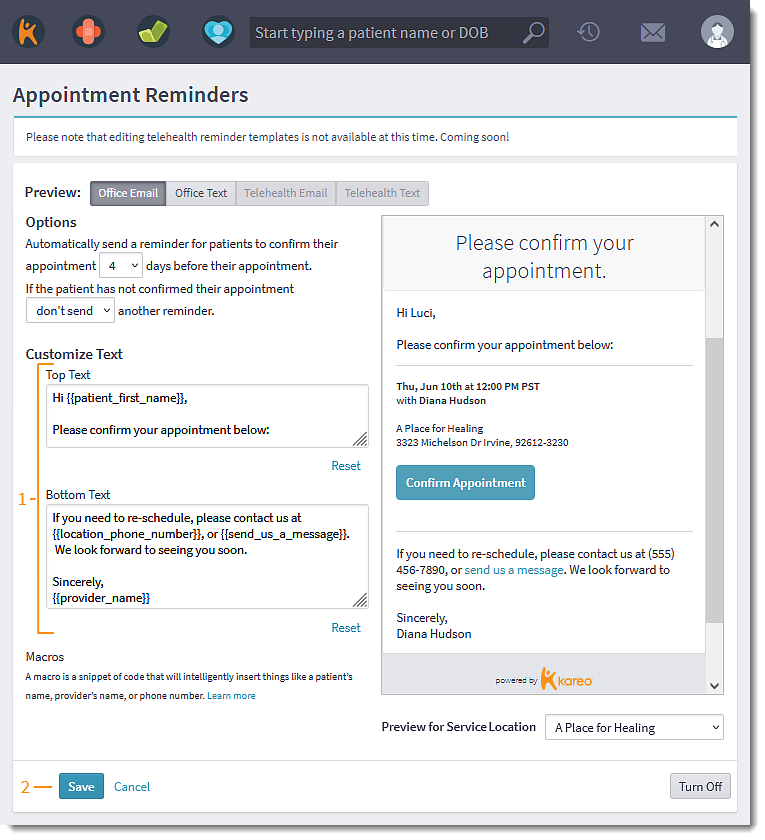
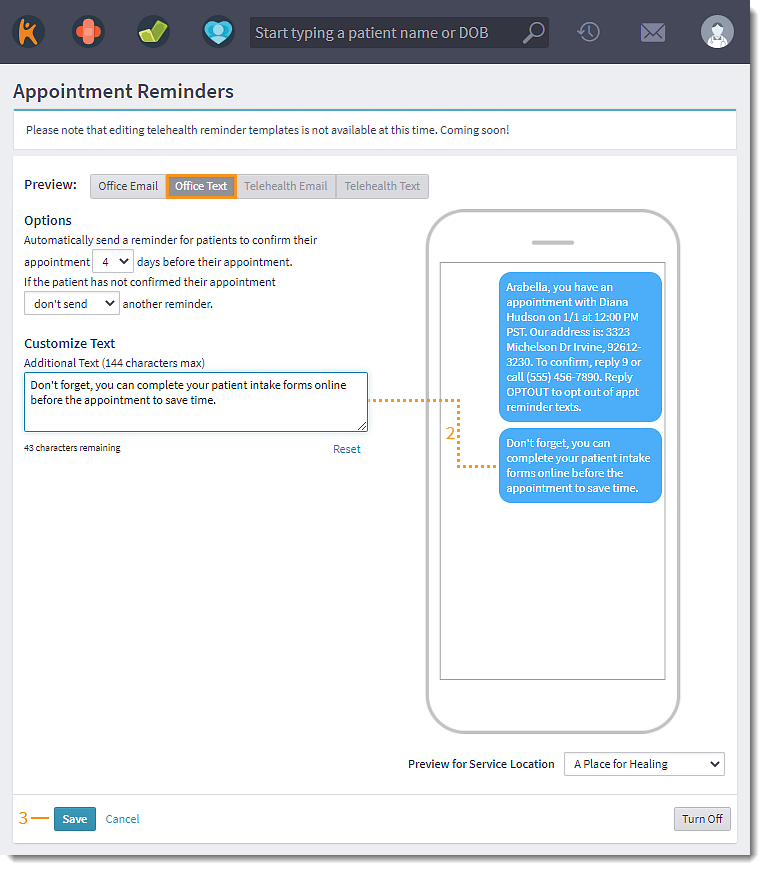
Customize the appointment reminder office email and/or text to help tailor the patient's experience. System administrators have the option to customize the email for each message (e.g., add parking instructions, practice website, COVID protocols) and add an additional text message, when applicable.
Note: Customization for Telehealth confirmation and reminders are not available at this time.
Access Customization
|
 |
Customize Email Reminder
|
 |
Customize Text Reminder
|
 |
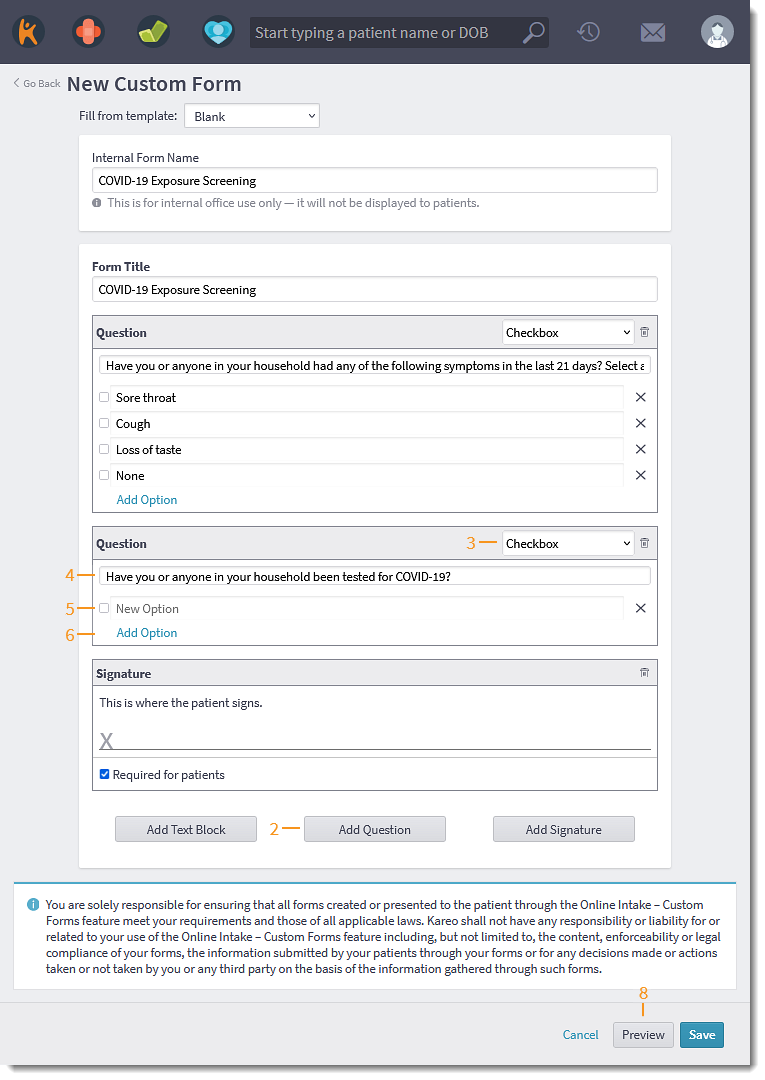
Custom Form: Multiple Choice Questions
Tailor the practice's custom forms by using checkboxes to create multiple choice questions. This allows system administrators to create different types for forms (e.g., COVID questionnaires, screening tools) specific to the practice's needs.
Create Multiple Choice
|
 |
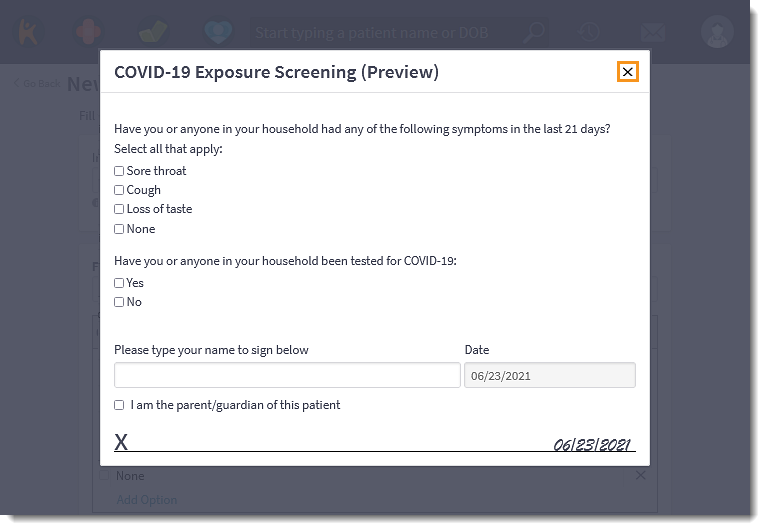
Once saved, the front office can send the form to the patient through the Patient Intake workflow. |
 |
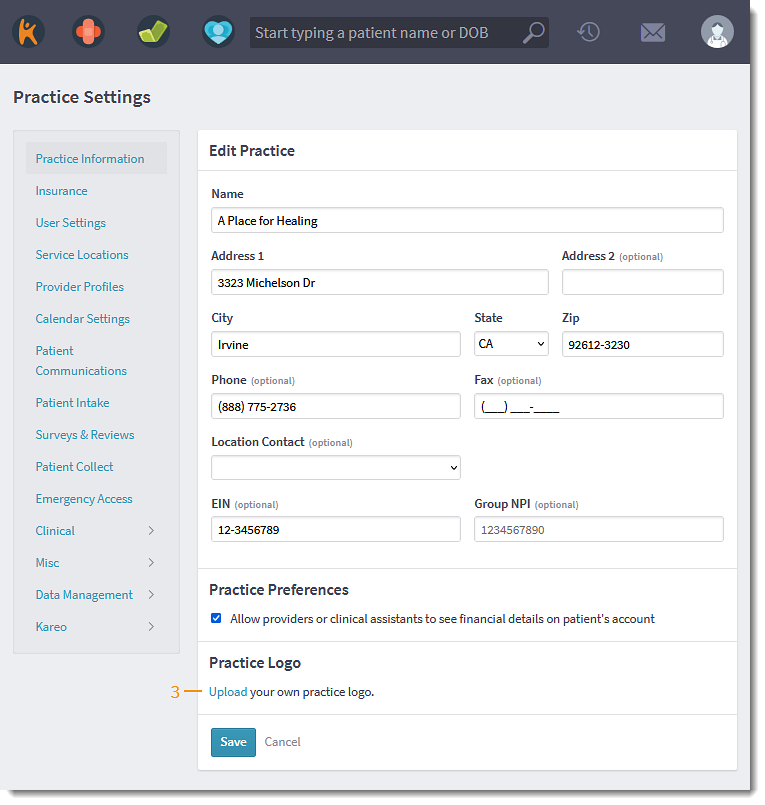
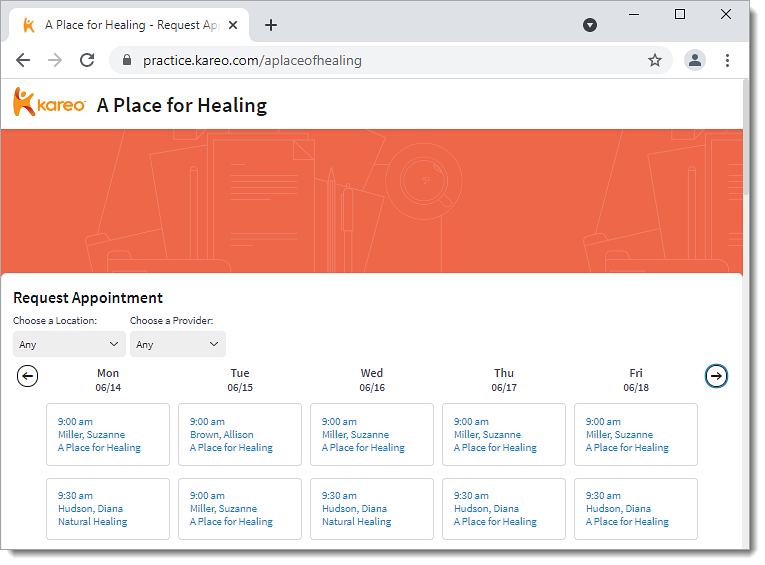
Practice Online Scheduler: Add Logo
Build the practice's brand recognition by adding a logo to the practice's online scheduler.
Note: The uploaded logo is only available for the practice online scheduling feature and cannot be applied to other workflows at this time.
Add Logo
|
 |
|
 |
|
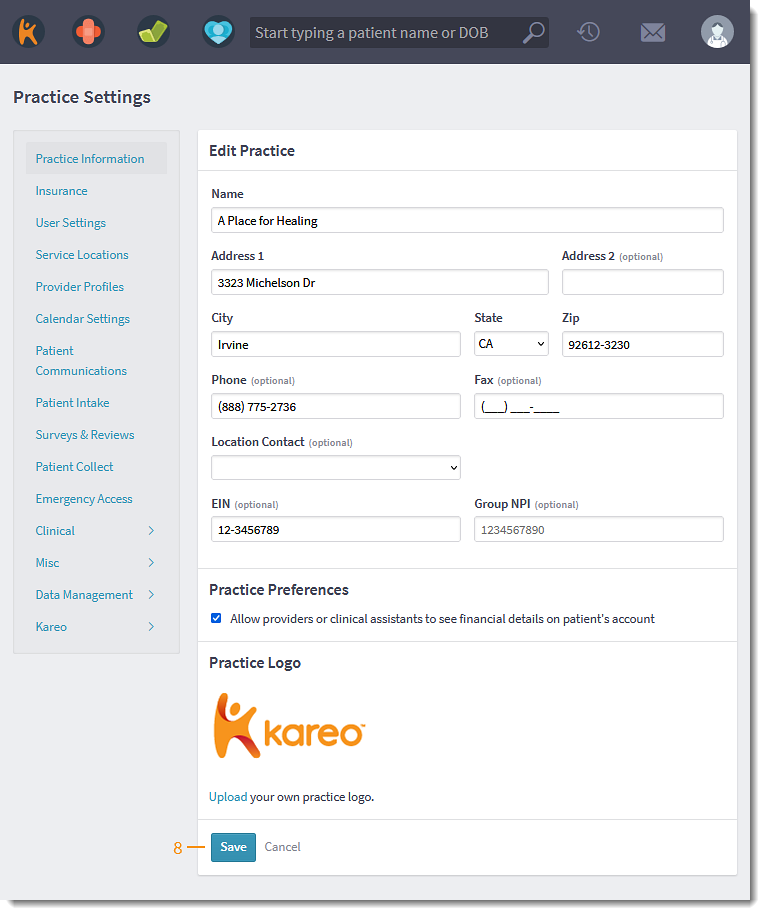 |
View Logo
|
 |
Practice Online Scheduler: Hide Service Location
System administrators can hide service locations that are not available for patient appointments from the practice online scheduler. This helps the patient avoid confusion when requesting an online appointment and streamlines the practice's workflow.
| Hide Service Location | 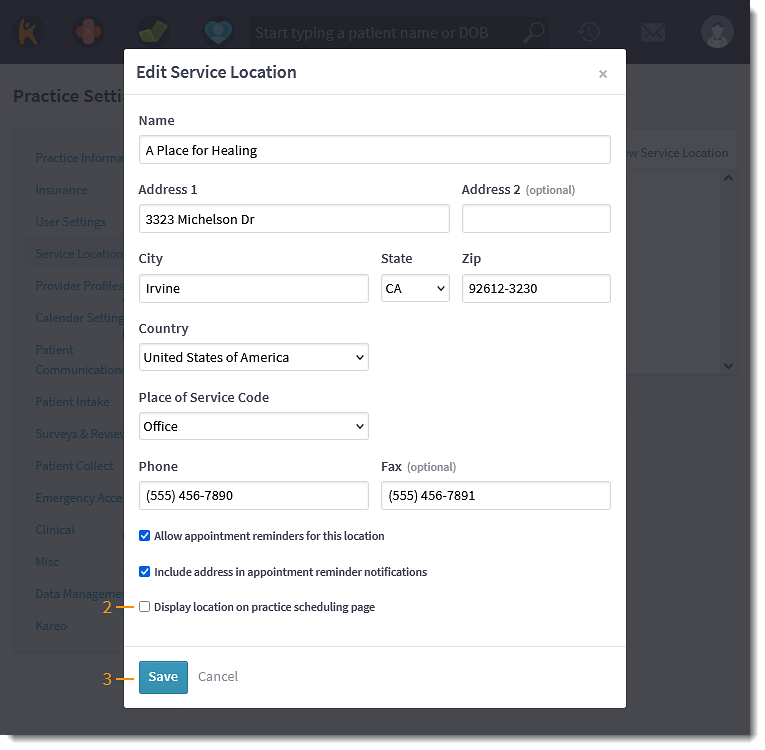 |
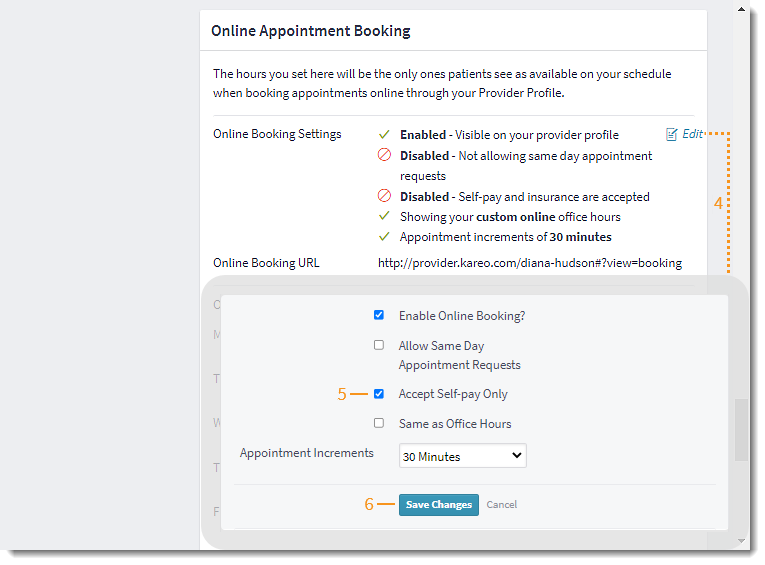
Online Appointment Booking: Self-Pay
Providers now have the option to indicate they are self-pay only when patients are scheduling an online appointment via the Provider Profile or Practice Online Scheduler.
Complete the following steps for all providers in the practice that only accepts self-pay patients.
|
 |
Engage General Improvements
- To maintain the highest online payment security standards and enhance patient data loss prevention efforts, Kareo is now HITRUST certified. Visit the HITRUST site for more information.
Engage Resolved Issues
- Fixed an issue where the service location address line 1 is missing in the Provider Profile
Platform
Patient Payment Card Notes
The practice or patient can add notes to a saved card on file. This allows the front office or biller to review instructions before processing a payment (e.g., determine which card to use or how to split the balance). Notes are entered by the patient when completing the Credit Card Authorization form through patient intake (Engage subscribers) or entered by the practice under the patient's Payment Cards.
Add Patient Payment with Notes
|
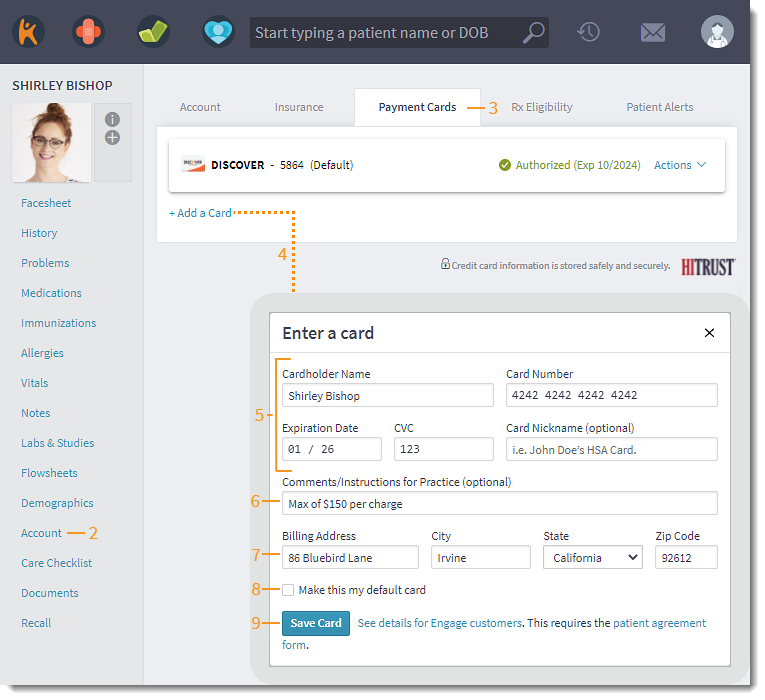 |
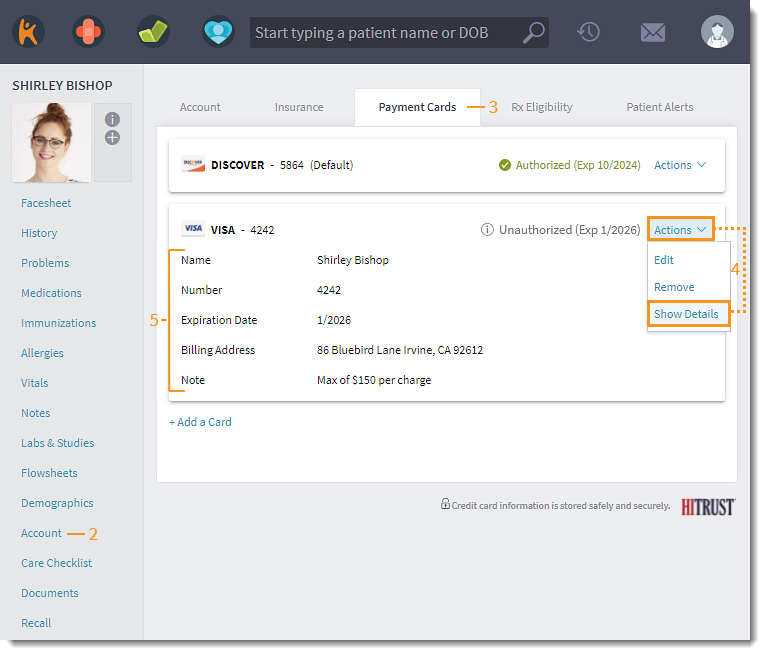
Payment Cards
|
 |
| Patient Intake
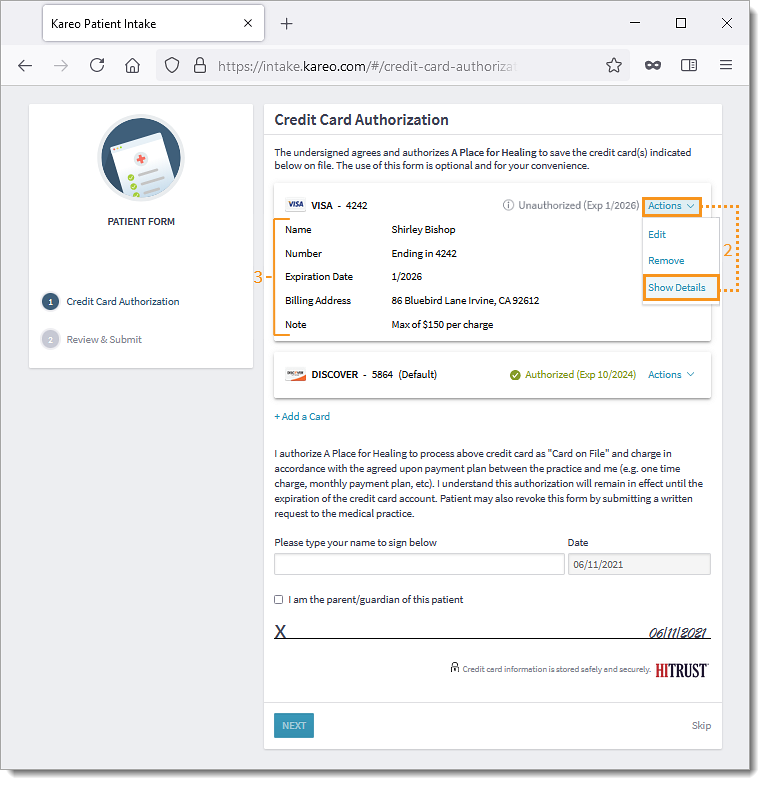
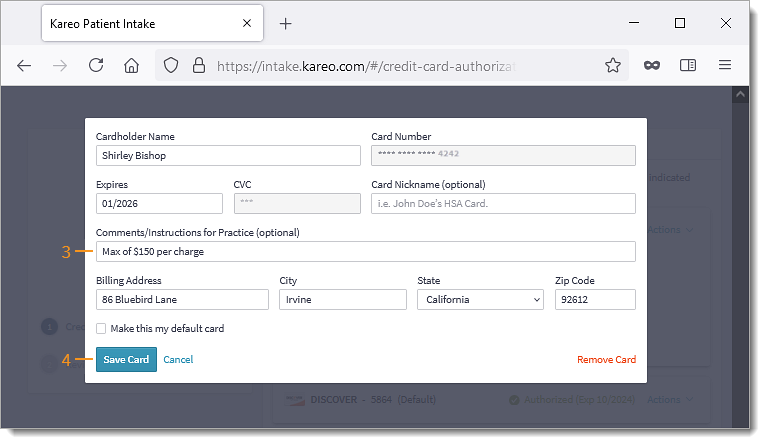
For Engage Subscribers, send the Credit Card Authorization form to allow patients to electronically sign the authorization form. Patients can manage their card(s) on file, including viewing and editing the saved note. View Note
|
 |
Edit Note
|
 |
Collect Payment
|
 |
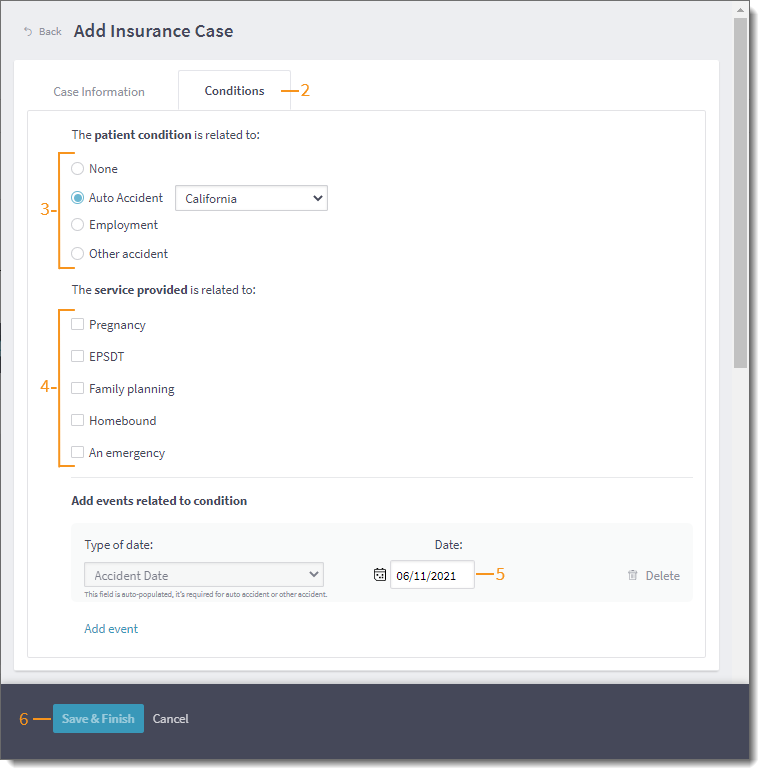
Insurance Case Conditions
Patient condition information that prompted the need for healthcare services can be entered or edited in the Insurance Case. This information now syncs to and from the Desktop Application (PM) eliminating the need to move between the applications.
Add Insurance Case Condition
|
 |
Platform General Improvements
- To maintain the highest online payment security standards and enhance patient data loss prevention efforts, Kareo is now HITRUST certified. Visit the HITRUST site for more information.
Platform Resolved Issues
- Fixed an issue where the automatic patient statements feature sent duplicate statements to the patient
- Fixed an issue where patients received an error message when attempting to make a payment through the Patient Portal
- Fixed an issue where users experienced latency or an error message when logging into and navigating in Kareo
- Fixed an issue where users received an error message when attempting to modify appointments synced from the Desktop Application
Mobile
Mobile Resolved Issues
- Fixed an issue where appointments scheduled at midnight does not appear on the mobile app