Set Up Kiosk on iOS
The Tebra Kiosk app eliminates the need for in-office paper intake and allows patients to digitally enter their historical information, fill out medical intake forms, and update basic demographic fields in an electronic format. The information can be reviewed and merged into the patient's chart.
Kiosk is great for patients who may have missed, forgotten or disregarded the email sent by the practice in advance of their appointment. It also enables practices to easily manage and accommodate walk-in patients.
For the best experience, Kiosk should be not be used in dark mode. Check the Kiosk app requirements for supported OS and devices.
Available for Engage subscribers.
Set Up Your DeviceTebra Kiosk requires Guided Access to prevent patients from navigating away from the app.
|
 |
Get Started
|
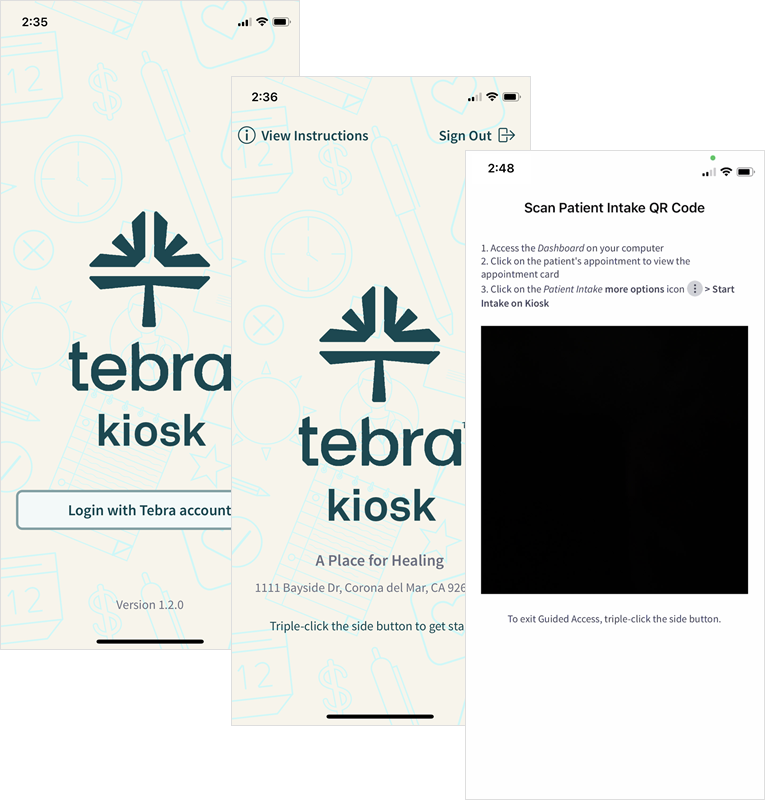 |
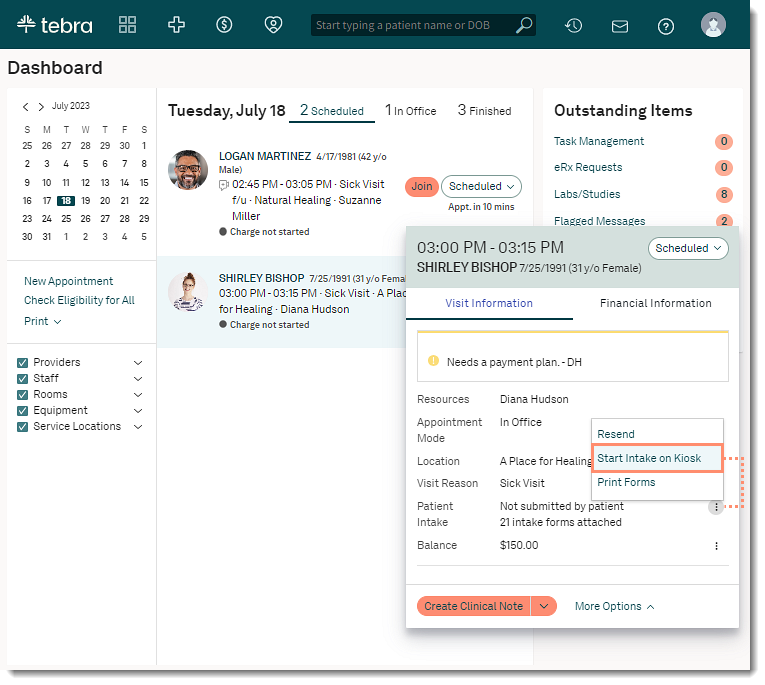
Prepare Patient IntakeTo complete the following steps, the intake form must be sent to the patient first through a scheduled appointment.
|
 |
|
 |
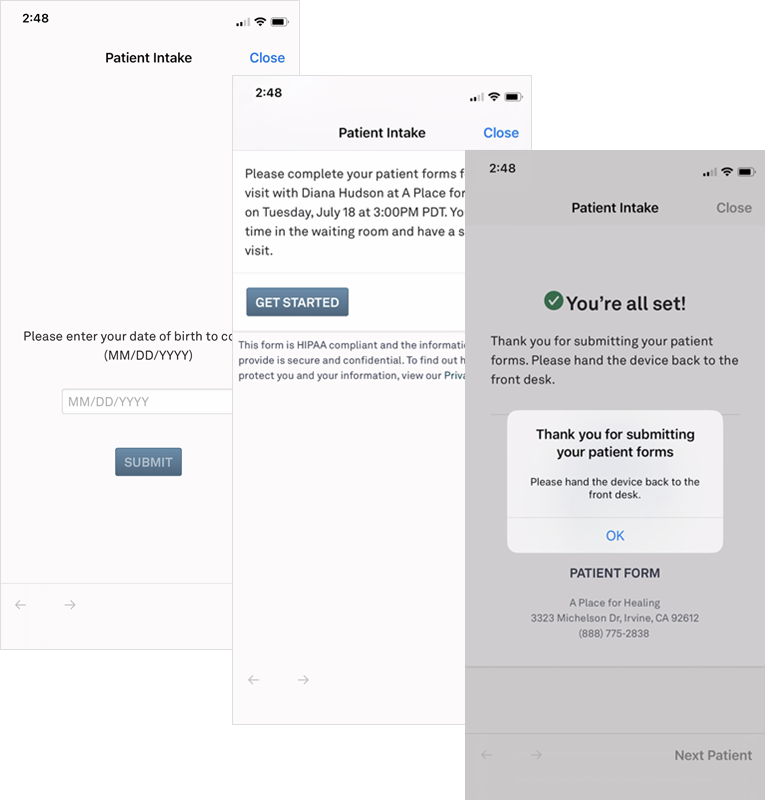
Patient Experience: Complete IntakeHand the patient the device to begin the Patient Intake. Note: The session expires after 5 minutes of inactivity. If necessary, scan the QR code again to continue.
The submitted patient intake is now ready for review in the web app. |
 |