Updated: 06/09/2023 | Views: 24679
The Clinical Superbill enables you to capture a comprehensive list of charges for the exam, procedures, supplies, and other goods and services provided during the patient's visit, all without leaving the clinical note.
Creating a Superbill can be done in stages and by more than one person. It starts with clicking the Superbill button at the bottom of the note and ends with submitting the bill. Superbills can be edited, but not deleted. Access the superbill as often as needed to make changes until the charges are finalized and submitted for billing.
Access Notes
- Enter the first 2–3 letters of the patient's name or date of birth (mm/dd/yyyy) in the top navigation bar search box.
- Click to select the patient from the auto-populated results. The patient's Facesheet page opens.
- Click Notes. The Notes page opens.
- Click Open next to an existing note or create a new note.
|
 |
Create Superbill
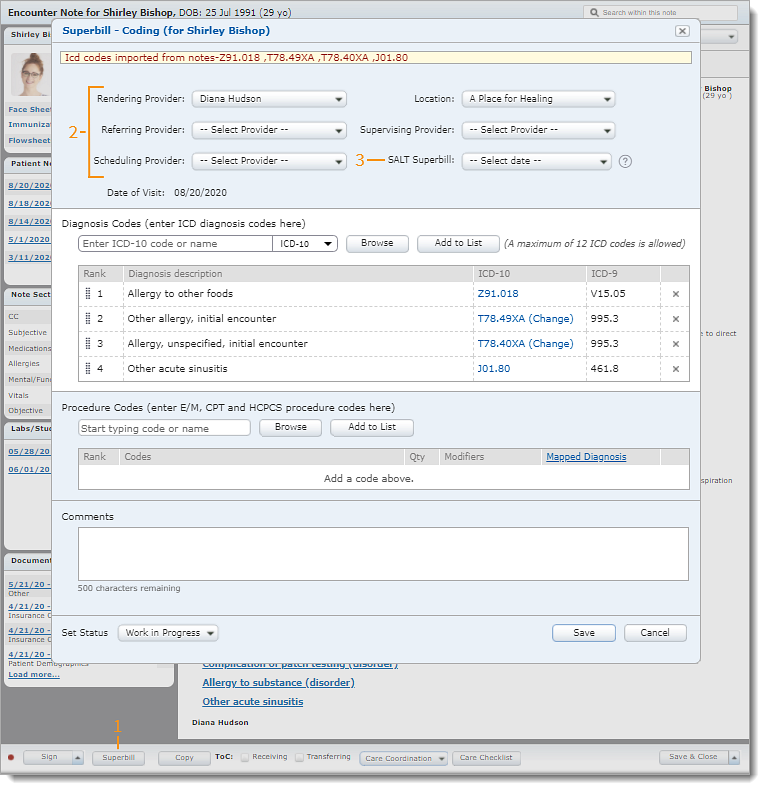
- Click Superbill. The Superbill Coding pop-up window opens.
Note: Once a superbill is created, it cannot be deleted.
- Select the necessary Rendering Provider, Service Location, Referring Provider, Supervising Provider, or Scheduling Provider.
- Optionally, copy diagnoses and charges from a previous superbill by selecting a date from the SALT (same as last time) Superbill drop-down.
|
 |
Enter Diagnosis Codes
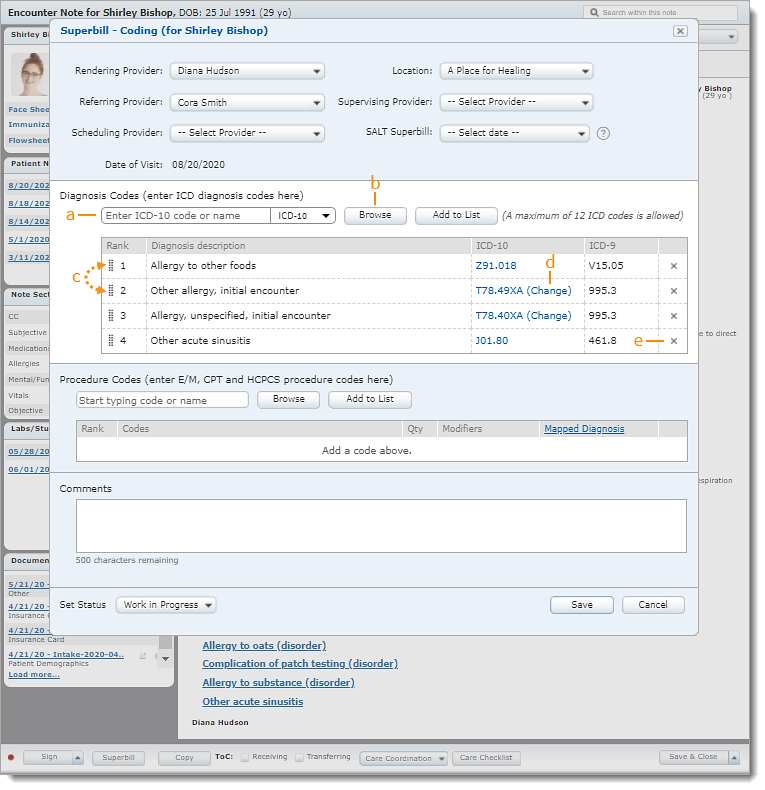
ICD codes auto-import from the Assessment section of the note into the Diagnosis Code section of the superbill. If necessary, codes can be added, removed, or re-ordered.
Note: Codes added or deleted in the superbill will need to be manually updated in the note.
- Enter up to 12 Diagnosis Codes:
- Enter ICD-10 Code: Click to view and select from a list of the patient's active problems. Or, search for a code by entering the first 3 characters of the code name or number and selecting from the list of results.
- Browse: Click to open the ICD Browser pop-up window and choose from saved coding favorites, the patient's diagnosis codes, or perform a general search.
- Rank: Click and drag the bar to re-order the Diagnosis Codes list, if necessary.
- Change: Click to select a different extension for any ICD-10 code with a 7th character, if necessary.
- Remove: Click X to remove the code from the superbill, if necessary.
|
 |
Enter Procedure Codes
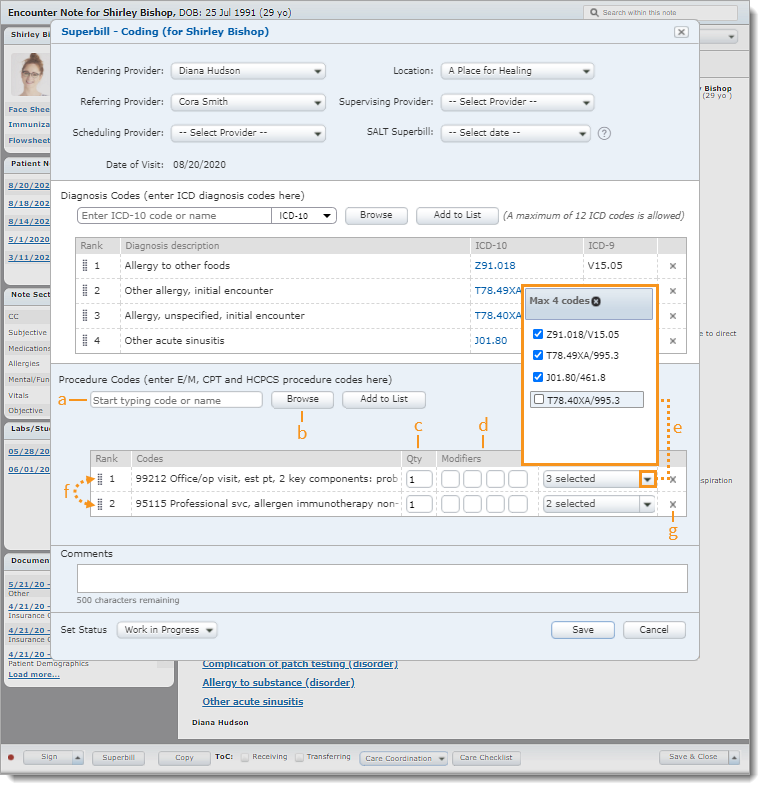
Procedure codes (E/M, CPT and HCPCS) capture the level and complexity of care provided to the patient during the visit.
- Enter Procedure Codes:
- Procedure: Enter the first 3 numbers of the code or first 3 letters of the name. Select the procedure code from the auto-populated results. The code is added to the list.
- Browse: Click to open the Procedures Browser pop-up window and choose from saved coding favorites, custom codes, or perform a general search.
- Qty: Enter the quantity delivered to the patient as appropriate.
- Modifiers: Enter up to four applicable modifiers.
- Mapped Diagnosis: Diagnosis Codes are mapped to Procedure Codes in the order in which they appear in the ICD section. Click the drop-down arrow to select up to four Diagnosis Codes.
- To remove a diagnosis, click to clear the selection.
- Rank: Click and drag the bar to re-order the Procedure Codes list, if necessary.
- Remove: Click X to delete the Procedure Code, if necessary.
|
 |
Complete Superbill
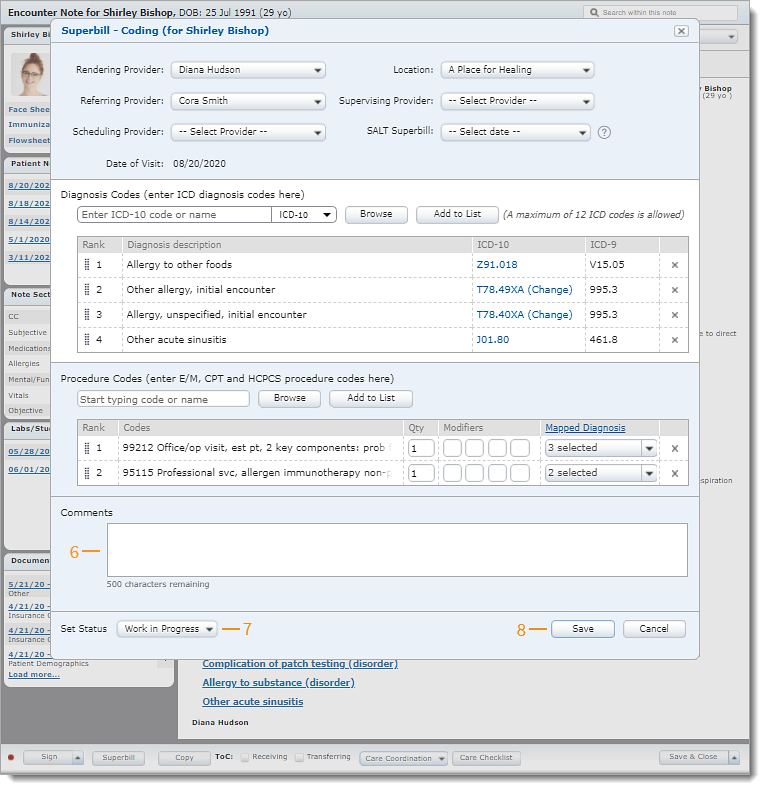
- Enter comments, if desired.
Note: Comments entered appears in the Medical Office Notes section of the draft encounter (Billing subscribers).
- If necessary, select the desired Status from the drop-down to indicate the progression of the superbill.
- Click Save when finished.
View the progress of the superbill on the Superbills page.
|
 |