Share or Remove Treatment Plan on Patient Portal
- Last updated
-
-
Save as PDF
Updated: 06/23/2023 | Views: 1487
Treatment Plans allow providers or clinical assistants to build comprehensive treatment plans for their patients. When the patient signature is captured in the Patient Portal, the treatment plan is automatically shared. Providers can choose to share treatment plans that were not automatically shared or remove access to shared treatment plans.
Note: Treatment plans with a Draft status cannot be shared.
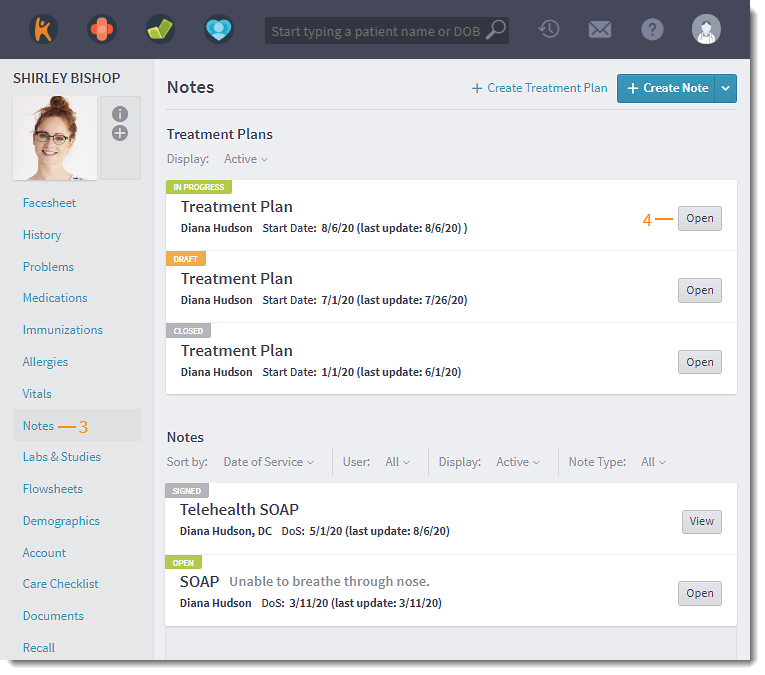
Access Treatment Plan
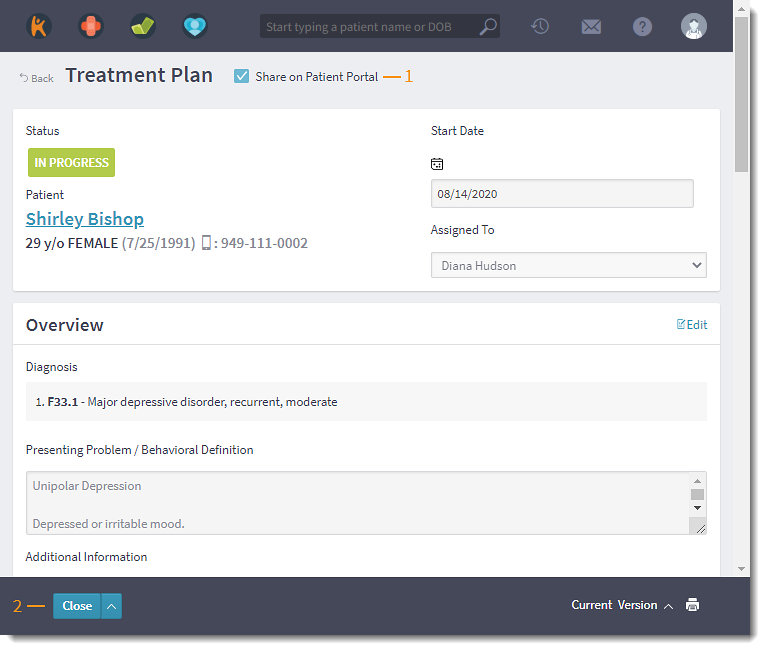
- Enter the first 2–3 letters of the patient's name or date of birth (mm/dd/yyyy) in the top navigation bar search box.
- Click to select the patient from the auto-populated results. The patient's Facesheet page opens.
- Click Notes. The Notes page opens.
- Click Open. The Treatment Plan page opens.
|
|
Share Treatment Plan
Shared treatment plans does not include progress or closing comments.
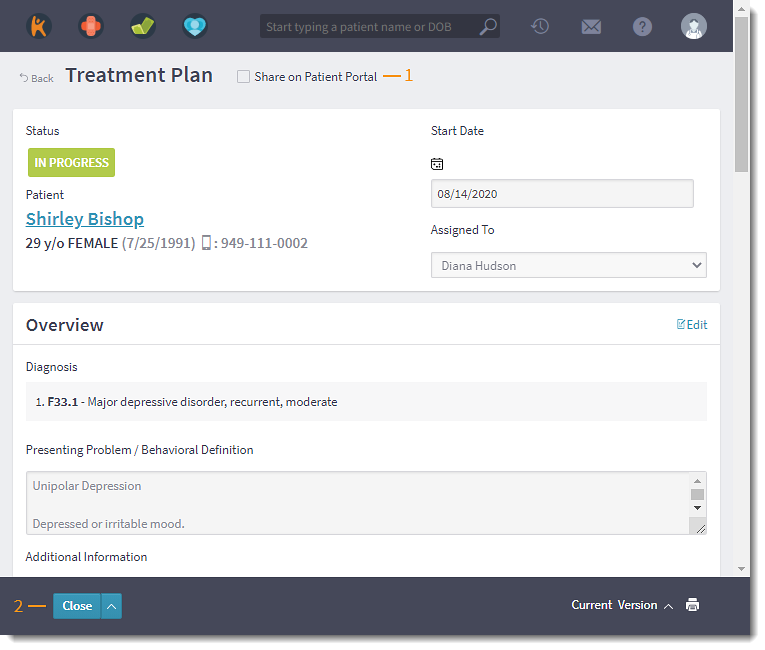
- Click to select "Share on Patient Portal".
- If an orange or red icon displays, hover over the icon for details about the patient's portal status. Review Patient Portal Status Indicators for additional information.
- Click Close when finished. The treatment plan is now viewable in the Patient Portal.
|
|
Remove Treatment Plan
When necessary, remove the patient's access to the treatment plan in the Patient Portal.
- Click to clear "Share on Patient Portal".
- Click Close when finished. The treatment plan is no longer accessible in portal.
|
|
Patient Portal Status Indicator
Status |
Displays When |
Next Step |
|
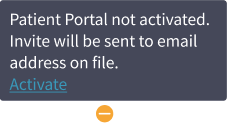
The patient has not been invited to or activated a Patient Portal account. |
Send an invite to the email in the patient's chart.
- From the pop-up message, click Activate. The Activate Patient Portal pop-up window opens.
- Verify the email address, and click Activate. "Share on Patient Portal" is selected and an invitation to activate the Patient Portal is emailed to the patient.
- After activating the portal, the patient can now view the treatment plan in the Patient Portal.
|
|
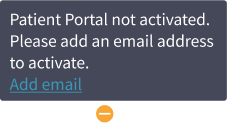
The patient does not have a saved email address in the patient's chart. |
Add an email address to send a Patient Portal invite.
- From the pop-up message, click Add Email. The Activate Patient Portal pop-up window opens.
- Enter the patient's Email Address and click Activate. "Share on Patient Portal" is selected and an invitation to activate the Patient Portal is emailed to the patient.
Note: The email address enter is saved to the patient's chart.
- After activating the portal, the patient can now view the treatment plan in the Patient Portal.
|
|
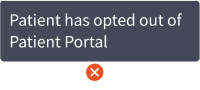
The patient has opted out of the Patient Portal. |
The treatment plan cannot be shared in the Patient Portal. Print the treatment plan for the patient. |