Updated: 03/28/2024 | Views: 4380
Treatment Plans allow providers or clinical assistants to build comprehensive treatment plans for their patients. This is a powerful tool for engaging patients in their treatment through detailed plans tailored to their individual needs. Treatment Plans help guide patients towards reaching their goals while providers can monitor their progress and make treatment adjustments when necessary.
In addition to creating a detailed plan tailored to the patient's needs, provider can capture the patient signature via the Patient Portal. This gives the patient the ability to review and sign their tailored treatment plan at their own pace.
In order for the patient to sign the treatment plan via Patient Portal:
- Invite the patient to the Patient Portal
- The patient must activate the Patient Portal after receiving the email invitation
Access Notes
- Enter the first 2–3 letters of the patient's name or date of birth (mm/dd/yyyy) in the top navigation bar search box.
- Click to select the patient from the auto-populated results. The patient's Facesheet page opens.
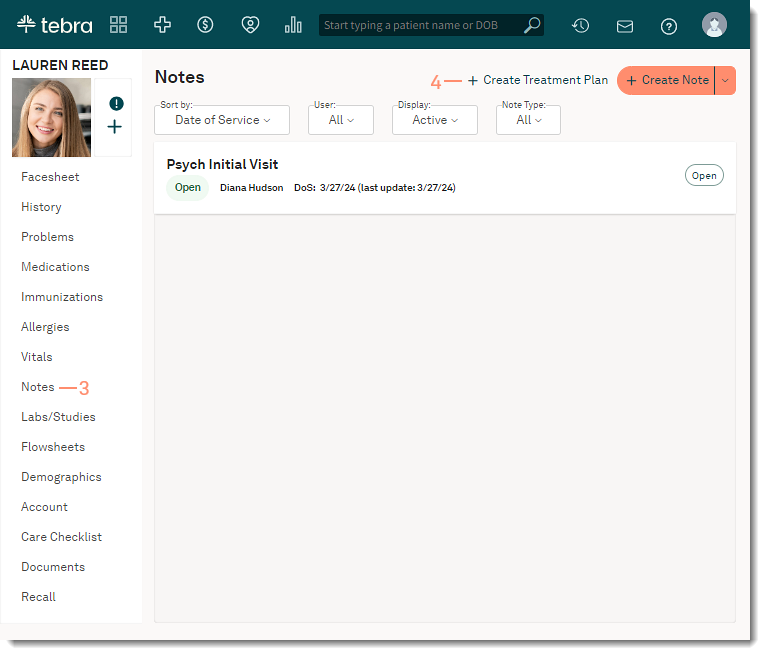
- Click Notes. The Notes page opens.
- Click + Create Treatment Plan. The Treatment Plan page opens.
|
 |
Create Treatment Plan
The treatment plan will automatically save as a draft after 5 minutes of inactivity.
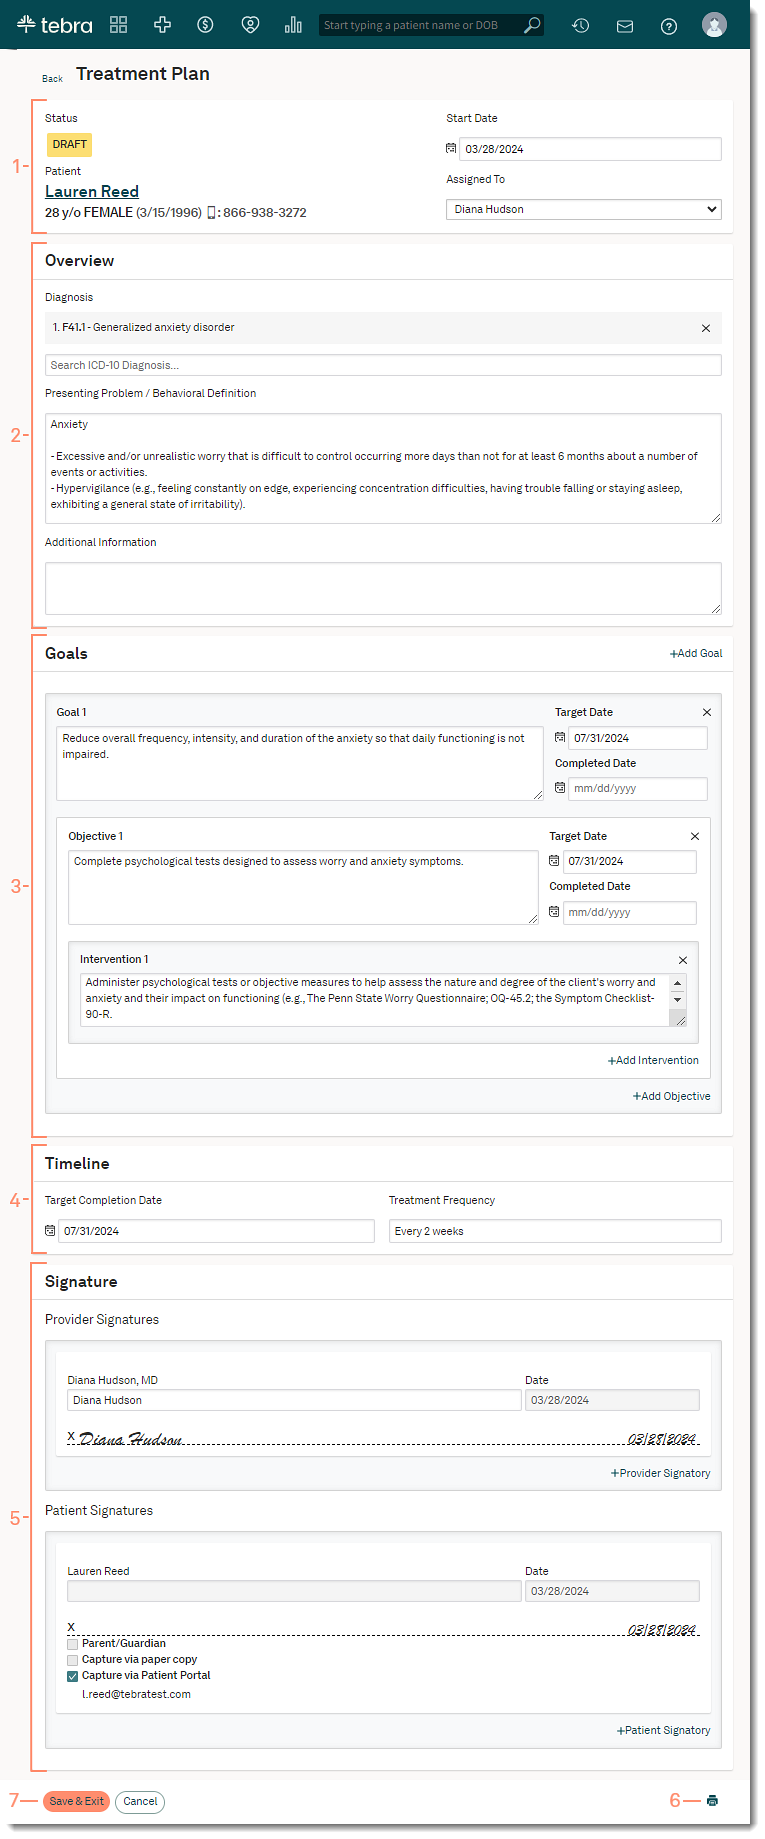
- Plan details:
Note: These fields can only be selected while the treatment plan is in Draft.
- The Start Date is defaulted to today's date. If necessary, select a new start date.
- The Assigned To auto-populates the provider creating the treatment plan. If necessary, select a different provider.
- Overview:
- Diagnosis: Click to view and select from the patient’s active problem list. If necessary, search for and select a different diagnosis.
- Presenting Problem/Behavioral Definition: Enter relevant information or use a Text Shortcut to populate the field. If necessary, use the information entered to create a shortcut for future use.
- Additional Information: Enter relevant information or use a Text Shortcut to populate the field. If necessary, use the relevant information entered to create a shortcut for future use.
- Goals: Add up to 10 goals, objectives, and interventions through a structured hierarchy. This allows providers to add multiple objectives to a goal and multiple interventions to an objective.
- Enter relevant information into Goal 1 or use a Text Shortcut to populate the field. If necessary, use the information entered to create a shortcut for future use.
- To add a Target Date for the goal, click to select a date from the calendar picker.
- Click +Add Objective. The Objective 1 editor opens. Enter relevant information or use a Text Shortcut to populate the field. If necessary, use the information entered to create a shortcut for future use.
- To add a Target Date for the objective, click to select a date from the calendar picker.
- To add additional objectives, click +Add Objective.
- Click +Add Intervention. The Intervention 1 editor opens. Enter relevant information or use a Text Shortcut to populate the field. If necessary, use the information entered to create a shortcut for future use.
- To add additional interventions, click +Add Intervention.
- To add additional goals, click +Add Goal. Then, add objectives and interventions as necessary.
- Timeline:
- Target Completion Date: Click to select a date from the calendar picker.
- Treatment Frequency: Enter the frequency of the treatment (e.g., Every 2 weeks).
- Signature: Capture providers and patient/guardian signatures to sign off on the developed treatment plan.
- Provider Signatures: Providers electronically sign the form by typing their name in the designated field.
- To add additional provider signatures, click +Provider Signatory. The provider(s) electronically signs the form by typing their name in the designated field.
- Patient Signatures: Choose the best method to document the patient's signature.
- Not required: Click to select when a patient signature is not required.
- Electronic Signature: Patients types their name in the designated field to electronically sign the form.
- Parent/Guardian: Click to select when the designated field is for a parent/guardian signature.
- Capture via paper copy: Click to select when the patient signature will be capture on a printed copy.
- Capture via Patient Portal: Click to select when the patient signature will be captured in the Patient Portal. The patient will receive an email notification requesting the signature.
Note: Only the patient signature can be captured in the Patient Portal. Capture additional signatories via paper copy or in-office.
- If an orange or red icon displays, hover over the icon for details about the patient's portal status. Review Patient Portal Status Indicators for additional information.
- +Patient Signatory: Click to add additional patient signatures.
- Click the print icon to generate a PDF of the treatment plan. Save or print the PDF using the browser's functions.
 Print the PDF to capture signature(s) via paper copy. Then, scan and upload the signed treatment plans to the patient's document. Print the PDF to capture signature(s) via paper copy. Then, scan and upload the signed treatment plans to the patient's document.
- Click Save & Exit when finished. The treatment plan is now available on the Notes page to monitor the patient's progress.
The status of the treatment plan changes to In Progress when the provider and patient signature is documented. Otherwise, the status stays as Draft.
|
 |
Patient Portal Status Indicator
| Status |
Displays When |
Next Step |
 |
The patient has not been invited to or activated a Patient Portal account. Send an invite to the email in the patient's chart. |
Send an invite to the email in the patient's chart.
- From the pop-up message, click Activate. The Activate Patient Portal pop-up window opens.
- Verify the email address, and click Activate. "Capture via Patient Portal" is selected and an invitation to activate the Patient Portal is emailed to the patient.
- After activating the portal, the patient can now sign the treatment plan in the Patient Portal.
|
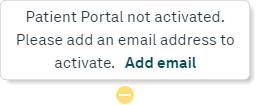 |
The patient does not have a saved email address in the patient's chart. |
Add an email address to send a Patient Portal invite.
- From the pop-up message, click Add Email. The Activate Patient Portal pop-up window opens.
- Enter the patient's Email Address and click Activate. "Capture via Patient Portal" is selected and an invitation to activate the Patient Portal is emailed to the patient.
Note: The email address enter is saved to the patient's chart.
- After activating the portal, the patient can now sign the treatment plan in the Patient Portal.
|
 |
The patient has activated their Patient Portal account, but does not have a saved email address in the patient's chart. |
Add an email address to the patient's chart.
- From the pop-up message, click Add Email. The Add Patient Email pop-up window opens.
- Enter the patient's Email Address and click Add Email. "Capture via Patient Portal" is selected.
Note: The email address enter is saved to the patient's chart.
- The patient can now sign the treatment plan in the Patient Portal.
|
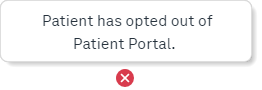 |
The patient has opted out of the Patient Portal. |
Capture the patient signature in-office or via paper. |