Updated: 06/09/2023 | Views: 3381
The Group Appointments feature gives you the flexibility to add multiple patients to the same appointment. Providers can create a shared note that applies to the entire group or create individual notes for each patient attending the group appointment.
Create Group Note
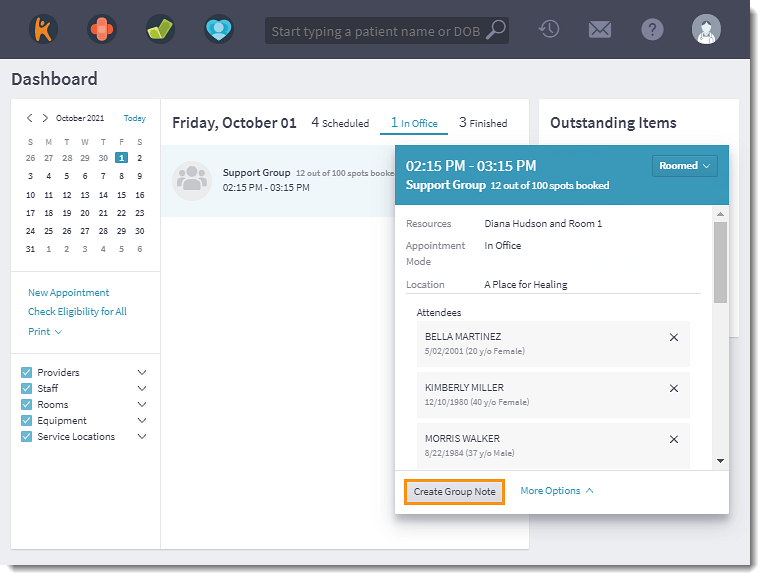
- Click on the group appointment on the Dashboard to view the appointment card.
- Click Create Group Note. The Welcome to Group Notes pop-up window opens.
- Click Got it. The Group Note page opens.
|
 |
Document Group Note
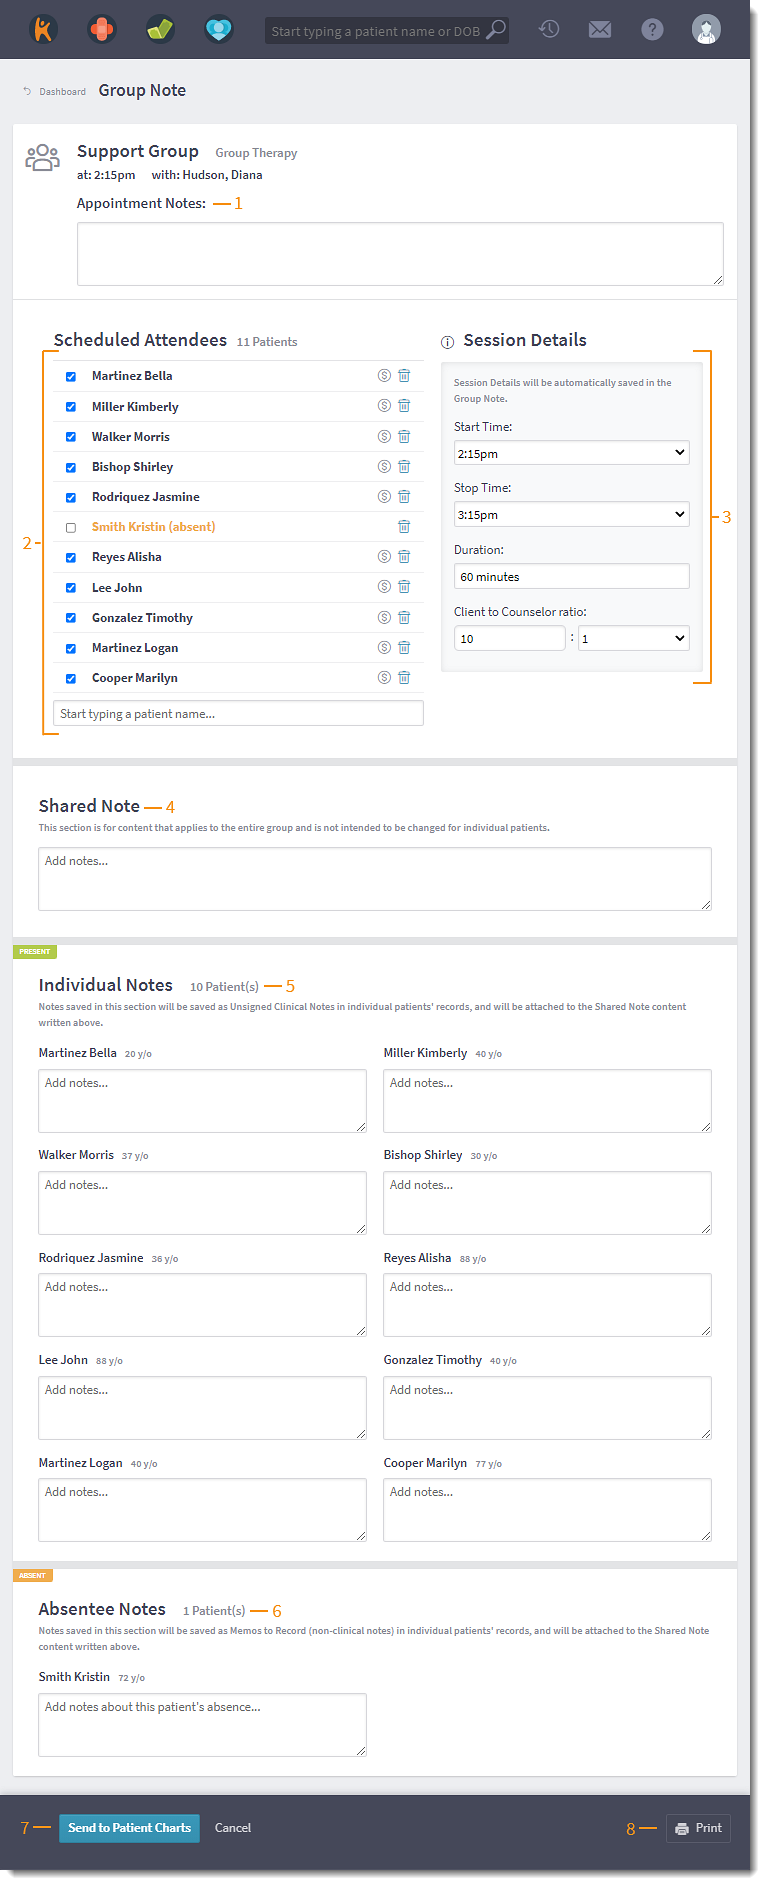
- Appointment Notes: Optionally, add notes related to the appointment. These notes are not added to patient charts.
- Scheduled Attendees: By default, all attendees are selected to indicate they were present at the appointment.
- To mark a patient as absent, click to clear the checkbox next to the patient's name.
- To collect the patient's payment, click the dollar icon. The payments page opens in the same browser window.
 Tip: To avoid losing the group note, right click on the icon and select Open in new window. Tip: To avoid losing the group note, right click on the icon and select Open in new window.
- To remove the patient from the scheduled attendee list, click the trash icon. Then, click Yes to confirm in the pop-up window.
Note: The patient will also be removed from the scheduled group appointment. To indicate a no-show, mark the patient as absent to add applicable notes.
- To add a patient to the group appointment that was not originally scheduled, begin entering the patient's name and click on the patient's name when it appears.
- If the patient record is not found, select Click to create new patient record to add a patient record.
- Session Details: By default, the Start Time, End Time, Duration, and number of Clients are populated from the scheduled group appointment. These details will be saved to the patient's group note.
- The number of clients automatically updates when the scheduled attendees is marked as absent or a new patient is added.
- Shared Note: Enter a shared note that applies to the entire group. These notes are not intended for individual patients.
- Individual Notes: Optionally, enter notes for individual patients. The individual note is populated in the Individual Behaviour during Session section of the Group Note.
- Absentee Notes: When applicable, enter notes for absent patients. The notes are saved as a Memo to Record in the patient's chart.
- Print: Click to generate a PDF of the Group Note page.
- Click Send to Patient Charts when finished. The Note Saving Warning pop-up window opens.
- Click Save Notes to Charts. The group notes are created as an unsigned note in the patient's charts.
Note: After saving, the Group Note page will no longer available for editing. Any editing or signing of notes must be done through each patient's individual chart.
|
 |