Updated: 12/22/2023 | Views: 4343
Clinical automatically saves a note to increase productivity and avoid losing clinical note.
Criteria for Notes AutoSave:
A new note can be created from three different locations: the patient's appointment on the Dashboard, the patient's Facesheet, and the Notes tab. It is recommended to create the note from the patient appointment to auto-populate appointment details.
Create Clinical Note
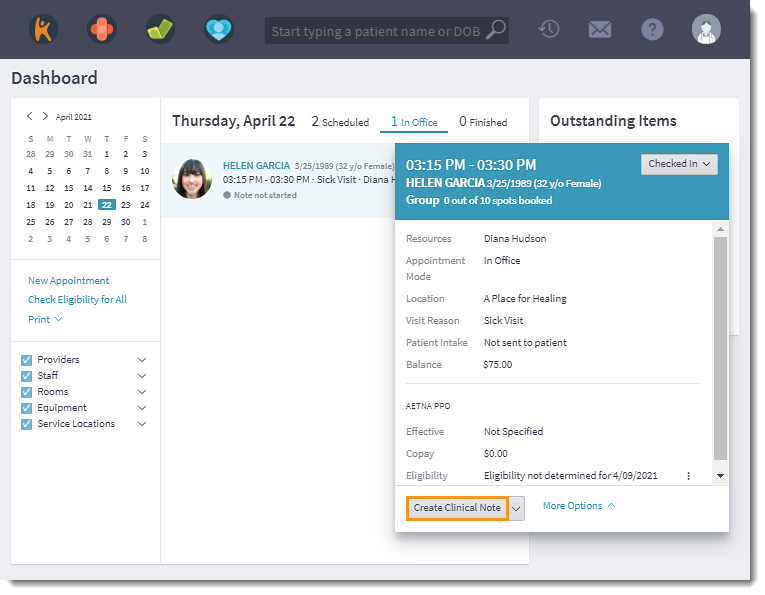
- Hover over the Platform icon and click on Dashboard. The Dashboard opens.
- Click the In Office tab. All patients with an in-office status displays.
- Click on the patient's appointment to view the appointment card.
- Click Create Clinical Note. The default note type opens.
Note: If a clinical note for this appointment is in progress, the saved note opens.
- To select a different note type, click the drop-down arrow and select the note.
|
 |
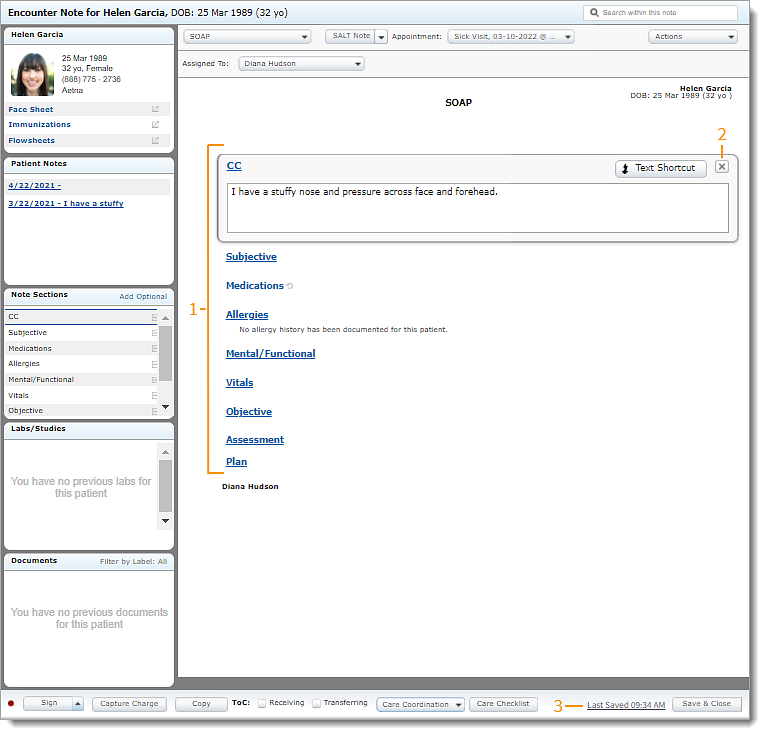
AutoSave Workflow
- Click on a section header to add notes using free-form text, Text Shortcut, or Template.
Note: Depending on the standard note type or custom note type selected to create a note, sections and templates of the note will vary.
- Click X or click on another section header to close the current section and autosave the note.
Note: The section must be closed for the note to autosave.
- The Last Saved status displays to indicate when the note was last saved.
- Continue to document the note and finalize as necessary. The note continues to autosave when the criteria for Notes AutoSave is met.
|
 |