Updated: 11/29/2023 | Views: 3886
Tebra templates provide an efficient and thorough way to document notes. You'll find templates available in various sections throughout the note. The easy-to-use checklist format generates text for the items you select and automatically adds them to the note.
A new clinical note can be created from three different locations: the patient's appointment on the Dashboard, the patient's Facesheet, and the Notes tab. It is recommended to create the note from the patient appointment to auto-populate appointment details.
Create Clinical Note
- Hover over the Platform icon and click on Dashboard. The Dashboard opens.
- Click the In Office tab. All patients with an in-office status displays.
- Click on the patient's appointment to view the appointment card.
- Click Create Clinical Note. The default note type opens.
Note: If a clinical note for this appointment is in progress, the saved note opens.
- To select a different note type, click the drop-down arrow and select the note.
Important Note: Clinical logs the user out after 15 minutes of inactivity and does not save new notes in progress. To avoid losing the new note and enable autosave, click Save & Close. Then, click Open to start documenting the clinical note.
|
 |
|
|
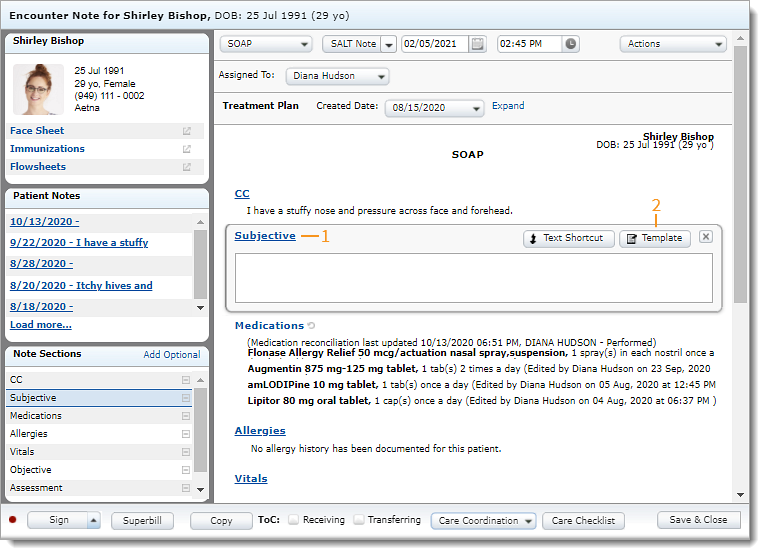 |
General Template
- If necessary, click Default and select a different system or custom template. Then, click Select. Options will change based on the template selected.
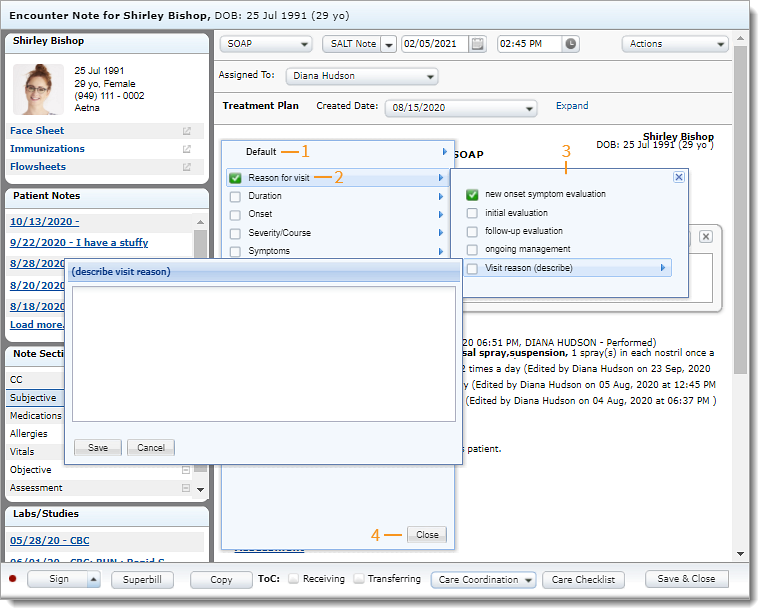
- Click an item to expand additional options.
- Add the appropriate item(s) to the note:
- If the item is a checkbox, click to select.
- If the item requires a numeric value, click to select and use the number pad to enter the appropriate value. Click Save when finished.
- If the item requires additional information, click to select and type the details in the blank field. Click Save when finished.
- If the item requires a positive or negative, click plus to indicate yes/positive presence or click minus to indicate no/negative presence. When selected, the plus icon turns green and the minus icon turns red.
- Click Close when finished. The selected items populate in the section.
|
 |
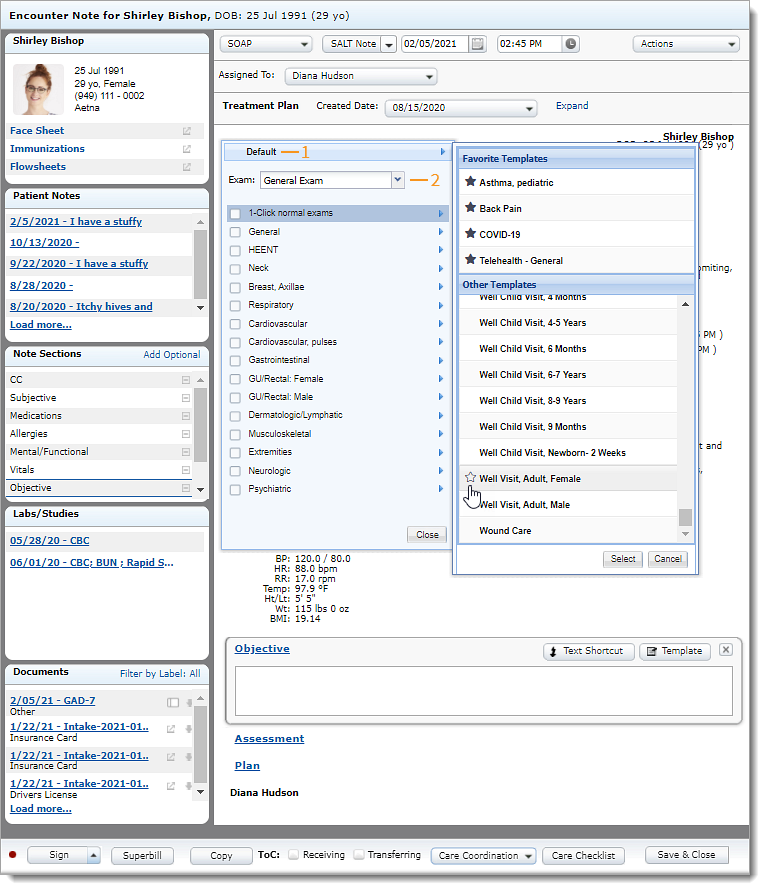
Exam Template
- If applicable, click Default and select a specific system or custom template. Then, click Select. Options will change based on the template selected.
- To save the template as a favorite, hover over the template and click the star icon.
- The Exam type updates based on the template selected. If necessary, select a different Exam from the drop-down.
|
 |
- Click 1-Click normal exams to expand additional options.
- Click to select "Check All".
- If necessary, click to clear individual items to indicate the absence of normal findings.
|
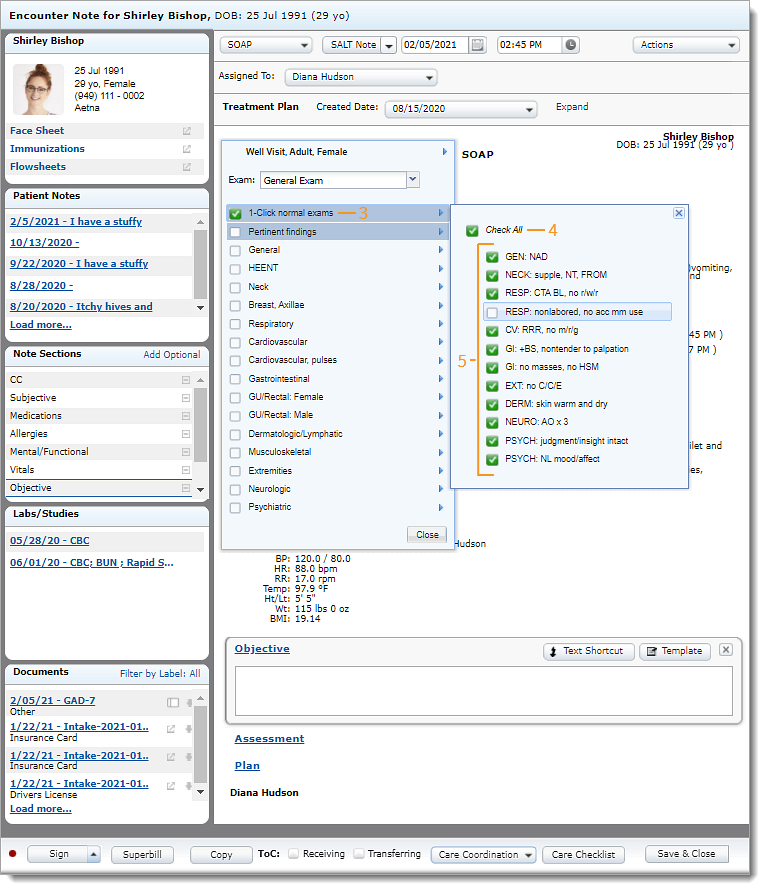 |
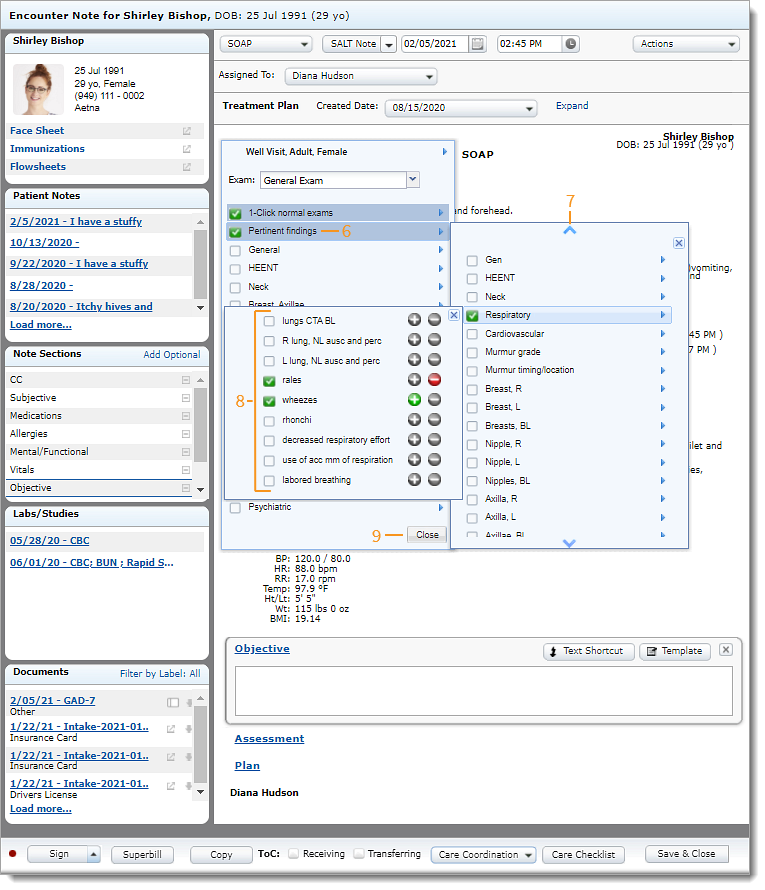
- Click Pertinent Findings to expand additional options.
- Click an item to expand additional options.
- Add the appropriate item(s) to the note:
- If the item is a checkbox, click to select.
- If the item requires a numeric value, click to select and use the number pad to enter the appropriate value. Click Save when finished.
- If the item requires additional information, click to select and type the details in the blank field. Click Save when finished.
- If the item requires a positive or negative, click plus to indicate yes/positive presence or click minus to indicate no/negative presence. When selected, the plus icon turns green and the minus icon turns red.
- Click Close when finished. The selected items populate in the section.
|
 |
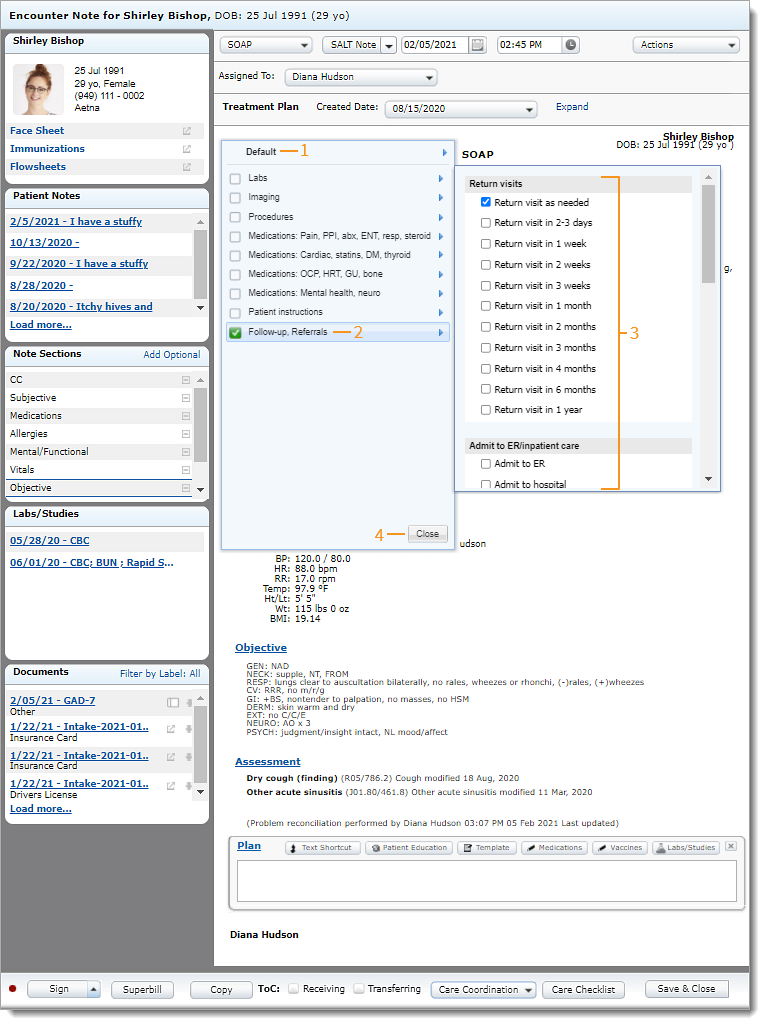
Plan Template
- If applicable, click Default and select a specific system or custom template. Then, click Select. Options will change based on the template selected.
- To save the template as a favorite, hover over the template and click the star icon.
- Click an item to expand additional options.
Note: Selecting Labs, Imaging, or Medications from the Default template will not generate a prescription or lab order.
- Add the appropriate item(s) to indicate the patient's treatment plan:
- If the item is a checkbox, click to select.
- If the item requires a numeric value, click to select and use the number pad to enter the appropriate value. Click Save when finished.
- If the item requires additional information, click to select and type the details in the blank field. Click Save when finished.
- If the item requires a positive or negative, click plus to indicate yes/positive presence or click minus to indicate no/negative presence. When selected, the plus icon turns green and the minus icon turns red.
- Click Close when finished. The selected items populate in the section.
|
 |