Updated: 07/13/2023 | Views: 2675
With Clinical, you can add a patient's current and previously documented problems in the Assessment section of a note. When a problem is added, it also displays in the Plan section to allow for writing a plan specific to each problem identified for the patient. When adding a problem or condition, you can also enter an associated diagnosis. If the patient does not have any problems, mark the "No known problems" checkbox.
Review Add Problem to learn how to add a problem from the patient's chart.
As the note is being edited, Notes AutoSave will automatically save the note to increase productivity and avoid losing clinical note. Criteria for Notes AutoSave:
- Users move from one section of the note to another
Note: The section must be closed for the note to autosave.
- Users open the Care Checklist, sends a referral, or creates a Charge within the note
- Prior to a session time out due to 15 minutes of inactivity
Create Clinical Note
A new clinical note can be created from three different locations: the patient's appointment on the Dashboard, the patient's Facesheet, and the Notes tab. It is recommended to create the note from the patient appointment to auto-populate appointment details.
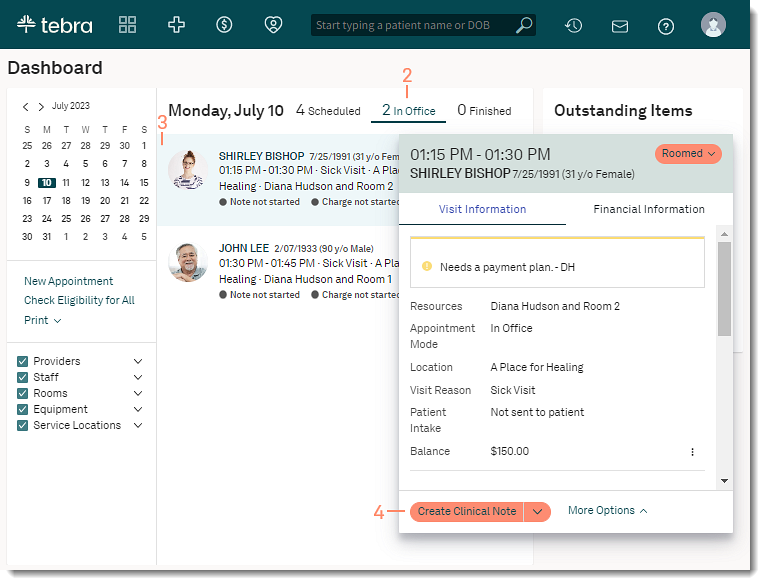
- Hover over the Platform icon and click on Dashboard. The Dashboard opens.
- Click the In Office tab. All patients with an in-office status display.
- Click on the patient's appointment to view the appointment card.
- Click Create Clinical Note. The default note type opens.
Note: If a clinical note for this appointment is in progress, the saved note opens.
- To select a different note type, click the drop-down arrow and select the note.
- Document the clinical note and include the patient's existing problems and/or add new problems.
|
 |
Include Existing Problem
- Click on the Assessment section header to include problems.
- Click Include Problems. The Include Problem pop-up window opens.
- To document the reconciliation, click "Problem reconciliation performed".
- Click to select the previously documented problem(s).
- Click Include. The problem populates in the Assessment and Plan section.
|
 |
Add New Problem
- Click on the Assessment section header to include problems.
- Click Include Problems. The Include Problem pop-up window opens.
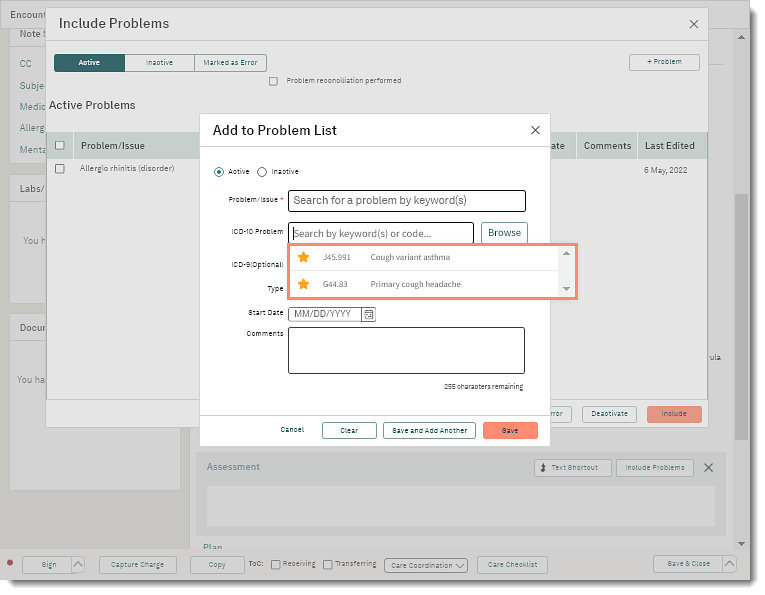
- Click + Problem. The Add to Problem List pop-up window opens.
- By default, "Active" is selected to indicate the problem is still being treated.
- To indicate that the problem is no longer active, click to select "Inactive".
- To indicate the problem is resolved, click to select "Resolved".
Note: This option is only displayed after "Inactive" is selected.
- Select ICD-10 Problem: Add an ICD-10 diagnosis code using a favorite ICD-10 code, searching by keyword or code, or using the ICD browser.
|
 |
- To select an ICD-10 diagnosis code favorite, click in the ICD-10 Problem field.
- Click to select the code favorite.
|
 |
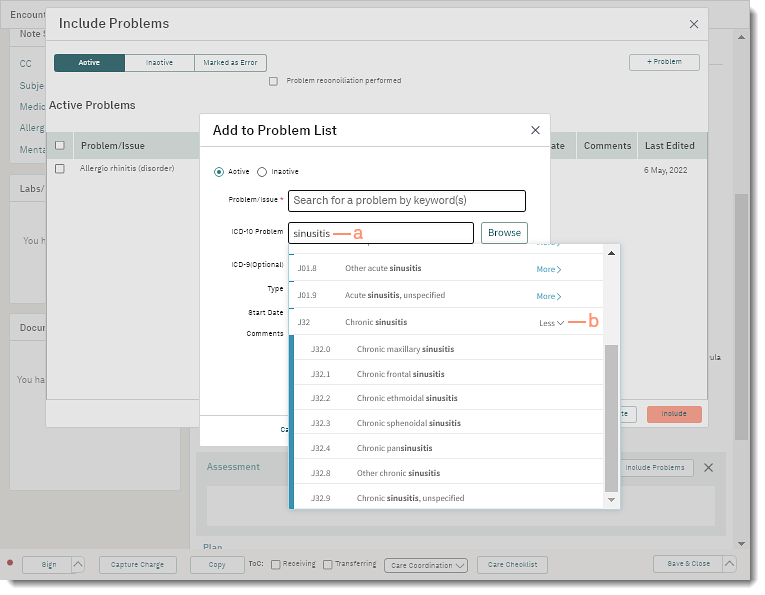
- To search by keyword(s) or ICD-10 code, click in the ICD-10 Problem field.
- Enter general diagnosis keyword(s) or a code.
- Select an ICD-10 code from the auto-populated results.
- If available, click More to view additional results and select the most accurate code.
|
 |
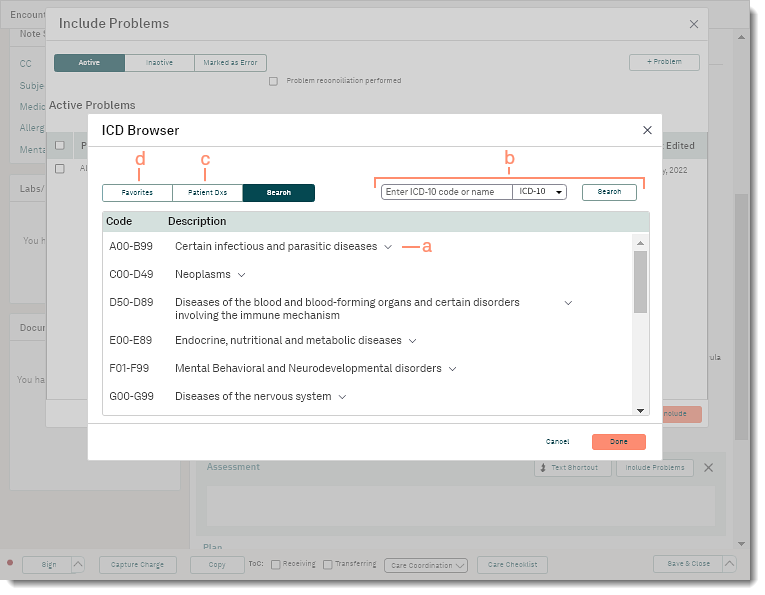
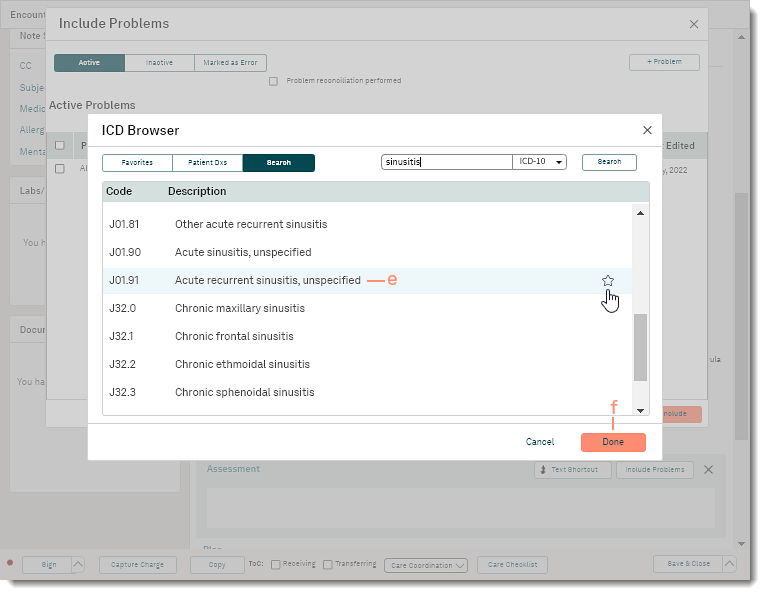
- To browse for an ICD-10 diagnosis code, search for a code, view the user's code favorites, or the patient's previous diagnosis, click Browse. The ICD Browser pop-up window opens.
- To browse for a code, click the arrow icon to display additional codes.
- To search for a code, enter the code or description in the search bar and click Search.
- To view the patient's documented diagnosis, click Patient DXs.
- To view the user's favorite codes, click Favorites.
|
 |
- Select an ICD-10 code from the list.
- To add the code as a favorite, hover over the code and click the star icon.
- Click Done to add the ICD-10 Problem.
|
 |
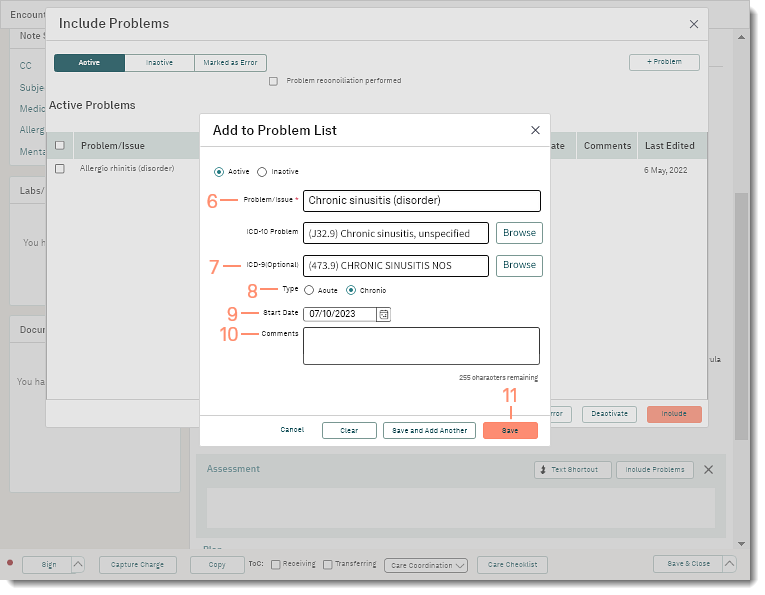
- After an ICD-10 Problem is selected, the appropriate SNOMED clinical terminology auto-populates in the Problem/Issue field, or a list displays if more than one option is available.
- If a list displays, select the appropriate SNOMED clinical terminology.
- If necessary, search for a SNOMED clinical terminology. Click in the Problem/Issue field and enter the name of the problem/issue and select it from the auto-populated results.
- The appropriate ICD-9 code (if available) auto-populates after a Problem/Issue is selected.
Note: The ICD-9 field is optional and can be left blank.
- Click to select "Acute" or "Chronic" to indicate the Type of problem.
Note: The type may be auto-selected based on the problem that is selected. If necessary, select the applicable type.
- Click the calendar icon and select the Start Date when the problem begins.
- If applicable, click the calendar icon and select an End Date for the problem.
- Enter any applicable Comments.
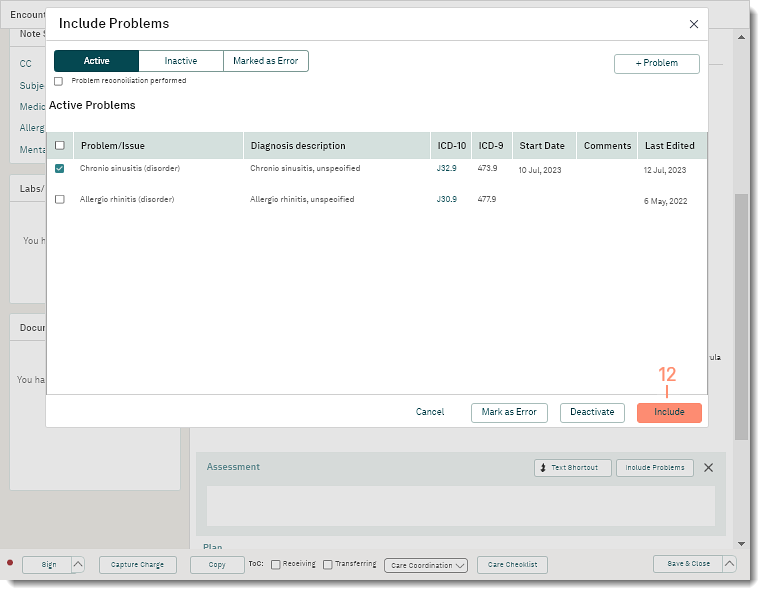
- Click Save when finished. New active problems are added to the Active Problems list and selected by default. Inactive problems are added to the Inactive tab.
Note: The new problem is also documented in Problems in the patient's chart.
|
 |
- Click Include. The problems populate in the Assessment and Plan section.
- Continue to document the patient's note.
|
 |