Updated: 03/14/2024 | Views: 8366
When ordering eLabs, you can create custom preferences that make eLab order processing easy.
This eLab preference process is only available for existing providers who were already enrolled with eLabs prior to March 15, 2024. For new practices enrolled with eLabs after March 15, 2024, review Process eLab Order to learn more.
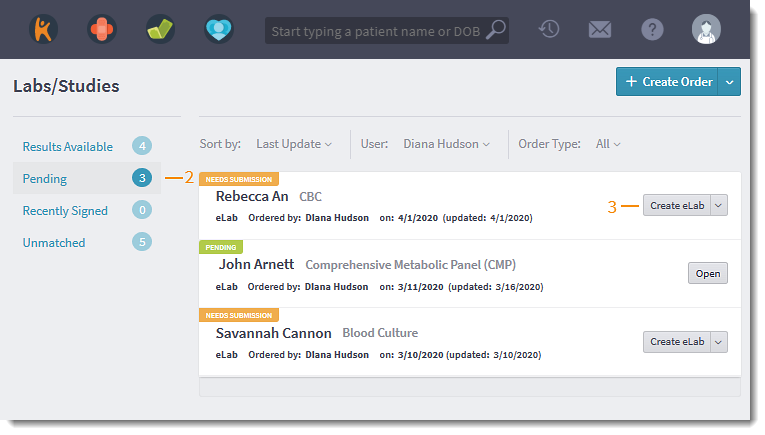
Access eLab Order
- Hover over the Clinical icon and click on Labs/Studies. The Labs/Studies page opens.
- Click Pending. Pending lab orders displays.
- Click Create eLab. The Create Order pop-up window opens.
|
 |
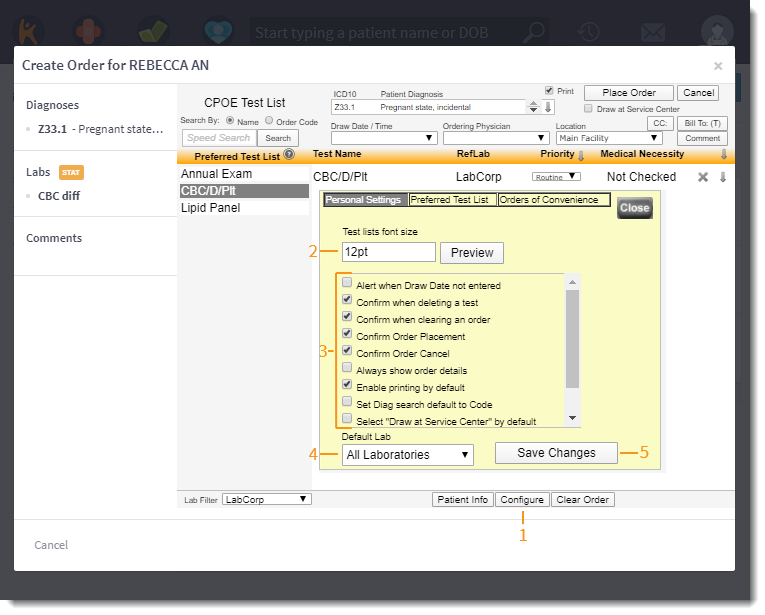
Personal Settings
Set font size, alerts, and defaults for one or all eLab facilities.
- Click Configure. The configurations pop-up window opens.
- To change the font size, enter the desired Preferred Test List font size.
- Click Preview to preview the font size display under the Preferred Test List on the left.
- Click to select or clear lab test alerts and defaults.
- To apply changes to a specific lab, click the drop-down arrow and select the lab.
- Click Save Changes when finished.
- To close the configuration window, click Close.
|
 |
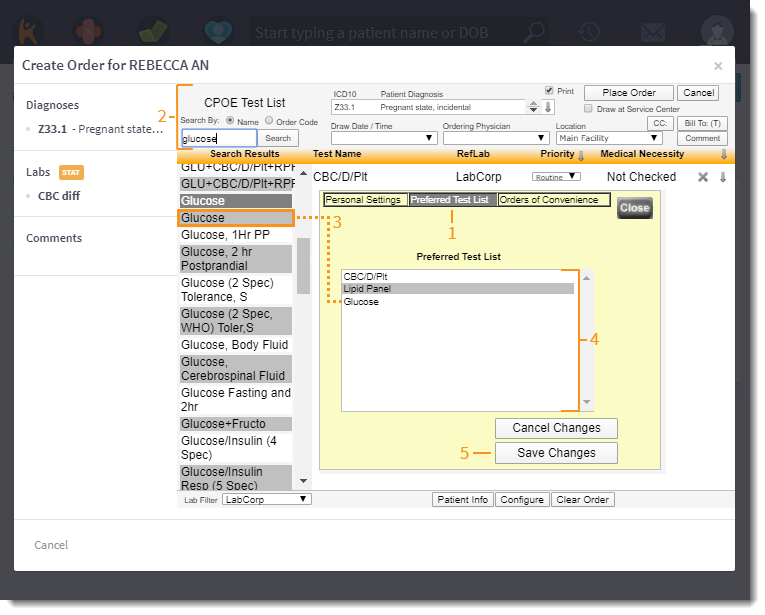
Preferred Test List
Create a list of lab tests commonly ordered with the selected lab facility.
- Click the Preferred Test List tab.
- Search for the test by Name or Order Code.
- Click on the test name to add to the Preferred Test List. Repeat the process to add additional preferred tests.
- To remove a test from the Preferred Test List, click on the test name.
- Click Save Changes when finished.
- To close the configuration window, click Close.
|
 |
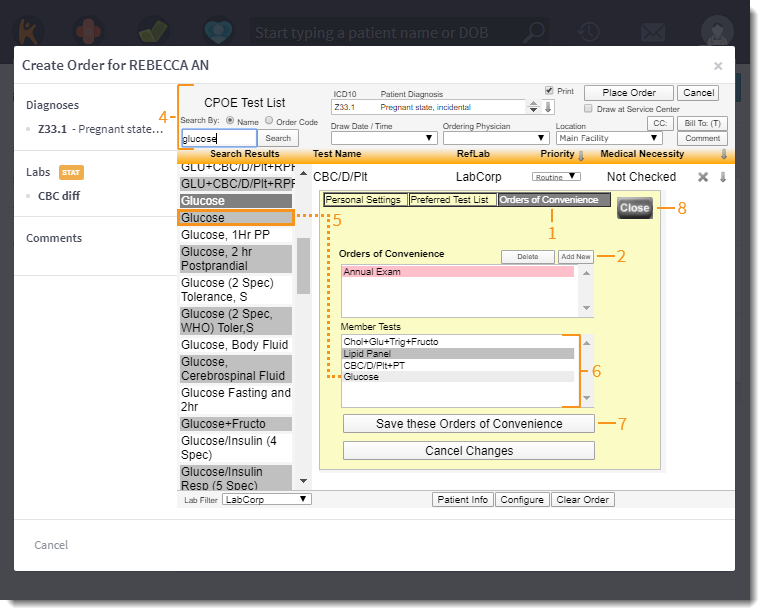
Orders of Convenience
Create multiple-test order bundles that appear in the Preferred Test List.
- Click the Orders of Convenience tab.
- Click Add New. The Enter the Name pop-up window opens.
- Enter a name for the order and click OK.
- Search for the test by Name or Order Code.
- Click on the test name to add to the Preferred Test List. Repeat the process to add additional preferred tests.
- To remove a test from Member Tests, click on the test name.
- Click Save these Orders of Convenience.
- Click Close when finished.
Once preferences are configured, process the eLab order.
|
 |