Updated: 06/09/2023 | Views: 8826
Existing lab results can be incorporated in a patient's chart. There's no need to route a lab for processing when you already have the results.
These results can be entered into a discrete lab result form, by scanning the paper result and uploading the image, or by entering results in the comments field. Discrete lab entry forms only exist for labs on the commonly performed lab list.
Access Labs/Studies
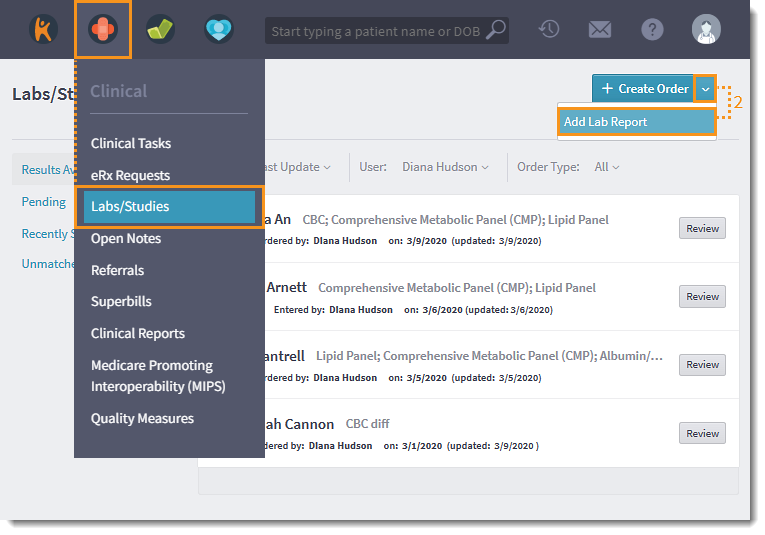
- Hover over the Clinical icon and click on Labs/Studies. The Labs/Studies page opens.
- Click to +Create Order drop-down arrow and click Add Lab Report. The Add Lab Report pop-up window opens.
|
 |
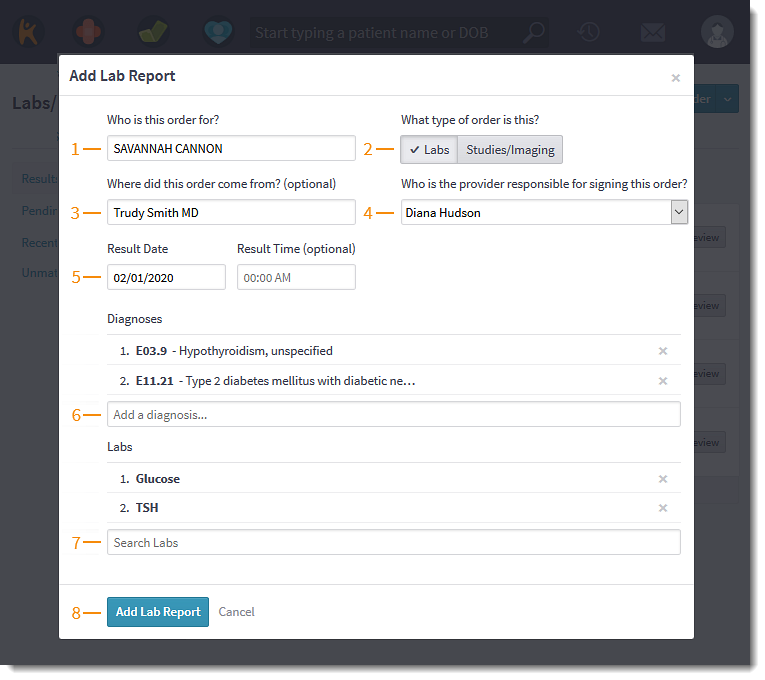
Add Lab Report
- Enter the first 2–3 letters of the patient's name and select it from the auto-populated results.
- Click to select the type of order.
- Optionally, enter information about where the lab report came from.
- Select the Provider reviewing the lab from the drop-down list.
- Enter the Result Date and Time to show when the lab was performed.
- Enter the first few letters of the diagnosis in the Add a diagnosis field. The patient’s active diagnosis list and matching search results display. Select the necessary diagnoses.
- Type the first few letters of the lab, study, or imaging name in the Search field. Select the desired lab, study, or imaging from the list. Repeat as necessary.
- Click Add Lab Report. The Results Entry pop-up window opens.
|
 |
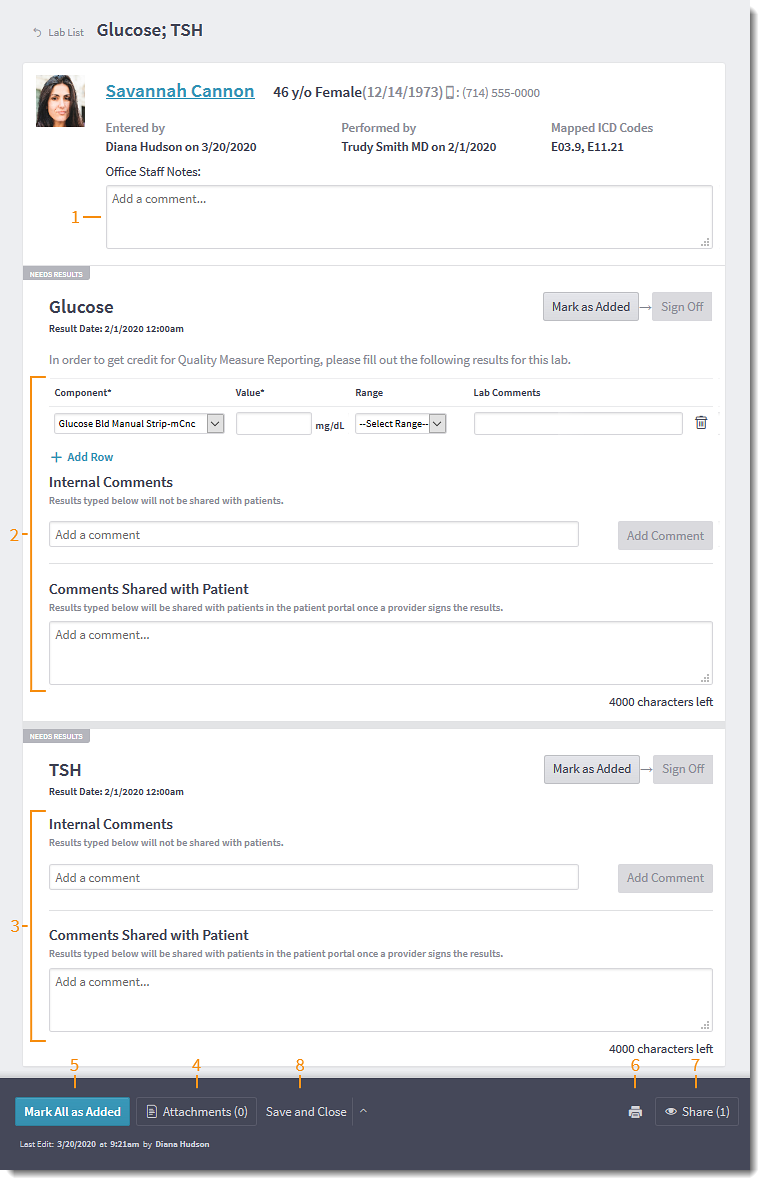
Enter Lab Results
- Type any notes in Office Staff Notes for the order.
- When available, enter discrete lab results in the provided fields.
- Select a lab Component from the drop-down and enter the numeric Value.
- Optionally, select a Range value of Low, Normal, or High, and enter any Lab Comments about the component.
- Click + Add Row to add another component measure to the lab results.
- Optionally, type any notes in Internal Comments for the specific lab and click Add Comment.
- Optionally, type any notes in Comments Shared with Patient for patients to view in the Patient Portal.
- To enter lab results manually, type results in Internal Comments for the specific lab and click Add Comment.
- Optionally, type any notes in Comments Shared with Patient for patients to view in the Patient Portal.
- To upload results from one or more documents scanned and saved to your computer, click Attachments. The Manage Attachments window opens.
- Click the browse for files link, then locate and double click a file to add it. Repeat to add an additional file, if necessary.
- Click Done to add the attachment(s).
- When all results are added, click Mark All as Added. The Mark All as Added button becomes the Sign Off on All button.
- Click Sign Off on All to sign off on all the results.
- Click the printer icon to print the lab results, if desired.
Note: The print option will not be available once the lab is signed, saved, and closed.
- Click Share to add additional providers or clinical assistants to view this lab.
- Click Save and Close. Signed results appear under Recently Signed on the Labs/Studies page, and as Signed in the patient's chart.
- To cancel the lab order, click the up arrow and click Mark Cancelled and Close.
- To mark the lab order as an error, click the up arrow and click Mark in Error and Close.
|
 |