Medicare Promoting Interoperability (MIPS) Dashboard
- Last updated
-
-
Save as PDF
Updated: 06/23/2023 | Views: 3658
The Medicare Promoting Interoperability Dashboard is an easy way for clinicians to track their progress during a reporting period for the Promoting Interoperability (PI) category. The Promoting Interoperability category composes 25% of the MIPS composite score. Tebra's MIPS dashboard can be used for insight into whether sufficient points have been collected towards Promoting Interoperability.
For practices reporting as a group, review Medicare Promoting Interoperability (MIPS) Group Dashboard to learn more. To check if the provider is reporting as an individual or group, go to qpp.cms.gov and enter the provider's individual NPI under Check Your Participation Status.
Generate Individual MIPS Dashboard
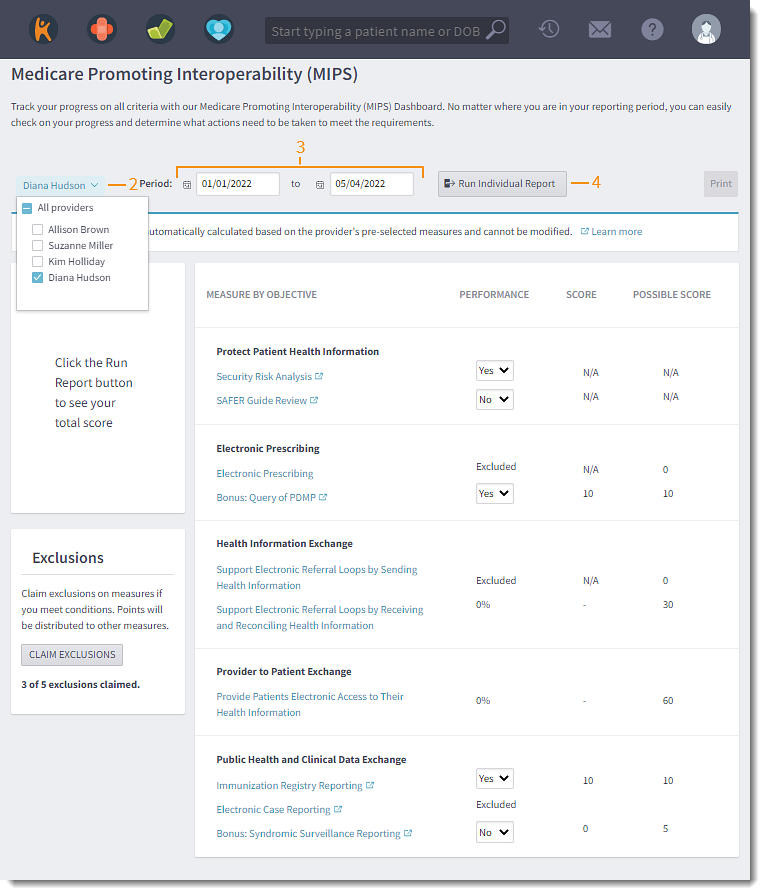
- Hover over the Clinical icon and click on Medicare Promoting Interoperability (MIPS). The Medicare Promoting Interoperability (MIPS) page opens.
- Click the Select Providers drop-down and select a provider.
- By default, the reporting period is set for the current calendar year. If necessary, select a custom date.
- Click Run Individual Report. The Medicare Promoting Interoperability (MIPS) dashboard updates.
|
 |
Navigate Individual MIPS Dashboard
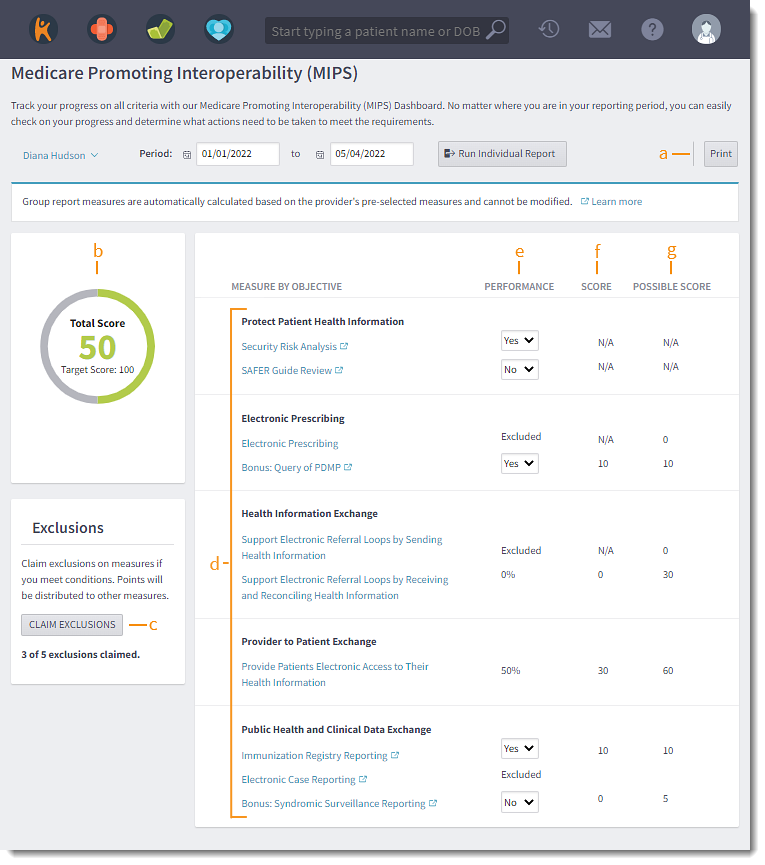
- Print: Click to generate a PDF of the report in a new tab. Download, Print, or Save a final copy of the report for attestation or audit.
- Total Score: The sum of the measure scores.
- Claim Exclusions: Click to select applicable exclusions for the provider.
- Measure by Objective: Click to view additional details.
- Performance: Progress achieved toward the measure.
- When the measure for Security Risk Analysis, Bonus: Query of PMDP, Immunization Registry Reporting, or Syndromic Surveillance Reporting is met, select Yes from the drop-down. Then, click Run Individual Report to refresh the score.
- Score: Points earned towards the measure.
- Possible Score: Maximum possible points for the measure.
|
 |
Claim Exclusions
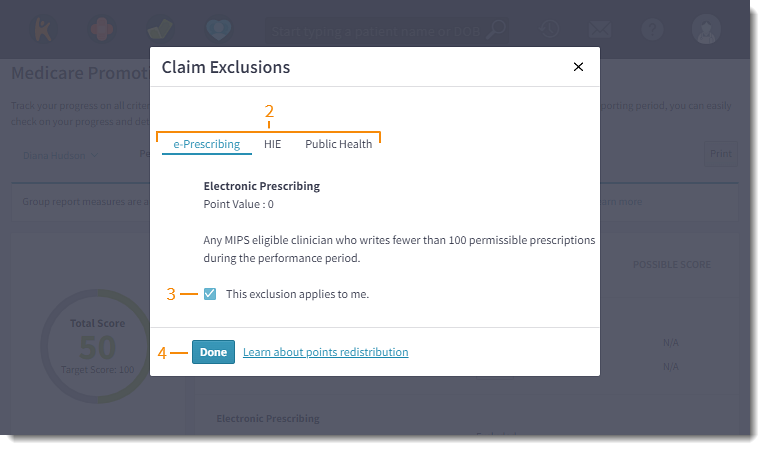
- Click Claim Exclusions. The Claim Exclusions pop-up window opens.
- Click on e-Prescribing, HIE, or Public Health tab to view additional details.
- If applicable, click to select the exclusion.
Note: Click to Learn about points redistribution to learn how claiming an exclusion impacts your score.
- Click Done once all applicable exclusion(s) are selected.
- Click Run Individual Report to refresh the score.
|
 |
Measure by Objective
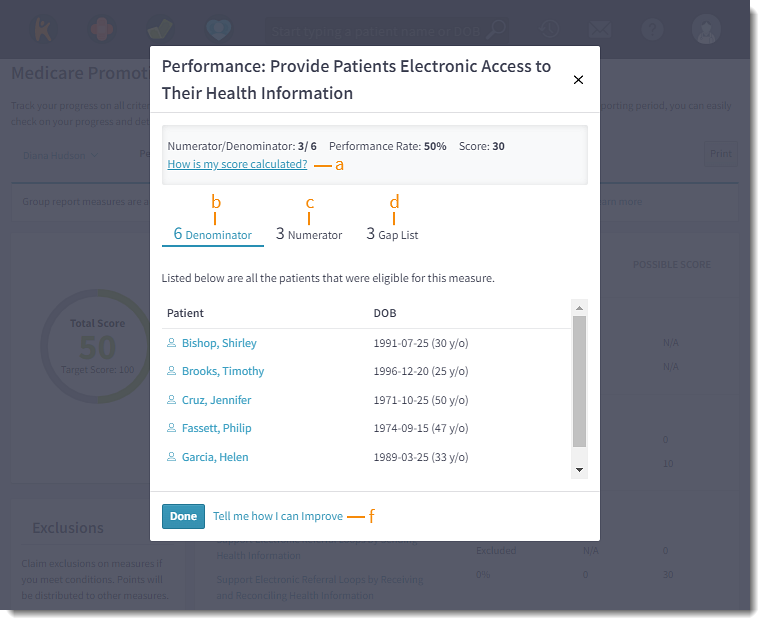
- Click on a measure objective. The measure objective pop-up window opens.
- Additional Details:
- How is my score calculated: Click to view how the score is calculated for each measure.
- Denominator: Displays the total number of patients eligible for the measure and the list the patients eligible for the measure.
- Numerator: Displays the number of patients who met the measure. Click to view the list of patients.
- Gap List: Displays the number of patients who did not meet the measure. Click to view the list of patients.
- Patient: Click to access the patient's chart.
- Tell me how I can improve: Click to view the measure's guide.
- Click Done to close the window.
|
 |