Updated: 12/13/2023 | Views: 1499
Patient Groups allow you to send bulk email messages to all of your patients or to a specific group of patients. Your account includes a list of preset Patient Groups and also provides the flexibility for you to create and edit custom groups to meet the needs of your patients and practice. When using a message template, a patient group message can be sent on-demand or scheduled for future delivery on a day and time that you choose. All preset and custom Patient Groups are accessible to every user in your practice.
Important Note: Messages to Patient Groups are sent by non-secure email, which is not a HIPAA-compliant channel to share confidential patient information.
You always navigate to the Messages window to create, edit or delete a patient group.
Navigate to Patient Groups
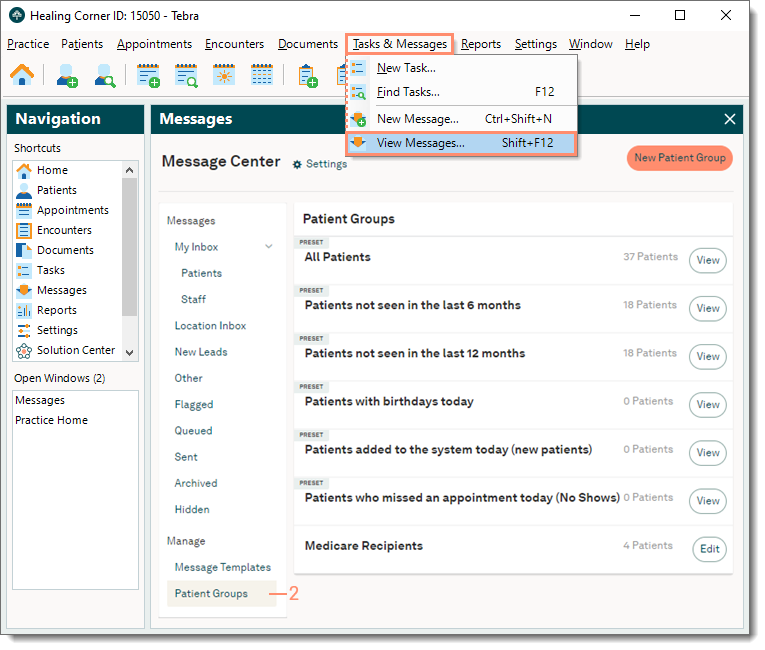
- Click Tasks & Messages > View Messages in the top menu. The Messages window also known as the Message Center opens.
 Tip: For faster navigation, click Messages under the Navigation Shortcuts or press Shift+F12 on your keyboard. Tip: For faster navigation, click Messages under the Navigation Shortcuts or press Shift+F12 on your keyboard.
- Click Patient Groups. The list of Patient Groups display.
|
 |
New Patient Group
- Navigate to Patient Groups then click New Patient Group. The New Patient Group window opens.
- Enter the information.
- Group Name: For internal reference. This name only displays in the Patient Groups list.
- Add Patient from Record: Begin typing a patient's name and select it when displayed to add the patient to the group. Continue to add additional patients to the list, as necessary.
- To remove a patient from the list, click the trash can icon.
- When finished, click Save. The new group displays in the Patient Groups list.
|
  |
Edit Patient Group
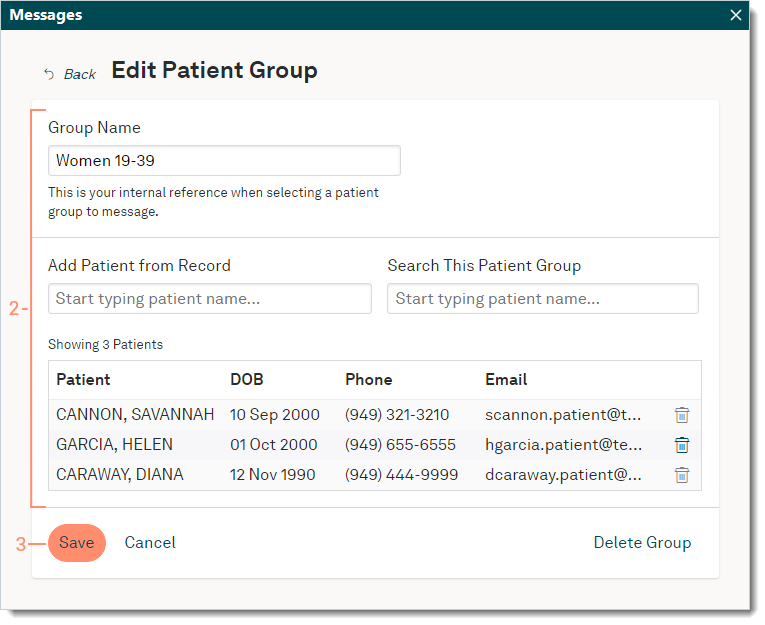
- Navigate to Patient Groups then click Edit on the right side of the group name. The Edit Patient Group window opens.
- Edit the name, add patients, and/or remove patients as necessary.
- When finished, click Save. The updated group displays in the Patient Groups list.
|
 |
Delete Patient Group
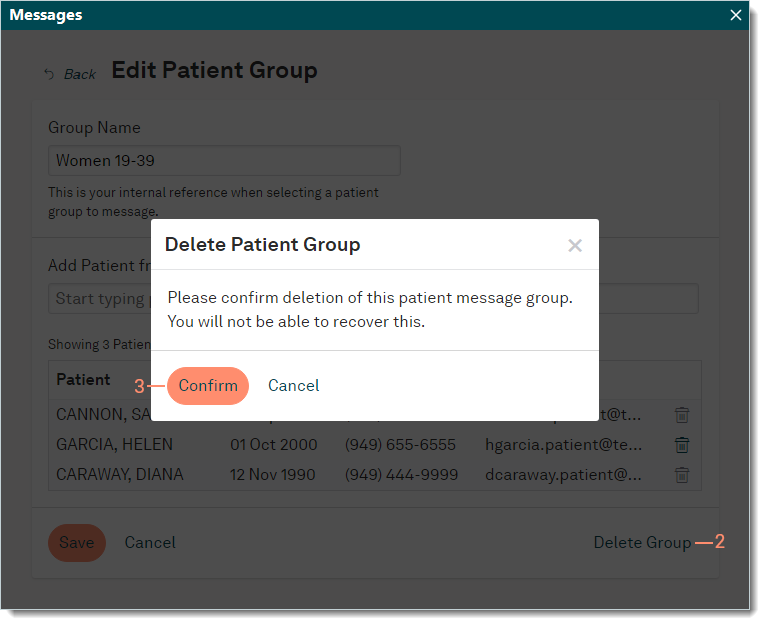
- Navigate to Patient Groups then click Edit on the right side of the group name. The Edit Patient Group window opens.
- Click Delete Group on the bottom right side of the window. The Delete Patient Group confirmation pop-up appears.
- Click Confirm to confirm the deletion. The group is deleted from the Patient Groups list.
|
 |