Updated: 12/08/2023 | Views: 7701
The Message Center allows users within a practice to communicate with each other and with patients. Create timely and targeted messages with custom email templates and patient groups, schedule batch email messages to be delivered on a future date, or communicate freely by sending personalized, on-demand messages. This interactive system lets patients reply directly to any communication they receive and delivers responses right to your inbox.
Navigate to View Messages
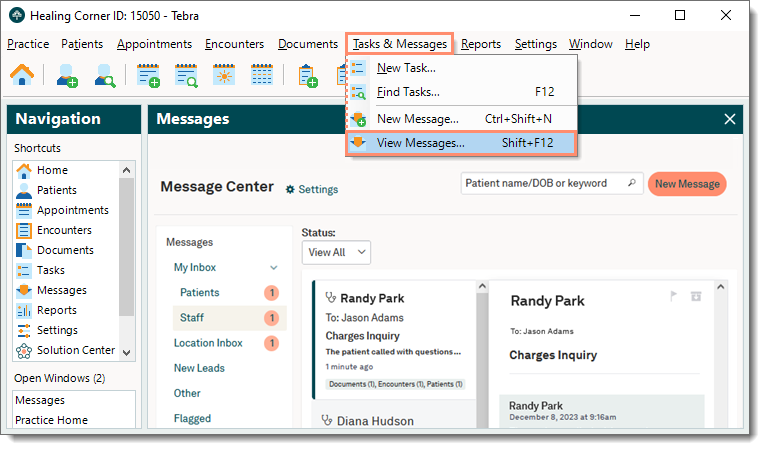
- Click Tasks & Messages > View Messages in the top menu. The Messages window also known as the Message Center opens.
 Tip: For faster navigation, click Messages under the Navigation pane Shortcuts or press Shift+F12 on the keyboard. Tip: For faster navigation, click Messages under the Navigation pane Shortcuts or press Shift+F12 on the keyboard.
|
 |
Navigate Messages
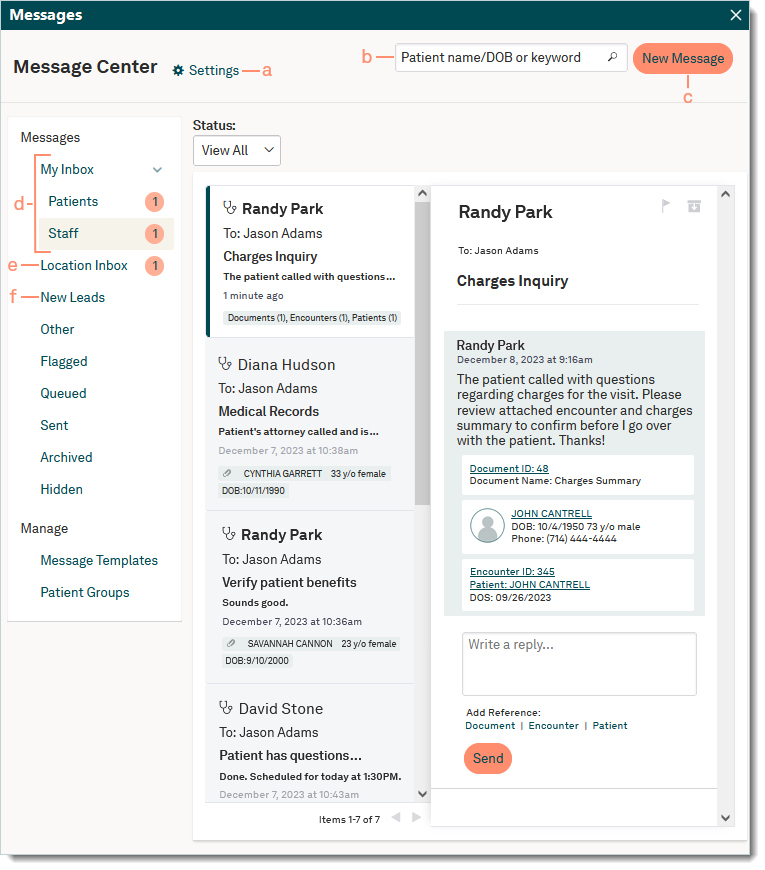
- Settings: Click to open and configure the Messages Settings.
- Search: Find messages by patient name or keyword.
- New Message: Click New Message to create and send a new message.
- My Inbox: Click to view and filter the following messages as necessary. Available filters vary based on selection.
- Patients: Displays messages sent from the patient directly replying to the user via email, text, or Patient Portal. To filter messages from patients, use the Status and/or Message Type drop-down menus.
- Staff: Displays interoffice messages. To filter messages between staff members, use the Status drop-down menu.
- Location Inbox: Click to display email or text messages between a patient and a specific service location. By default, users with the "Office Staff" web user role can view all emails and text messages between a patient and location. Providers can view messages between their patients and the service location.
Note: If applicable, users with the "Provider" and "Clinical Assistant" web user roles can enable the Location Related option in the Messages Settings to view all patient messages to the practice.
- To filter messages between the patient and service location, use the Status, Message Type, and/or Location drop-down menus.
- New Leads: For Practice Growth activated customers, click to display messages sent from Web-to-Text, Call-to-Text, or a direct text message from a potential patient to the practice location.
|
 |
- Click to view additional messages. Available filters vary based on selection.
- Other: Displays New Appointment requests, messages from Tebra Customer Care, other reports, and announcements. To filter other messages, use the Status drop-down menu.
- Flagged: Displays messages that were flagged. To filter flagged messages, use the Message Type drop-down menu.
- Queued: Displays messages scheduled to be sent. To filter queued messages, use the Message Type drop-down menu.
- Sent: Displays messages sent by the user. To filter sent messages, use the Message Type drop-down menu.
- Archived: Displays messages that were archived. To filter archived messages, use the Message Type drop-down menu.
- Hidden: Displays messages between a patient to the service location when the Location Related option is disabled in the Messages Settings. To filter hidden messages, use the Location drop-down menu.
- Click to create, view, edit, or delete Message Templates and Patient Groups.
|
 |
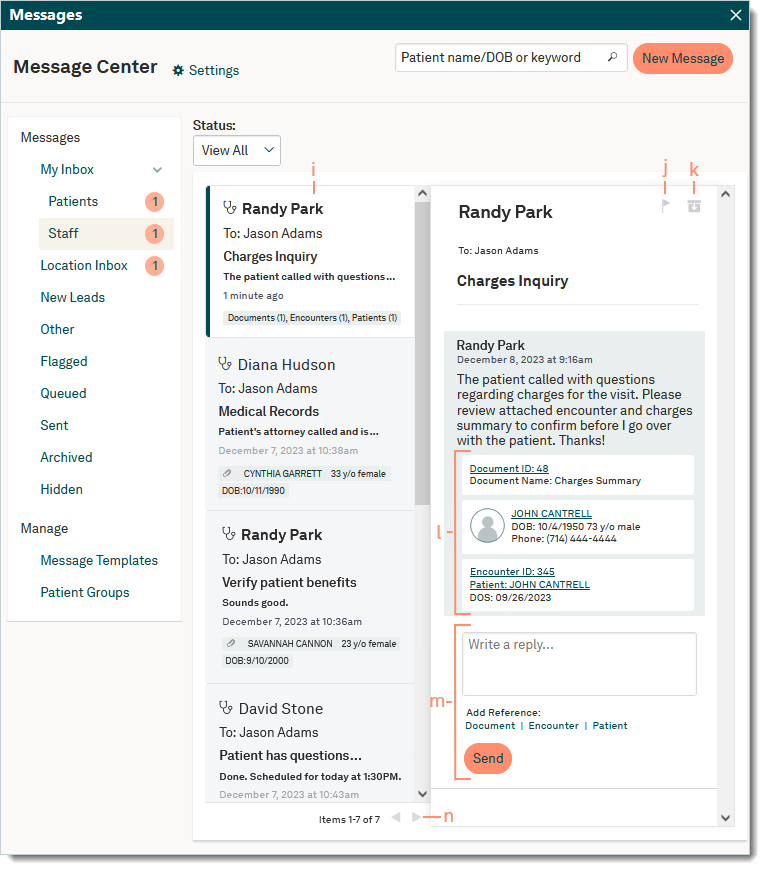
- Click a message to display details on the right side of the window then take the appropriate action(s).
Note: The message preview displays the most recent message and messages with multiple participants in the conversation are grouped into one thread that displays on the right side of the window with the newest message at the bottom.
- Click the flag icon to indicate messages are important and to also display them under the Flagged messages.
Note: Flagged messages are also accessible from the To Do List of the Desktop Application (PM) Dashboard and under the Outstanding Items of the web platform Dashboard.
- Messages cannot be deleted but can be archived. To archive messages, click the file box icon to remove messages from the inbox and move them to the Archived messages.
- Document, Encounter, and Patient: If applicable, click the Document ID, Encounter ID, and/or patient name to open an attached record referenced in the message.
- If applicable, reply to the message.
- Enter the reply to the message.
Important Note: Do not include PHI when replying to a patient's email or text message as this method is non-secure. To send sensitive information, use the Patient Portal.
- Add Reference: Click to attach a Document (up to 10MB in size), Encounter, and/or Patient record when replying to a staff message as necessary.
- Click Send to send the reply to the message.
- If applicable, click the left and right arrows to navigate to additional pages of messages.
|
 |