Updated: 12/13/2023 | Views: 1337
Message Templates allow you to save time by creating, storing, and reusing messages that you send on a regular basis. Once created, you can send a message template to a patient group right away or schedule delivery for a future date and time. Set up and store as many email templates as you require -- from a thank you email to targeted marketing communications, every message is addressed from you and delivered to each recipient's individual inbox.
You always navigate to the Messages window to create, duplicate, edit or delete a message template.
Navigate to Message Templates
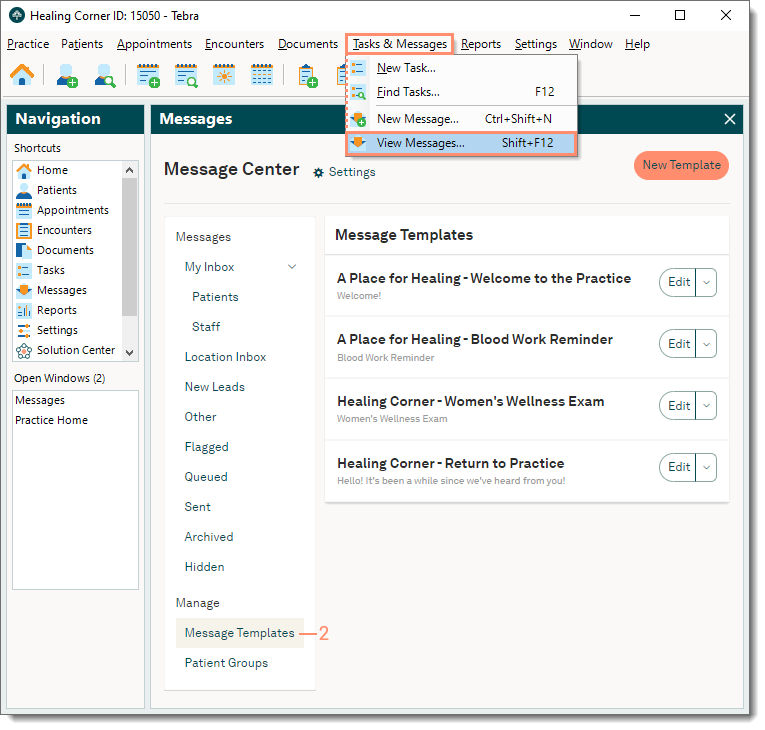
- Click Tasks & Messages > View Messages in the top menu. The Messages window also known as the Message Center opens.
 Tip: For faster navigation, click Messages under the Navigation pane Shortcuts or press Shift+F12 on the keyboard. Tip: For faster navigation, click Messages under the Navigation pane Shortcuts or press Shift+F12 on the keyboard.
- Click Message Templates. The list of Message Templates display.
|
 |
New Message Template
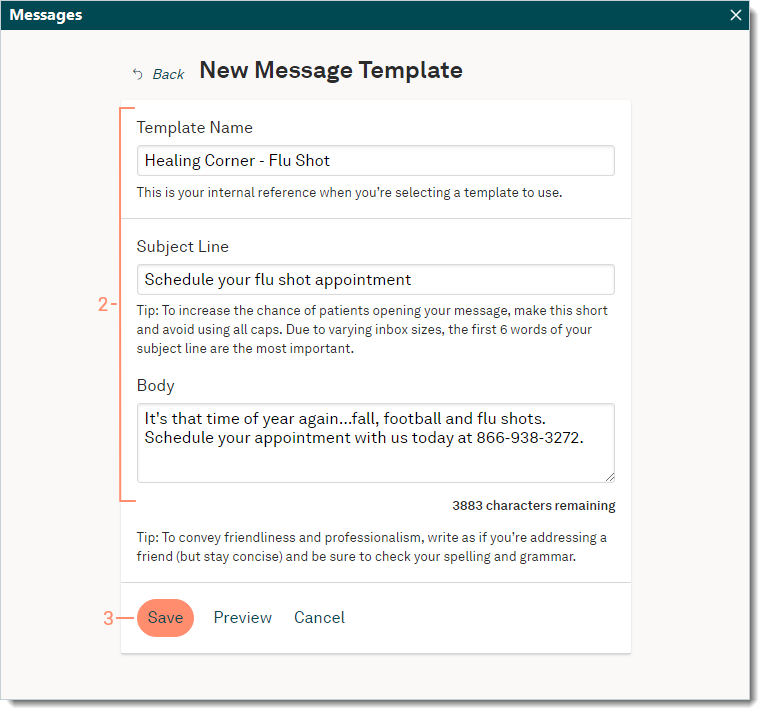
- Navigate to Message Templates then click New Template. The New Message Template window opens.
- Enter the information.
- Template Name: For internal reference and only displays in the Message Templates list.
- Subject Line: The email subject that displays when the message is sent.
- Body: The message details.
- When finished, click Save. The new template displays in the Message Templates list.
- To see how the message appears to recipients, click Preview then click Close to return to the New Message Template window.
|
 |
Duplicate Message Template
- Navigate to Message Templates then click the drop-down arrow on the right side of the template name and select Duplicate. The New Message Template window opens.
- Make any necessary changes to the information.
- Template Name: "Copy of" is added to the beginning of the name. Edit the name as needed.
- Subject Line and Body: Edit the subject and message details as needed.
- When finished, click Save. The new template displays in the Message Templates list.
- To see how the message appears to recipients, click Preview then click Close to return to the New Message Template window.
|
 |
Edit Message Template
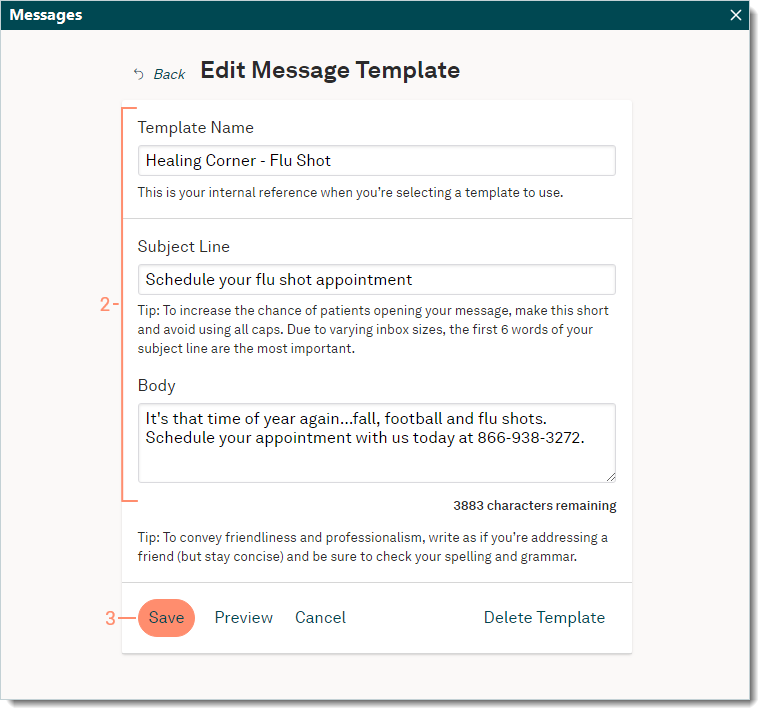
- Navigate to Message Templates then click Edit on the right side of the template name. The Edit Message Template window opens.
- Make the necessary changes.
- When finished, click Save. The updated template displays in the Message Templates list.
|
 |
Delete Message Template
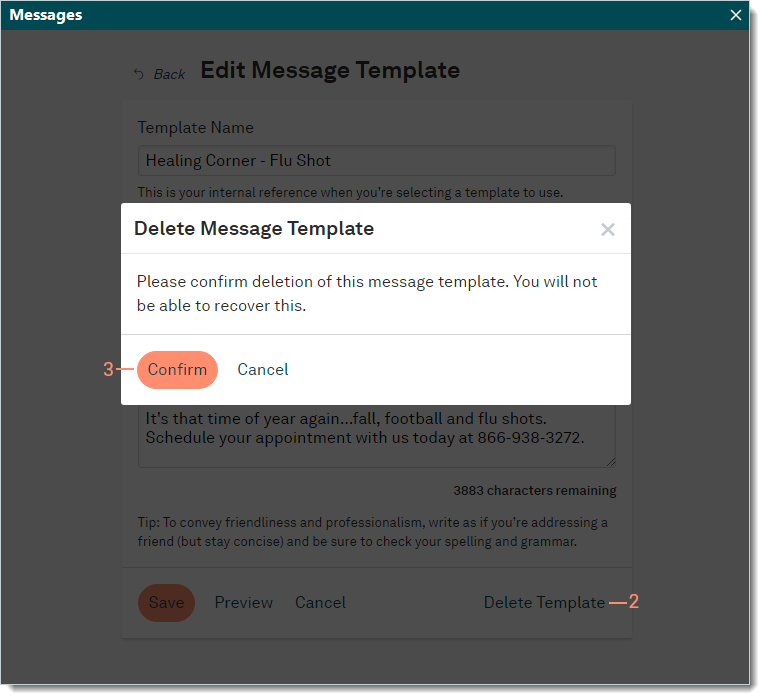
- Navigate to Message Templates then click Edit on the right side of the template name. The Edit Message Template window opens.
- Click Delete Template. The Delete Message Template confirmation pop-up appears.
- Click Confirm to confirm the deletion. The template is deleted from the Message Templates list.
|
 |