Updated: 09/21/2023 | Views: 20527
Once an encounter is approved, one or more claims associated with the encounter are created. Each service line/procedure listed in an encounter creates a separate claim (e.g., three service lines/procedures in the encounter generates three Claim records that appear separately on the Find Claim window). You can easily find/track claims, view and edit them when necessary. To perform various claim transactions, review Claim Actions.
Find Claim/Track Claim Status
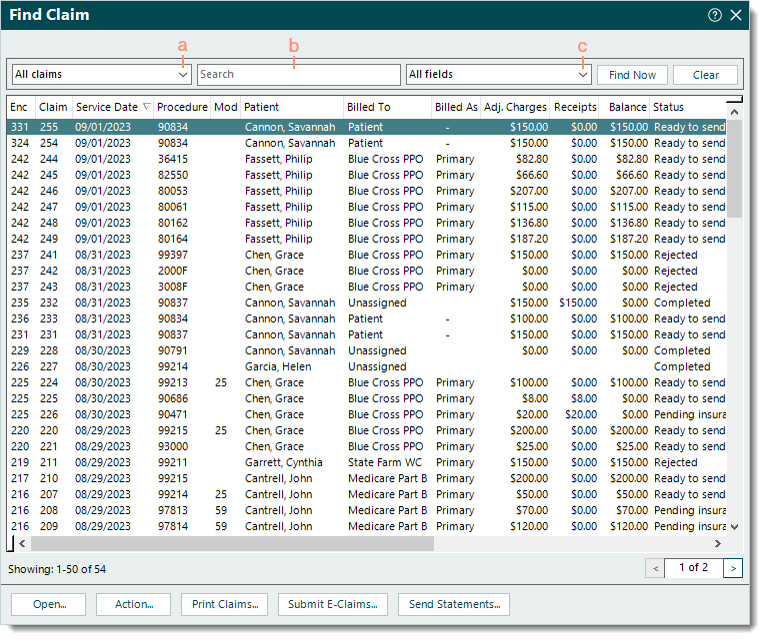
- Click Encounters > Track Claim Status. The Find Claim window opens.
 Tip: For faster navigation, press Ctrl+Shift+C on the keyboard. Tip: For faster navigation, press Ctrl+Shift+C on the keyboard.
- Use the following filters to narrow the search as necessary. Then, click Find Now.
- Claim status: Defaults to All claims. Click the drop-down arrow and select a status to search for claims in a specific stage of the claims billing process.
- Ready to print paper claims: Claims ready to be printed and sent on paper.
- Ready to submit electronic claims: Claims ready to be submitted electronically.
- Ready for patient statements: Claims with patient balances that are ready to be sent.
- Rejections: Claims that have not been either delivered (e.g., did not pass Tebra's validation) or accepted by the payer for adjudication.
- Denials: Claims that have been adjudicated by the payer and denied.
- No response: Claims that have not received a response from the payer within the contractual time frame.
Note: Claims are updated from Pending Insurance to No response based on the e-Claims and Paper Claims No Response Trigger days set under the Contracts and Fees. To clear these claims, ensure all electronic remittance advice (ERA) and paper remittance payments are posted. Then, review each claim still under No response to determine next steps.
- Pending insurance: Claims pending a response from the payer.
- Pending patient: Claims pending a response from the patient.
- Completed: Claims that have been settled or voided.
- Look For: Use the search bar to enter all or part of a keyword, ID, or tracking number for the claim.
- Search in: Defaults to All fields. Click the drop-down arrow and select a specific field to limit the search to.
|
 |
View Claim Transaction History
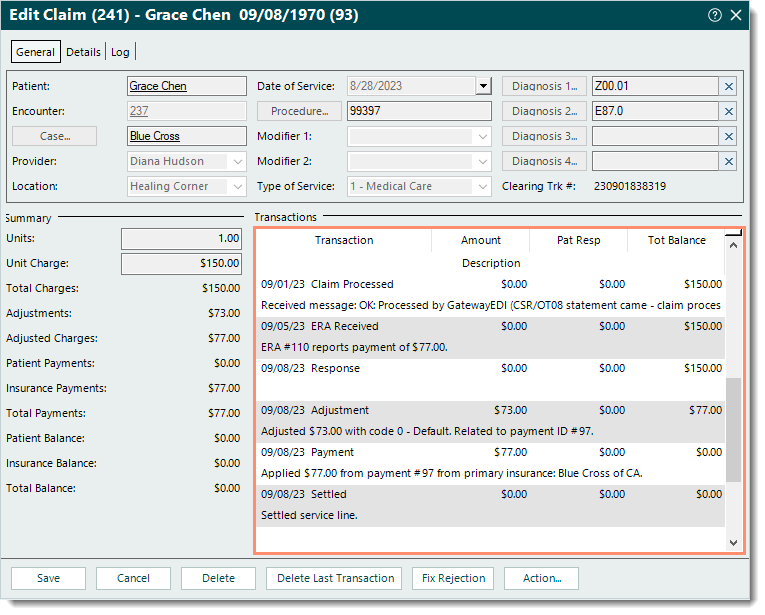
- Find the claim then double click to open. The Edit Claim window opens.
- Under the Transactions section, scroll if necessary to review the claim transaction history.
Tip: Depending on the type of transaction line, hover over or right click and select View Details to view additional information related to the transaction if applicable.
|
 |
Edit Claim
There are several workflows to edit a claim depending where the claim is in the claims billing process.
Note: To perform various claim transactions, review Claim Actions.
- For a single claim that has not yet been billed (electronically or on paper), edit the claim directly.
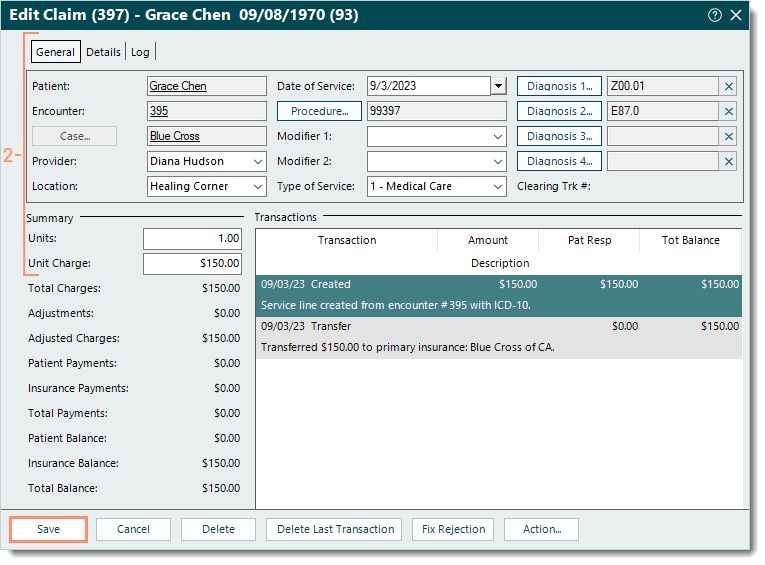
- Find the claim and double click to open. The Edit Claim window opens.
- Make the necessary changes under the General tab, Details tab, and/or Summary section.
- If changes need to be made to the records (e.g., Patient record, Encounter record, Case record) associated with the claim, double click on the text link to open the record and make the necessary changes. Then, click Save at the bottom of each relevant window until it is no longer available.
- Click Save.
|
 |
- For claims submitted electronically and were rejected (by Tebra's internal validation, the clearinghouse, or payer), the recommended workflow is to review and manage them through the clearinghouse reports.
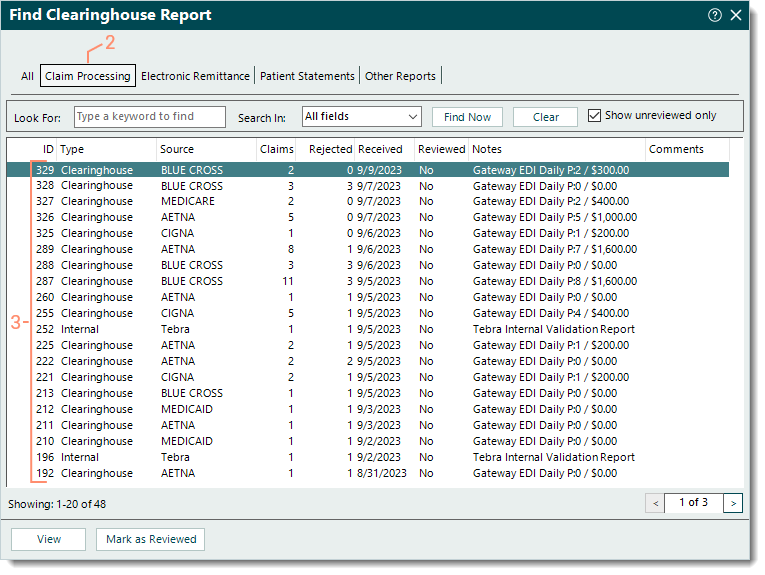
- Click Encounters > Clearinghouse Reports. The Find Clearinghouse Report window opens.
- Click the Claim Processing tab. The Claim Processing reports list displays.
- View each report's details to identify rejections and determine next steps. For more information, review Clearinghouse Report Rejections.
|
 |
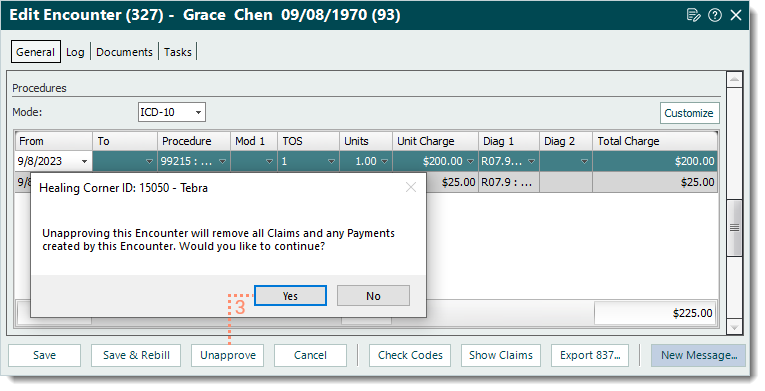
- For multiple claims generated from a single encounter (that was approved in error) and have not yet been billed (electronically or on paper), a user with appropriate permissions can unapprove the encounter to delete all associated claims and update the encounter's status to Review. Then, the encounter can be edited as necessary and approved to generate new claims to replace deleted claims.
- Find the claim and double click to open. The Edit Claim window opens.
- Double click the Encounter ID text link. The Edit Encounter window opens.
- Click Unapprove then click Yes to confirm unapproving the encounter and deleting all claims and payments created from the encounter. The Edit Claim window returns with no claim information.
- Click Cancel or close the window.
- When ready, find and edit the unapproved encounter (under Review) as necessary then approve the encounter to generate new claims to replace the deleted claims.
|
 |