Updated: 03/08/2023
Views: 3225
If a claim was rejected due to a postal zip code, follow the instructions below to verify all zip codes submitted on the claim. When all corrective actions are completed, rebill and resubmit all affected claims.
Most payers require the full 9-digit zip code for addresses on electronic claims. The rejection typically indicates the claim includes a zip code that is missing the 4-digit extension. All addresses need to be verified using the USPS zip code lookup tool.
 Tip: When entering a new address in Kareo, click Address and enter the information in the Check Address pop-up window to ensure proper formatting. Then, click USPS Website for quick access to the USPS zip code lookup tool to verify the 9-digit zip code is valid.
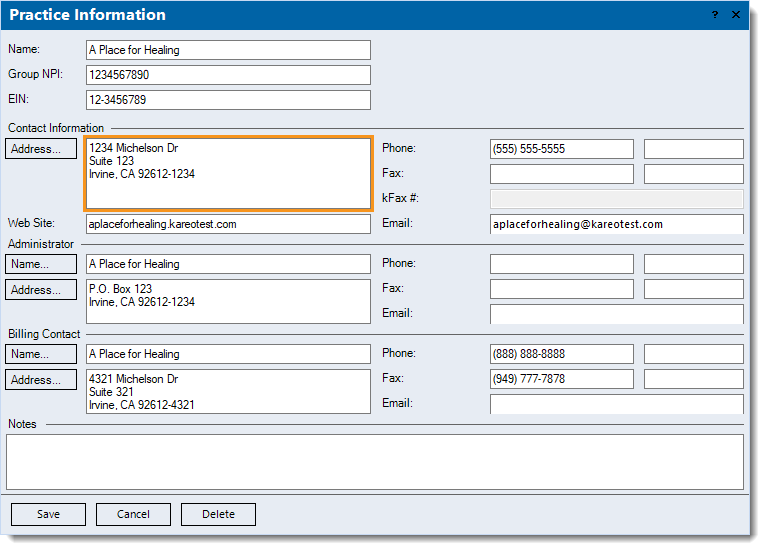
Practice Address
Follow the steps below to verify the practice's address:
- Click Settings > Practice Information. The Practice Information window opens.
- Use the USPS zip code lookup tool to verify the address on file under the Contact Information section and edit as necessary.
- To save any corrections made, click Save.
|
 |
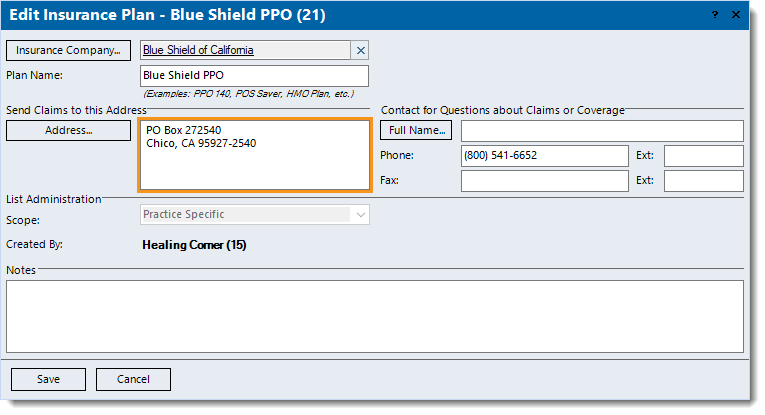
Insurance Plan Address
Follow the steps below to verify the payer’s address:
- Click Encounters > Track Claim Status. The Find Claim window opens.
- Look for and double click the appropriate claim to open. The Edit Claim window opens.
- Double click on the Case name. The Edit Case window opens.
- Double click the appropriate Insurance policy listed. The Insurance Policy window opens.
- Double click on the Insurance name. The Edit Insurance Plan window opens.
- Use the USPS zip code lookup tool to verify the address on file and edit as necessary.
- To save any corrections made, click Save until the Edit Case window.
- If there are multiple policies in the case, repeat steps 4-7 for each policy.
- Click Save at the bottom of each relevant window until it is no longer available.
|
 |
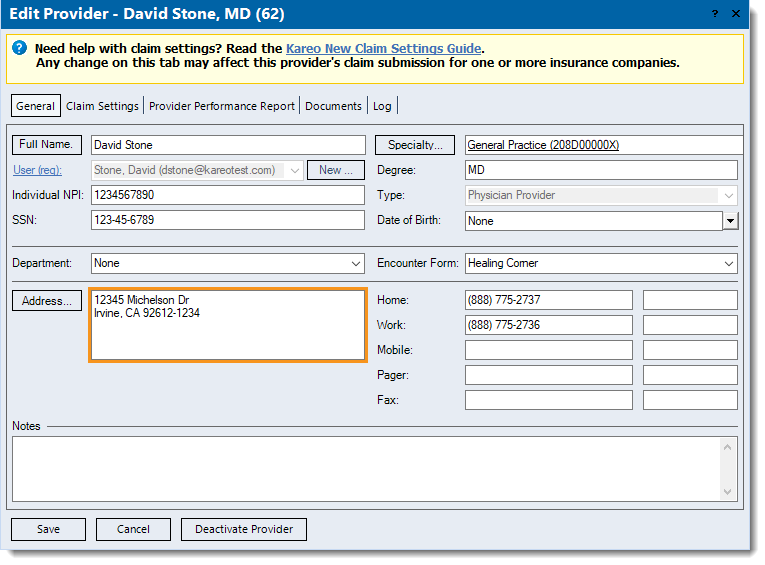
Provider Address
Follow the steps below to verify the provider’s address:
- Click Settings > Providers. The Find Provider window opens.
- Look for and double click the appropriate provider to open. The Edit Provider window opens.
- Use the USPS zip code lookup tool to verify the address on file and edit as necessary.
- To save any corrections made, click Save.
|
 |
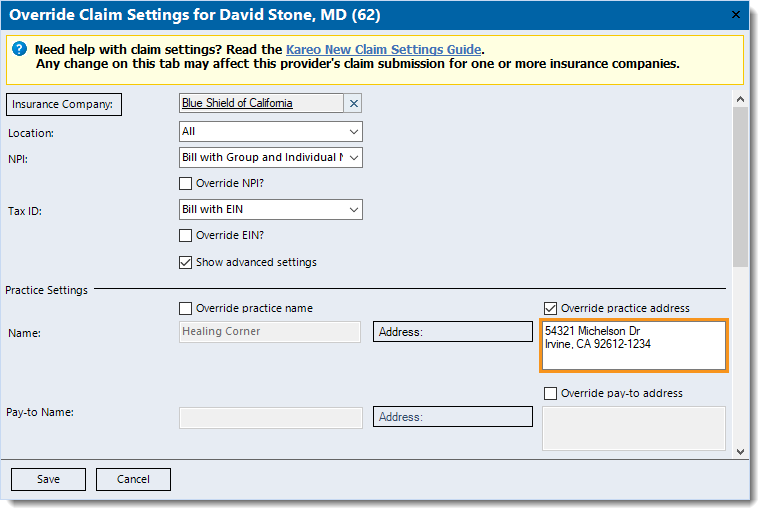
Practice Address Override
Follow the steps below to verify the practice's address entered as an insurance specific override under the Advanced Provider Override Settings:
- Click Settings > Providers. The Find Provider window opens.
- Look for and double click the appropriate provider to open. The Edit Provider window opens.
- Click the Claims Settings tab.
- Under the Override Claim Settings section, double click the appropriate insurance override to open. The Override Claim Settings window opens.
- Click to select "Show advanced settings". The Override Claims Settings window expands with more available options.
- Use the USPS zip code lookup tool to verify the address on file under the Practice Settings: "Override practice address" section and edit as necessary.
- To save any corrections made, click Save.
- If claims associated with the encounter are being submitted to multiple insurance companies with an address override, follow steps 4-7 for each insurance company.
- Click Save at the bottom of each relevant window until it is no longer available.
|
 |
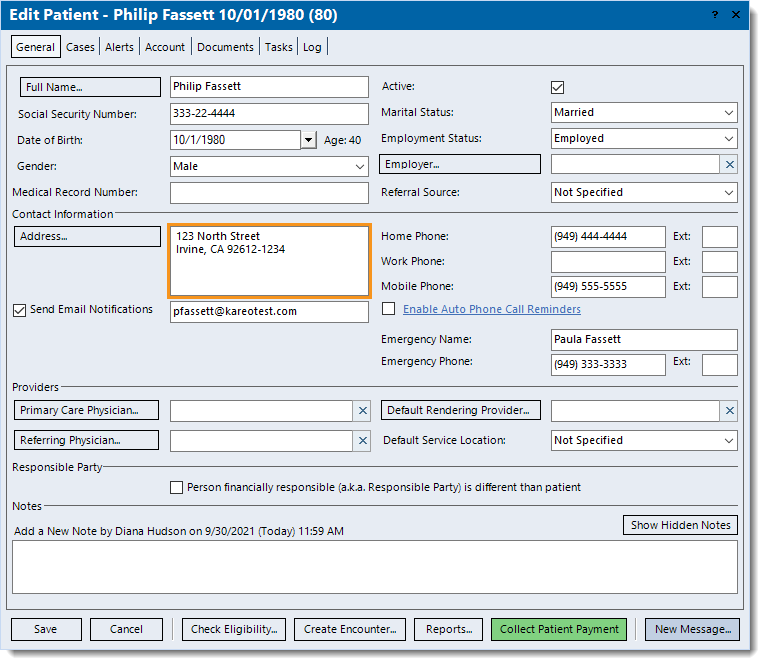
Subscriber Address
Follow the steps below to verify the patient's (subscriber) address:
- Click Encounters > Track Claim Status. The Find Claim window opens.
- Look for and double click the appropriate claim to open. The Edit Claim window opens.
- Double click on the Patient Name. The Edit Patient window opens.
- Use the USPS zip code lookup tool to verify the address on file under the Contact Information section and edit as necessary.
- To save any corrections made, click Save.
|
 |
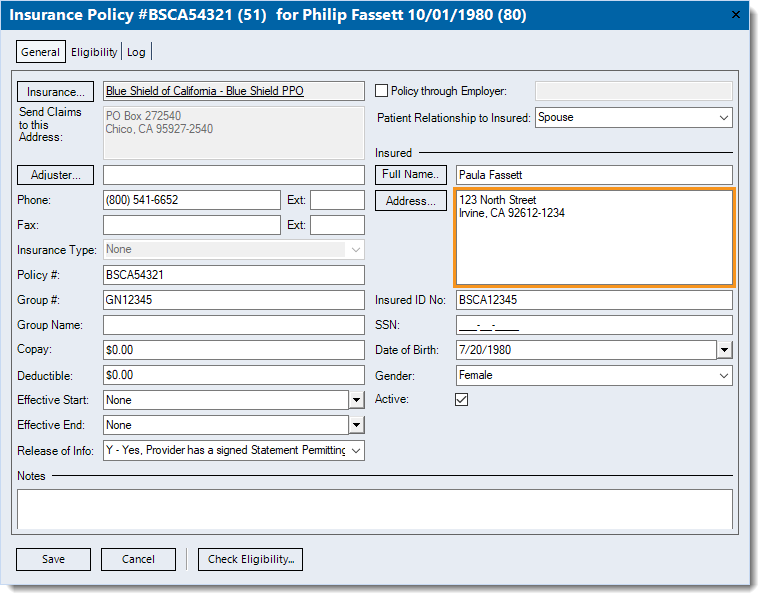
Insured Address
Follow the steps below to verify the insured's address:
- Click Encounters > Track Claim Status. The Find Claim window opens.
- Look for and double click the appropriate claim to open. The Edit Claim window opens.
- Double click on the Case name. The Edit Case window opens.
- Double click the appropriate Insurance policy listed. The Insurance Policy window opens.
- Use the USPS zip code lookup tool to verify the address on file under the Insured section and edit as necessary.
- To save any corrections made, click Save at the bottom of each relevant window until it is no longer available.
|
 |
Service Location
Follow the steps below to verify the service location's address:
- Click Settings > Service Locations. The Find Service Location window opens.
- Look for and double click the appropriate service location to open. The Edit Service Location window opens.
- Use the USPS zip code lookup tool to verify the address on file under the Billing Name and Address section and edit as necessary.
- To save any corrections made, click Save.
|
 |