Updated: 05/06/2021
Views: 3918
Patient statements reports are received when using Kareo's secure patient statement mailing service. The Patient Statements reports list includes patient statement confirmation reports (e.g., confirmation of receipt, final confirmation) as well as patient statement errors and change of address notifications. Within 24 hours of sending patient statements, the confirmation reports are routed to the practice(s) within your Kareo account and can be found in the Clearinghouse Reports under the Patient Statements tab. If any statements were undeliverable, an additional report provides further explanation of the error(s) for resolution.
Navigate Patient Statements Reports
- Click Encounters > Clearinghouse Reports. The Find Clearinghouse Report window opens.
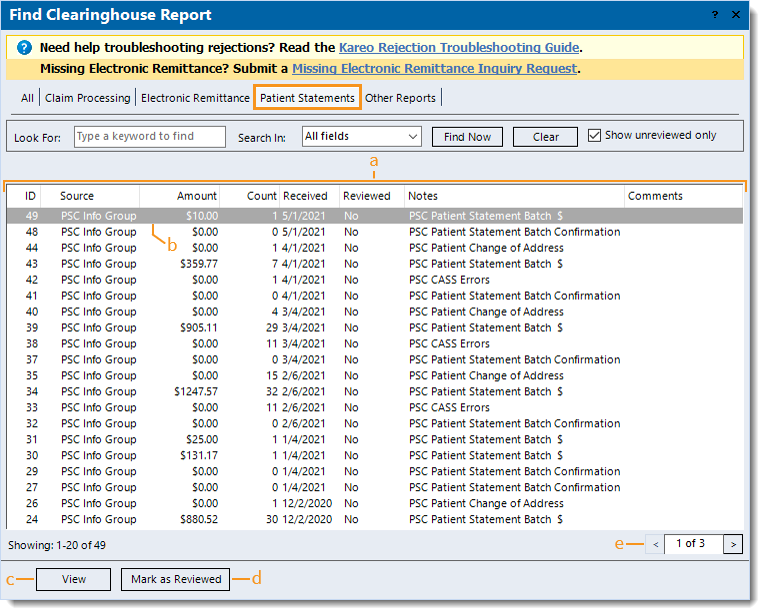
- Click the Patient Statements tab. The Patient Statements reports list displays.
- Report information:
- ID: Clearinghouse report ID assigned by Kareo.
- Source of the report: Kareo's mailing service partner, PSC Info Group (RevSpring).
- Amount: Total patient balances due of statements sent.
- Count: Total patient statements the report includes.
- Confirmation reports: Total statements sent.
- CASS errors reports: Total undeliverable statements due to errors.
- Change of address reports: Total statements sent to the patient's updated address.
- Received: Date the file was received in Kareo.
- Reviewed: No or Yes indicates whether the report was marked as reviewed.
Note: "Show unreviewed only" is selected by default and displays all reports that are not marked as reviewed. To also include reviewed reports, click to deselect "Show unreviewed only".
- Notes: A brief description of the report.
- Comments: Internal comments entered on the report.
- Click to select and highlight a report or double click to open and view a report.
- View: Click to open and view a highlighted report.
- Mark as Reviewed: After reviewing the report and determining no further action is needed, click to mark the report as reviewed.
- Pagination: Click the arrows to navigate forward or back, or enter a specific page number. Each page displays up to 20 reports
|
 |
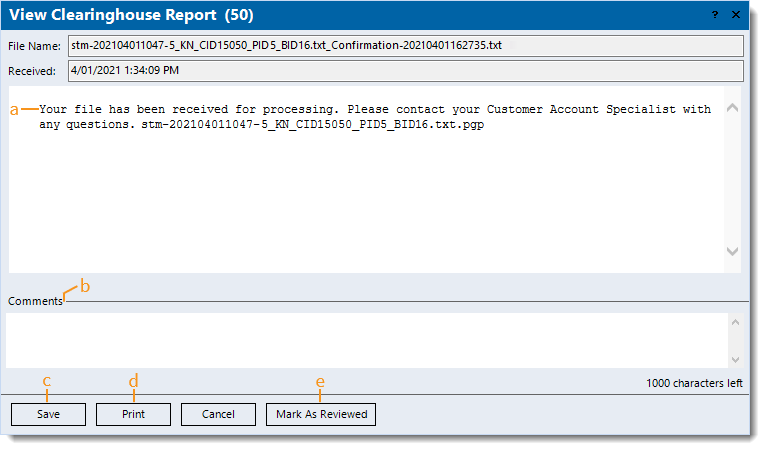
Patient Statements Confirmation Reports
- Example patient statements confirmation of file received report.
- Confirmation message details indicate the file was received for processing.
- Comments: Enter internal comments to add reminders or collaborate with other staff members.
- Save: Click to close the window and save any comments entered.
- Print: Click to print the report (excludes comments).
- Mark As Reviewed: After reviewing the report and determining no further action is needed, click to mark the report as reviewed.
|
 |
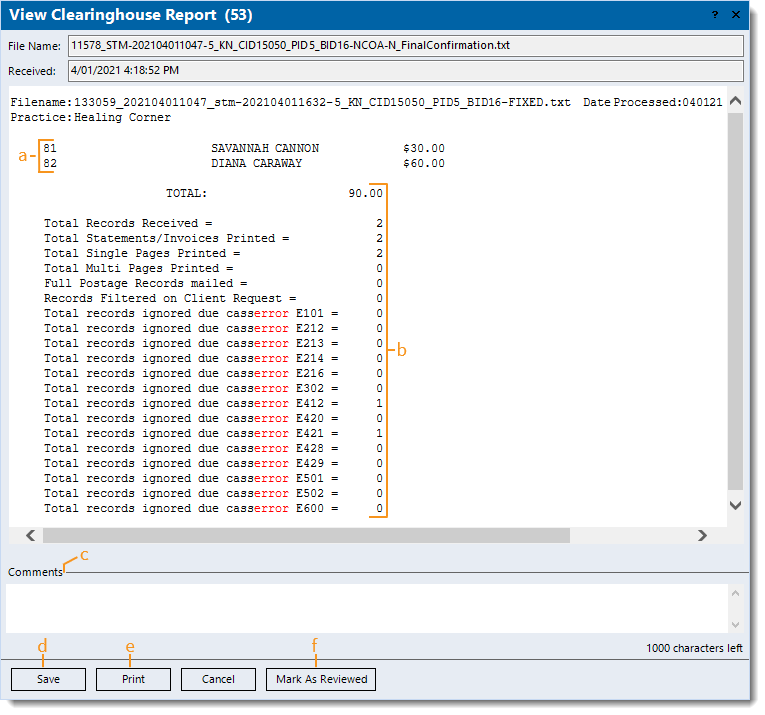
- Example patient statements final confirmation report.
- Patient details of statements sent: Patient ID, name, and balance due.
- Patient statements totals:
- TOTAL: The total patient balances due amount of statements sent.
- Total Records Received: The number of statements sent from Kareo and received by RevSpring.
- Total Statements/Invoices Printed: The number of statements printed.
- Total Single and Multi Pages Printed: The number of statements printed on a single page and additional pages.
Note: For the cost of the first page and additional pages printed, see the Patient Statement Mailing Service Fees section of the Pricing Policy.
- Total records ignored due casserror: The number of statements not sent due to a Coding Accuracy Support System (CASS) error.
Note: If any errors are indicated, a corresponding CASS error report with details regarding the specific errors is also available for review.
- Comments: Enter internal comments to add reminders or collaborate with other staff members.
- Save: Click to close the window and save any comments entered.
- Print: Click to print the report (excludes comments).
- Mark As Reviewed: After reviewing the report and determining no further action is needed, click to mark the report as reviewed.
|
 |
CASS Error Reports
When a batch of patient statements is sent to RevSpring, the file is checked against the Coding Accuracy Support System (CASS); a tool created and used by the USPS to ensure address matching quality and accuracy of the software. If errors are found, the patient statement final confirmation report received indicates the amount per error code and the corresponding CASS error report with details regarding the specific errors is also received for review.
- Example CASS error report.
- Click the patient name to access the Patient record.
- CASS Error Description: Click the short description of the error to view more details.
 Tip: Use the USPS Zip Code Lookup tool to help find the correct address information for errors such as Bad ZIP or Bad city. Tip: Use the USPS Zip Code Lookup tool to help find the correct address information for errors such as Bad ZIP or Bad city.
- Comments: Enter internal comments to add reminders or collaborate with other staff members.
- Save: Click to close the window and save any comments entered.
- Print: Click to print the report (excludes comments).
- Mark As Reviewed: After reviewing the report and determining no further action is needed, click to mark the report as reviewed.
|
 |
Patient Change of Address (COA) Reports
When a batch of patient statements is sent to RevSpring, all patient addresses are matched against the records in USPS. If a new address for the patient is found, RevSpring uses the new address to send the patient statement and generates a COA report for review.
- Example patient COA report.
- To automatically update all patient records with the updated addresses included in the report, click Update All Records.
- Click the patient name to access the Patient record.
- Move Description: Click the short description to view more details regarding the COA.
- To only automatically update a specific patient's record with the updated address, click Update Record under the patient's information.
- Comments: Enter internal comments to add reminders or collaborate with other staff members.
- Save: Click to close the window and save any comments entered.
- Print: Click to print the report (excludes comments).
- Mark As Reviewed: After reviewing the report and determining no further action is needed, click to mark the report as reviewed.
|
 |