Kareo and PatientPop are now Tebra. Becoming Tebra will take time and we appreciate your patience as we transition to the new brand experience.Learn More
Tebra Help Center

Encounter Actions

Updated: 08/30/2023|Views: 7755

Tebra offers a unique encounter workflow process that enables the medical office staff to capture encounters at the point of service and route them to the business office or third-party medical billing staff for claims billing. The recommended process is: new encounters are saved as drafts, completed draft encounters are saved for review, and reviewed encounters are either approved or rejected.

The below steps outline how each encounter action can be taken depending on the needs of the practice.
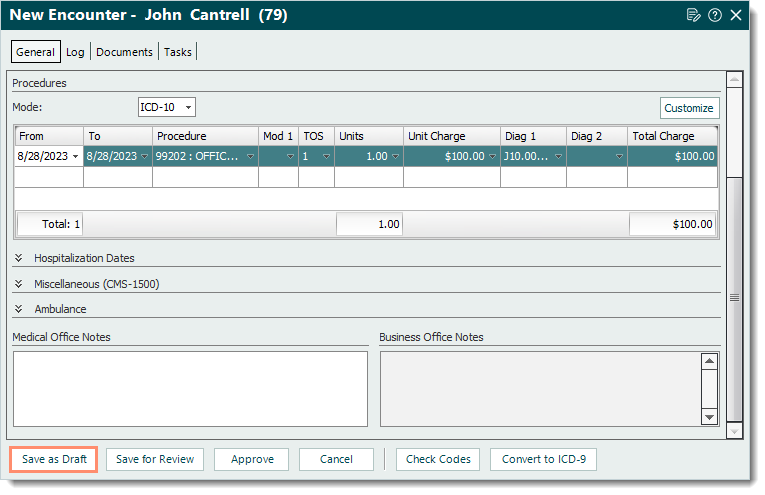
Save as Draft

New encounters and encounters with a status of Review or Rejected can be saved as draft encounters. 
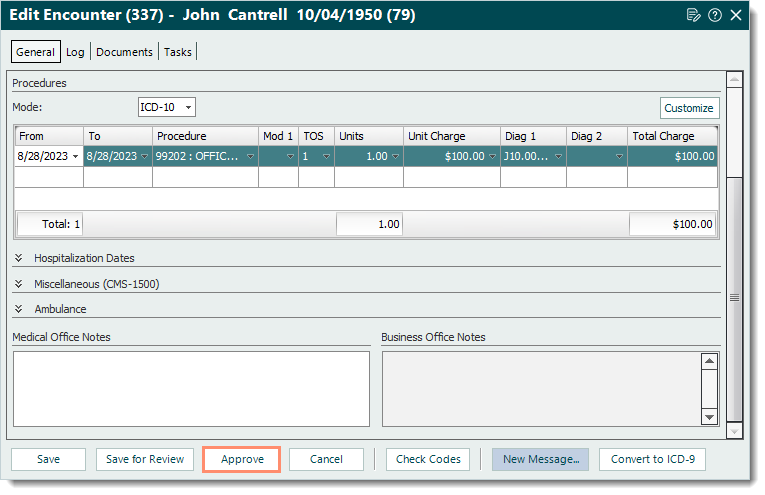
  1. Create or edit an encounter. 
  2. Click Save as Draft. The encounter is listed under the Draft tab of the Find Encounter window.
    Note: For practices using the Charge Capture feature, practices using an integrated EHR, or Clinical subscribers, the encounters created and transferred from the web platform or EHR are also listed under the Draft tab.
Desktop_Encounters_SaveasDraft.png

Save for Review

New encounters and encounters with a status of Draft or Rejected can be saved for Review.

  1. Create or edit an encounter. 
  2. Click Save for Review. The encounter is listed under the Review tab of the Find Encounter window.
Desktop_Encounters_SaveforReview.png

Approve Encounter

New encounters and encounters with a status of Draft, Review, or Rejected can be approved.

  1. Create or edit an encounter. 
  2. Review the encounter for accuracy and completeness.
  3. Click Approve. The encounter is listed under the Approved tab of the Find Encounter window.

Once an encounter is approved, one or more claims associated with the encounter are created and can be tracked. Each service line/procedure listed in an encounter creates a separate claim (e.g., three service lines/procedures in the encounter generates three Claim records that appear separately on the Find Claim window). 
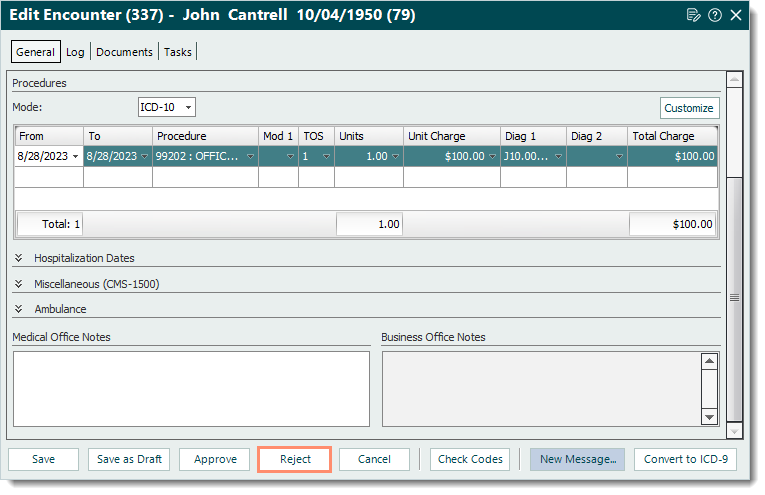
Desktop_Encounters_Approve.png

Reject Encounter

Encounters with a status of Review can be rejected. 
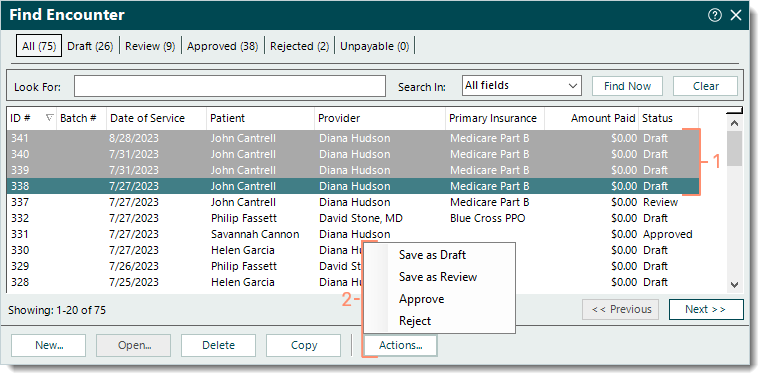
  1. Edit an encounter. 
  2. Review the encounter for accuracy and completeness.
    • If corrections need to be made, it is recommended to add specific notes under the Office Notes section.
  3. Click Reject. The encounter is listed under the Rejected tab of the Find Encounter window.
Desktop_Encounters_Reject.png

Bulk Encounter Action

Encounter actions can be done in bulk if necessary, but it is recommended to review each encounter individually to determine the next appropriate action. 

  1. Find the encounters then drag to select them. 
  2. Click Actions > Select Save as Draft, Save as Review, Approve, or Reject. The encounters are listed under the appropriate tab of the Find Encounter window.
    Note: The available action(s) for selection depend on the status of the encounters.
Desktop_Encounters_BulkAction.png


  • Was this article helpful?