Updated: 09/28/2023 | Views: 11559
Once patient statements are prepared, use the Print Patient Statements option to print a batch of statements on your office printer and mail them yourself. Statements open using Adobe Reader and are then ready to send to your printer. To generate a single on-demand patient statement for a specific patient, you also have the Patient Record Reports option.
Note: If you have not already done so, configure the Patient Statement Options, and if your remit-to address is a P.O. Box, there are two additional steps to complete when configuring the settings.
Self-Print Patient Statements
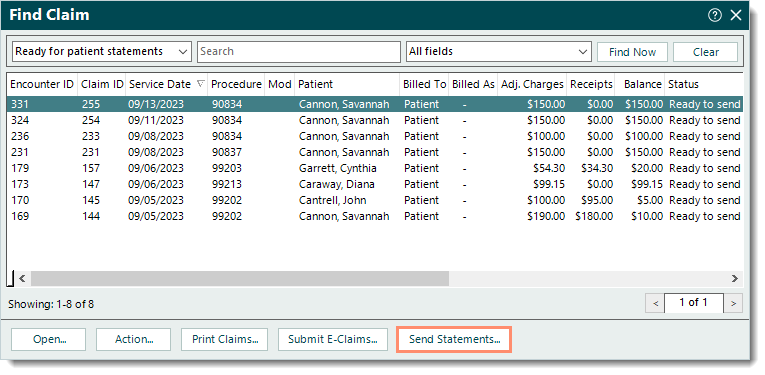
- After preparing patient statements, click Send Statements at the bottom of the Find Claim window. The Send Patient Statements - Select Criteria window opens.
- To navigate from the Practice Home window, click Encounters > Send Patient Statements.
|
 |
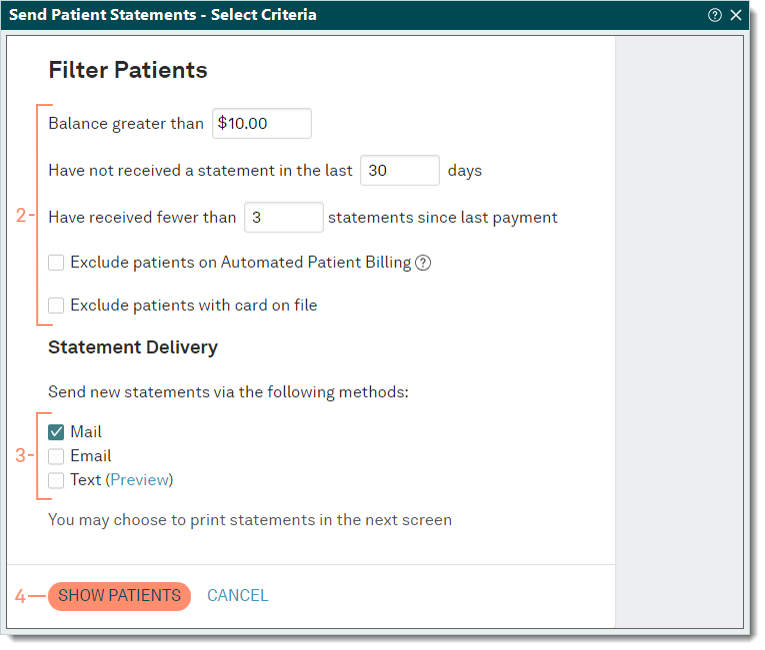
- Filter Patients: Enter the appropriate criteria to filter the patients.
Note: The criteria pre-populates with the Default Batch Options set in the Patient Statement Options.
- Automated Patient Billing enabled practices: To exclude all patients scheduled to receive automated statements, click to select "Exclude patients on Automated Patient Billing".
- Tebra Payments or Patient Collect (Stripe) activated practices: To exclude patients with payment cards on file, click to select "Exclude patients with card on file".
- Statement Delivery: Click to select the "Mail" method.
- Click SHOW PATIENTS. The Send Patient Statements - Confirm Patient List window opens.
|
 |
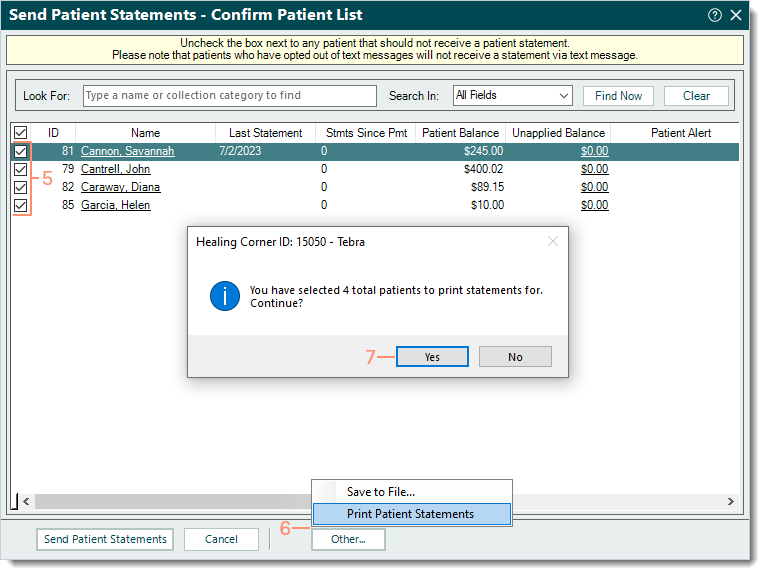
- Review the patient list and information.
- If applicable, click to clear the checkbox on the left of the patient's name to exclude the patient from receiving a statement.
- To view the mailing address on file, click the patient name to open the Patient record then select the General tab. Close the window to return to the patient list.
- Click Other > Print Patient Statements. A confirmation pop-up appears.
- To save an XML file for another third party vendor to process the patient statements, select Save to File. After saving the file, the Patient Statements Sent window opens. Then, proceed to step 8.
- Click Yes to confirm and the Adobe print window opens to print the statements. In the Desktop Application (PM), the Patient Statements Sent window opens.
|
 |
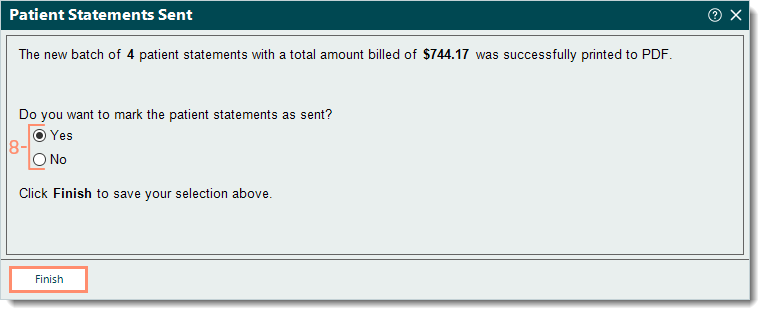
- Make the appropriate selection to mark the patient statements as sent:
- "Yes": Selected by default and updates the status of the claim(s) to Pending patient.
- "No": Click to select "No" if the status of the claim(s) should remain as Ready to send statements
- Click Finish.
|
 |