Updated: 03/29/2021
Views: 8610
When the patient is paying out of pocket, you can add a self-pay case instead of billing the insurance company.
Add Self-Pay Case
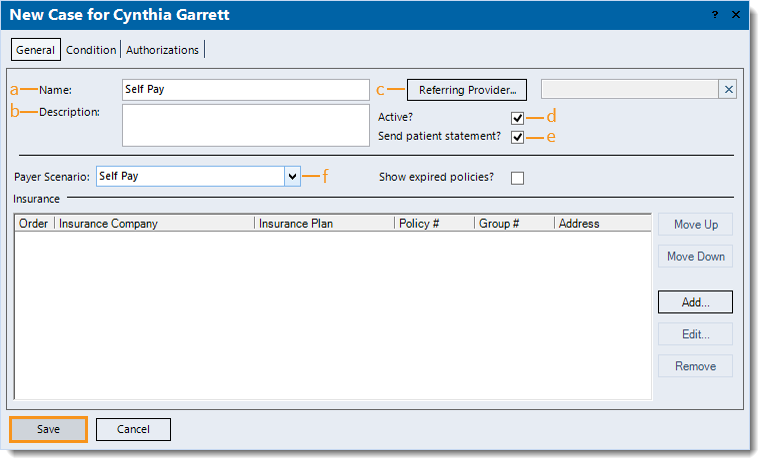
- To prevent duplication, navigate to Cases and verify the case is not in the system then click Add on the right of the window. The New Case window opens.
- Enter the General information:
- The Name for the case that will help distinguish if from other cases (e.g., Self Pay, Self-Pay Billing).
- Description (optional): Information that best describes the purpose or use of the case (e.g., the condition for which the patient is being seen).
- Referring Provider (optional): Automatically populates from the Patient record.
- If blank, click Referring Provider to search and select the provider.
- If the provider is not listed, click New at the bottom of the Select Referring Physician window.
- "Active?" is selected by default. To change the case to inactive at any time, click to clear the selection.
- "Send patient statement?" is selected by default and allows statements related to the case to be sent to the patient. To prevent patient statements from being sent, click to clear the selection.
- Click the Payer Scenario drop-down arrow and select Self Pay.
- If applicable, remove any insurance policies that were added by default (when there is an existing primary case with policies in the patient's record).
- Click Save at the bottom of each window until it is no longer available.
- For cash practices creating an additional self-pay case for the purposes of printing a claim, do not save, but proceed to the Add Self-Pay Insurance Policy section below.
|
|
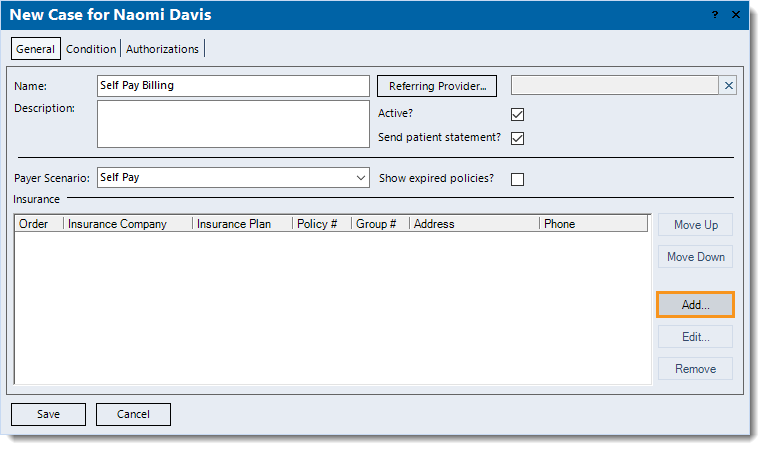
Add Self-Pay Insurance Policy
The below steps are only intended for cash practices that have created a custom self-pay insurance company and plan for the purposes of printing a claim as the policy needs to be added to the self-pay case.
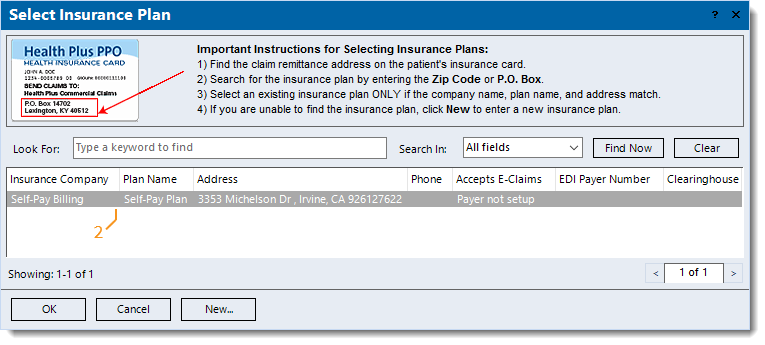
- Under the Insurance section, click Add on the right side of the window. The Select Insurance Plan window opens.
|
 |
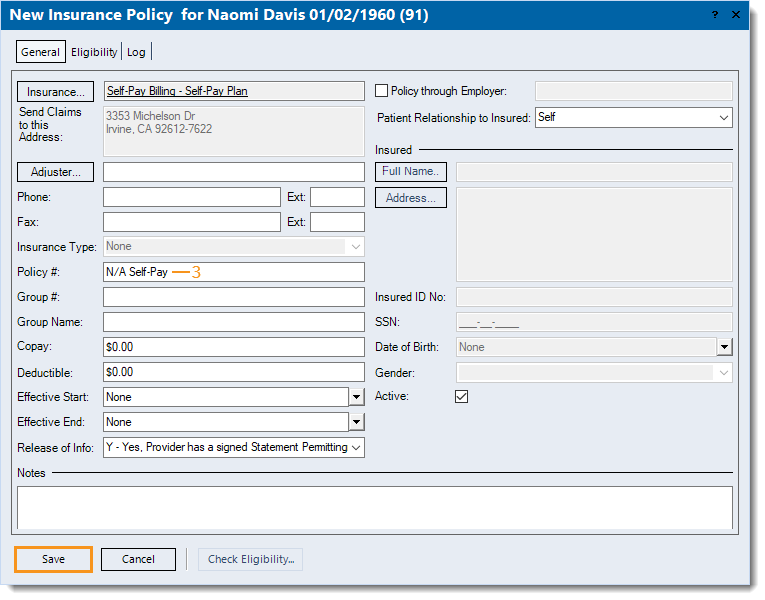
- Double click to select the self-pay plan. The New Insurance Policy window opens to the General tab by default.
|
 |
- Enter a desired Policy # (e.g., 0, NA, Self-Pay) as this is a required field.
Note: The information entered prints in box 1a of the CMS-1500 claim form.
- Click Save at the bottom of each window until it is no longer available.
|
 |