Updated: 12/13/2023 | Views: 10502
You can override claim settings for any insurance company or service location that has exceptions to the provider's general claim settings.
You always navigate to the Claim Settings tab to add, edit, or remove an override. To ensure any changes made are saved successfully, click Save until the Confirmation pop-up appears in order to confirm those changes.
Add Override
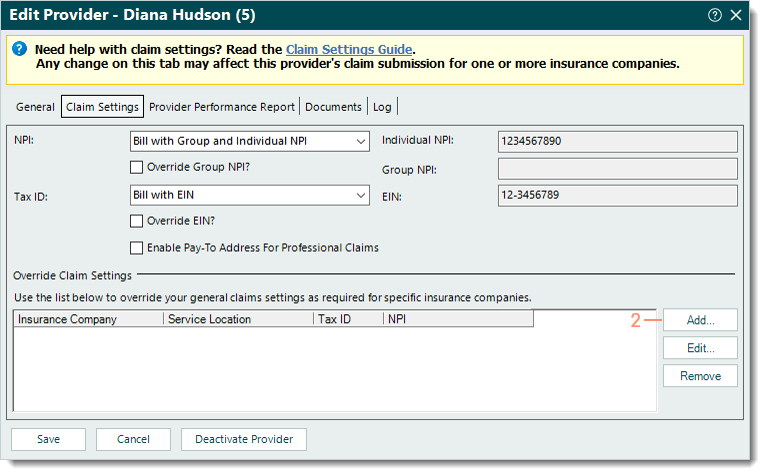
- Navigate to the Claim Settings tab of the Provider record. The provider’s claims settings information displays.
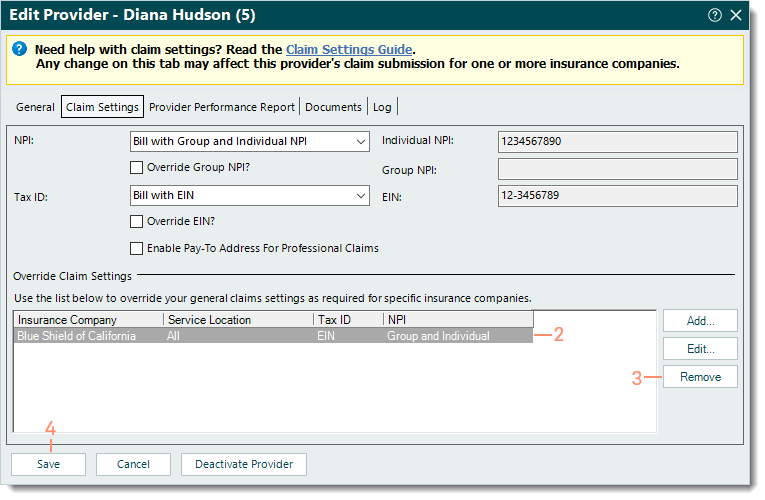
- Under the Override Claim Settings section, verify the override is not in the system to prevent duplication. Then, click Add. The Override Claim Settings window opens.
|
 |
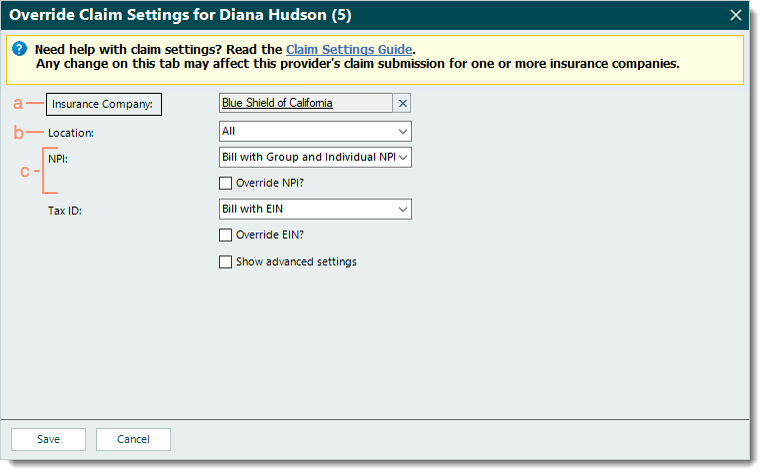
- Enter the appropriate claim settings override information.
- Insurance Company:
- If the override is for a specific insurance company, click Insurance Company. Then, find and double click the payer to select.
- If the override is for a specific location and applies to all payers, leave this blank.
- Location: To select a specific service location this override applies to, click the drop-down arrow and select the service location; otherwise, leave this set to All.
- NPI: Click the drop-down arrow and select how the provider is credentialed with the payer(s) to send claims.
- If the provider's claims need to be sent with a different Group or Individual NPI, click to select "Override NPI?". Then, enter the Group NPI Override or Individual NPI Override.
|
 |
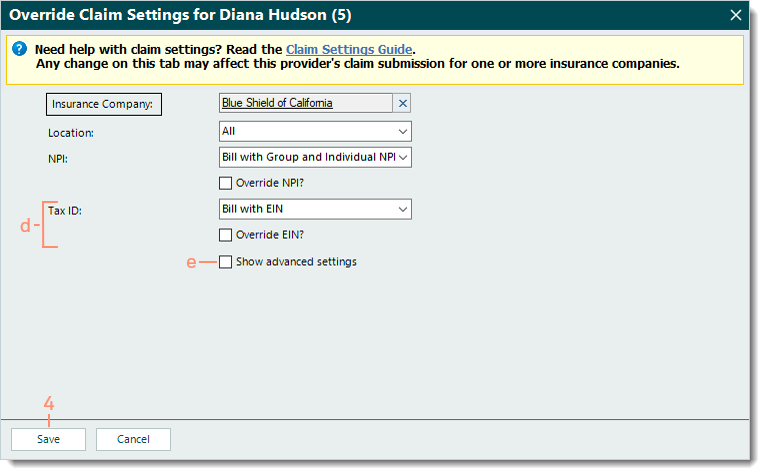
- Tax ID: Click the drop-down arrow and select how the provider is credentialed with the payer(s) to send claims.
- If the provider is credentialed with the payer(s) to send claims using an Employer Identification Number (EIN) assigned by the IRS to the practice, select Bill with EIN . This applies to any business entity including a Corporation, LLC, LLP, Partnership, or other taxable business entity.
- If the provider's claims need to be sent with a different EIN, click to select "Override EIN?". Then, enter the EIN Override.
- If the provider is credentialed with the payer(s) to send claims using the provider's Social Security Number (SSN), select Bill with SSN . This might be the case if the practice is a sole proprietorship and has not been assigned an EIN from the IRS.
- If additional settings (e.g., Practice, Paper Claim, Electronic Claim, or Eligibility) need overrides, click to select "Show advanced settings" and make the appropriate selections. If not, continue to step 4.
- Click Save in the Override Claims Settings window. The Edit Provider window returns.
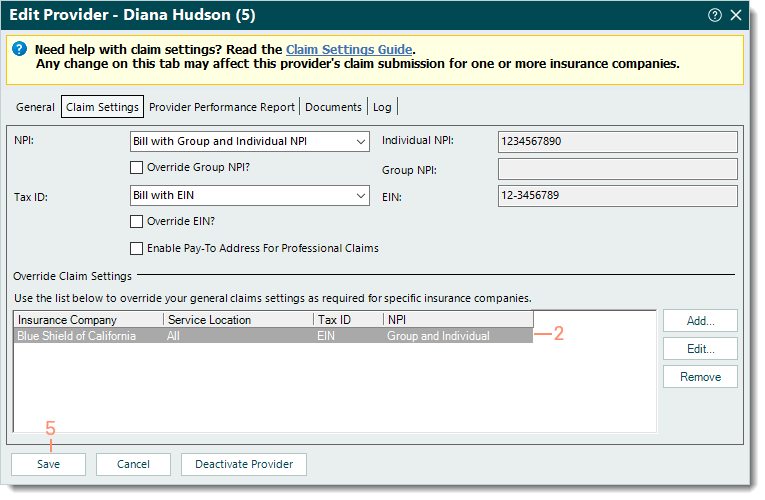
- Click Save in the Edit Provider window. The Confirmation pop-up appears then click Yes to confirm.
|
 |
Edit Override
- Navigate to the Claim Settings tab of the Provider record. The provider’s claims settings information displays.
- Under the Override Claim Settings section, double click the appropriate override (or click once to select it then click Edit). The Override Claim Settings window opens.
- Make the necessary changes.
- Click Save in the Override Claims Settings window. The Edit Provider window returns.
- Click Save in the Edit Provider window. The Confirmation pop-up appears then click Yes to confirm.
|
 |
Remove Override
- Navigate to the Claim Settings tab of the Provider record. The provider’s claims settings information displays.
- Under the Override Claim Settings section, click once to select the appropriate override.
- Click Remove. The override is removed from the list.
- Click Save. The Confirmation pop-up appears then click Yes to confirm.
|
 |