Updated: 12/13/2023 | Views: 10653
System Administrators can activate a new provider within an existing practice or when creating a practice via the New Practice Setup Wizard. Provider information can also be reviewed and edited at any time.
You always begin with finding the provider before adding or editing a provider.
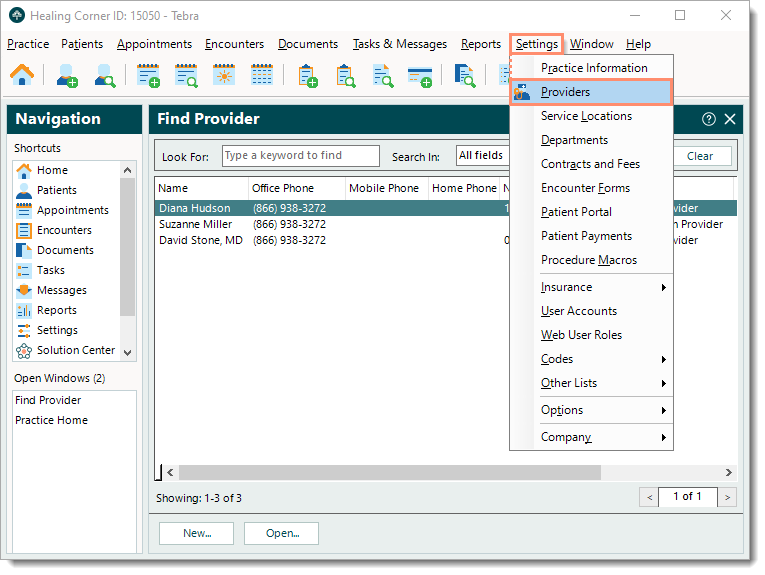
Find Provider
- Click Settings > Providers. The Find Provider window opens.
 Tip: When there are numerous providers listed, use the Look For search bar to enter all or part of a keyword for the provider. Then, click Find Now. Tip: When there are numerous providers listed, use the Look For search bar to enter all or part of a keyword for the provider. Then, click Find Now.
|
 |
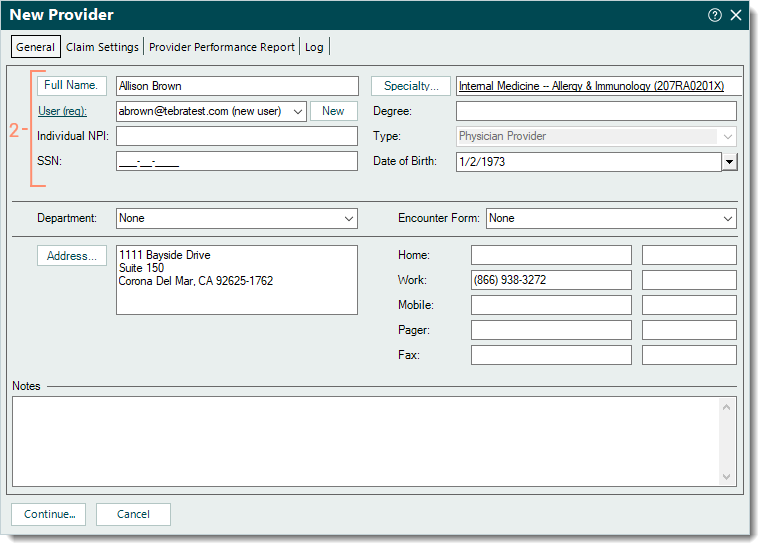
New Provider
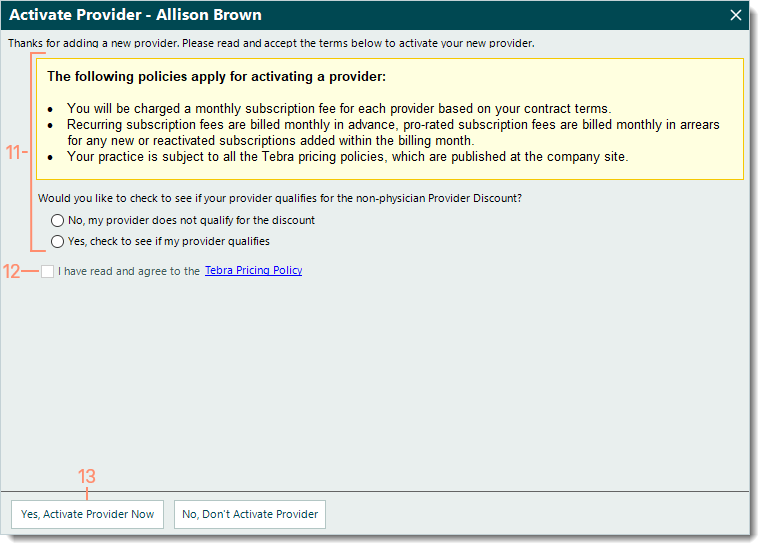
Review the pricing and billing policies before activating a new provider. Once a provider is created and activated, they can be deactivated but not deleted.
- To prevent duplication, verify the provider is not in the system then click New at the bottom. The New Provider window opens at the General tab by default.
- Enter the information:
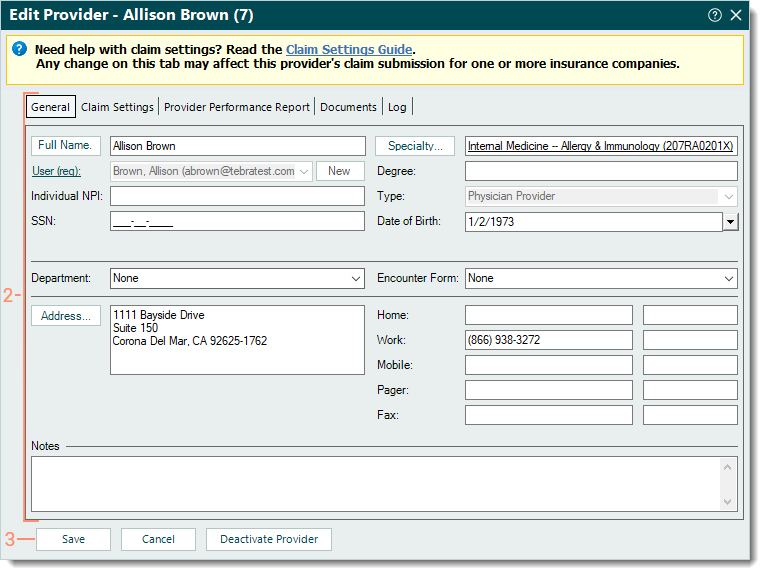
- Full Name: The provider's full name.
- User: The provider must be associated with their own unique user account.
Note: Use a valid email address for the provider to which only they can access their emails for security purposes. Do not use a staff member's email address for providers.
- If the provider has an existing user account, click to select the user account in the drop-down menu.
- If the provider is also a new user, click New. The New User Email Address pop-up window appears > enter the provider's Email Address.
Note: Once the provider has been added, update the user account permissions accordingly.
- Individual NPI: The individual National Provider Identifier assigned to the provider.
- SSN: The provider's 9-digit Social Security Number.
- Specialty: Click Specialty to search and select the provider's main specialty from the list of taxonomy codes.
- Degree: The provider's degree (e.g., DO, MD, PhD).
- Date of Birth: The provider's date of birth using the format "MM/DD/YYYY" (e.g., 05/25/1960).
|
 |
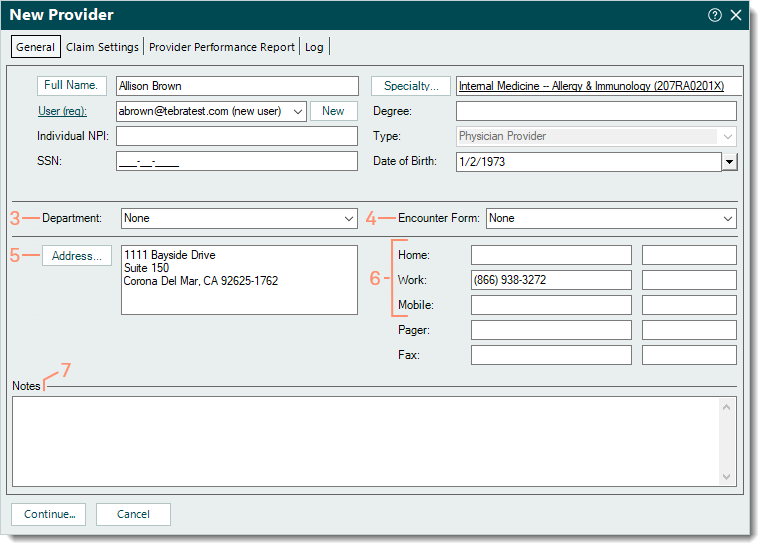
- Department: If departments have been set up for the practice, select the provider's department from the drop-down menu. Otherwise, leave it set to None.
- Encounter Form: Select the encounter form used by this provider from the drop-down menu. If this has not been set up, leave it set to None.
Note: If an encounter form is later set up for the provider, return to this and select the appropriate encounter form.
- Address: The provider's office address must be a physical location (not a PO Box) with a 9-digit zip code.
- Home, Work, and Mobile: At least one phone number for the provider is required.
- Notes: If applicable, enter internal notes related to the provider.
|
 |
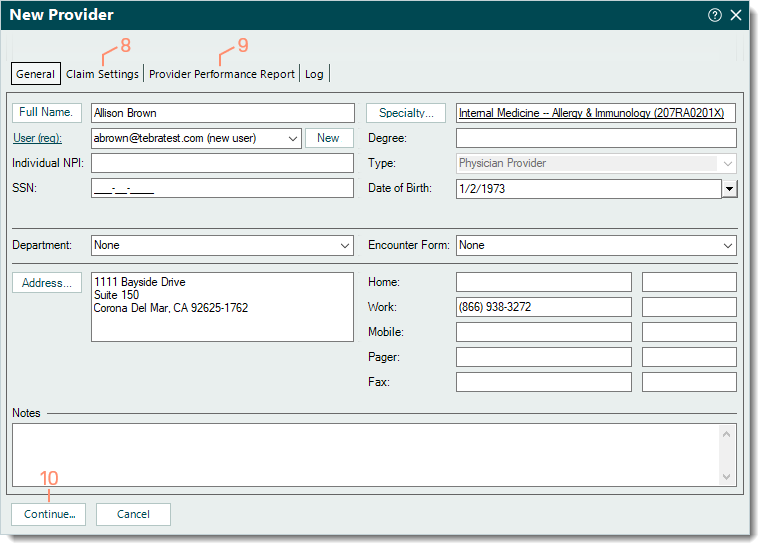
- Click the Claim Settings tab to configure the provider's default claim settings.
- If applicable, click the Provider Performance Report tab to configure the reports settings.
- Once all settings are configured, click Continue. The Activate Provider window opens.
- If a new user was entered for the provider, a Confirmation pop-up appears. Click Yes to confirm the new user account creation.
|
 |
- Review the pricing policies. Then, click to select the appropriate option:
- If the provider does not qualify for the non-physician provider discount, click to select "No, my provider does not qualify for the discount".
- If the provider qualifies for the non-physician provider discount, click to select "Yes, check to see if my provider qualifies".
- If your provider has not been assigned an individual National Identifier Number, click to select "No".
- A pop-up message indicating the system is unable to check without a valid NPI appears. Click OK. Then, create a case for further assistance with receiving the discount.
- If your provider has been assigned an individual National Identifier Number, click to select "Yes".
- The Individual NPI auto-populates from the General tab.
- To acknowledge having read and to agree to the Tebra Pricing Policy, click to select "I have read and agree to the Tebra Pricing Policy".
- Click Yes, Activate Provider Now.
- If "Yes, check to see if my provider qualifies" was selected, the system checks for a non-physician provider discount.
- If the provider does not qualify or the NPI could not be validated, a pop-up message appears. Click OK.
- "No, my provider does not qualify for the discount" is automatically selected. Click Yes, Activate Provider Now to create and activate the provider. Then, create a case for further assistance with receiving the discount.
- The Confirmation pop-up appears then click Yes to confirm the provider activation.
|
 |
Edit Provider
- Find the provider then double click to open. The Edit Provider window opens.
Tip: When needed, the provider ID can be found in parenthesis next to the provider name on the title bar.
- Make the necessary changes under the General, Claim Settings, Provider Performance Report and/or Documents tab.
Note: The Documents tab becomes available after creating the provider record.
- Click Save. The Confirmation pop-up appears then click Yes to confirm the changes.
|
 |