Stripe Terminal Setup: WisePOS E
- Last updated
-
-
Save as PDF
Updated: 06/29/2023 | Views: 1752
Available for Patient Collect (Stripe) activated customers.
Once the WisePOS E card reader is received, complete the setup to connect to the Stripe terminal. A WisePOS E countertop card reader is used with the Stripe terminal to offer a reliable and secure in-person payments solution that supports chip, swipe, and contactless payments, including Apple Pay and Google Pay.
For more information or questions about the Stripe terminal setup, review the FAQs.
Power-on the WisePOS E
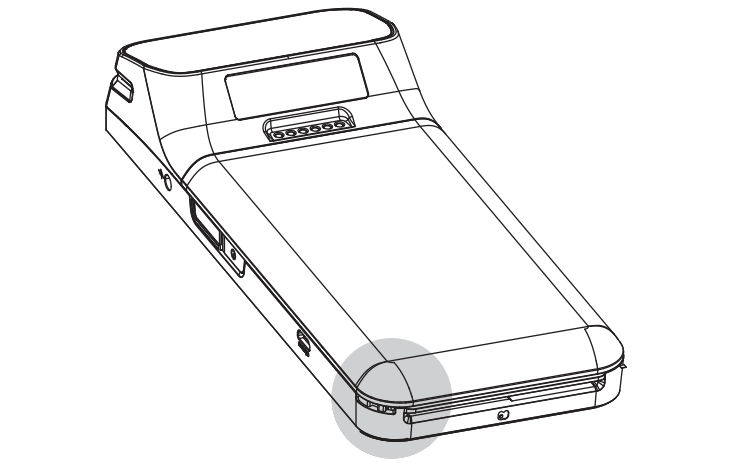
- With the back of the WisePOS E reader facing up, lift the indentation on the bottom left corner to detach the back cover.
- Insert the battery by sliding it into the exposed slot and aligning the gold connectors on the top. Once the battery is in place, attach the back cover.
|
 |
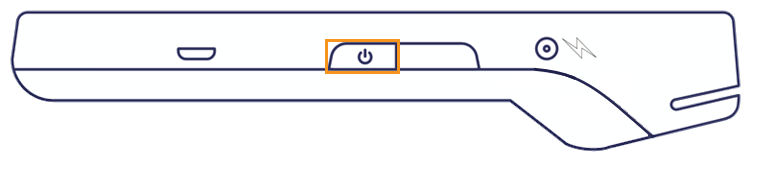
- With the screen facing up, press the power button on the right side of the reader.
- If the battery has been charged, the reader turns on.
- If the battery needs to be charged, plug the connector cable into the port also located on the right side of the reader (indicated by a lightning bolt icon).
|
 |
Connect WisePOS E to Wi-Fi
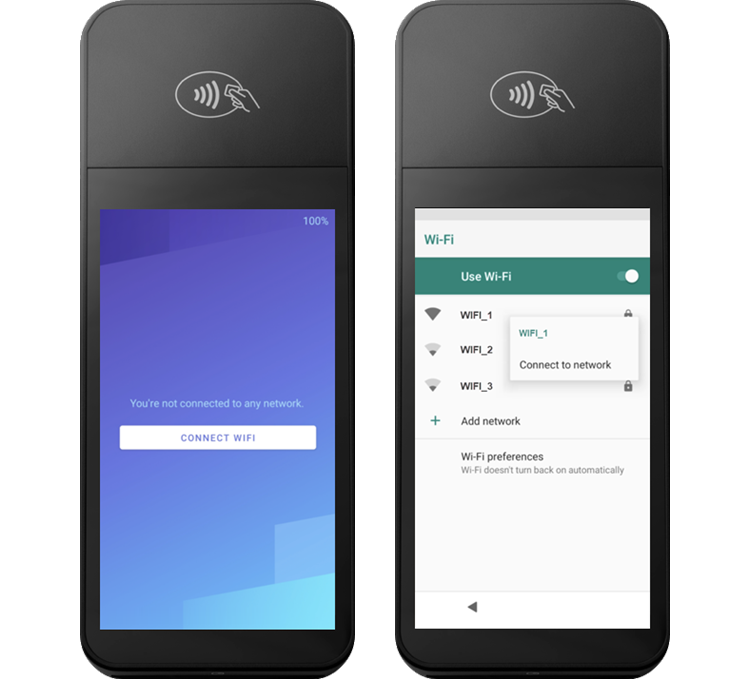
- Once the WisePOS E reader is powered on, the You're not connected to any network screen displays. Tap CONNECT WIFI. The Wi-Fi screen displays with a list of available networks.
- Select the same Wi-Fi network connection used for the Tebra Platform. The Wi-Fi Password screen displays.
Note: The Stripe terminal only supports password protected networks and in order to work properly, the terminal and the computer using the Tebra Platform must be on the same Wi-Fi network.
|
|
- Enter the Wi-Fi password then tap CONNECT or the checkmark key. The selected Wi-Fi network indicates Connected. The WisePOS E reader has an internet connection.
Note: A Downloading update screen may instead display if a Stripe terminal reader software update is required. Allow the reader software to automatically update.
|
 |
Register WisePOS E Reader
Once the WisePOS E reader has an internet connection, create a location and register the reader in the Stripe Dashboard to complete the Stripe terminal setup.
- In the Desktop Application (PM), click Settings > Patient Payments > Log into your Stripe Dashboard. The Stripe Sign in window opens, then enter the Stripe credentials. The Stripe Dashboard opens.
Note: The Stripe Dashboard can also be accessed by going directly to the Stripe Sign in page.
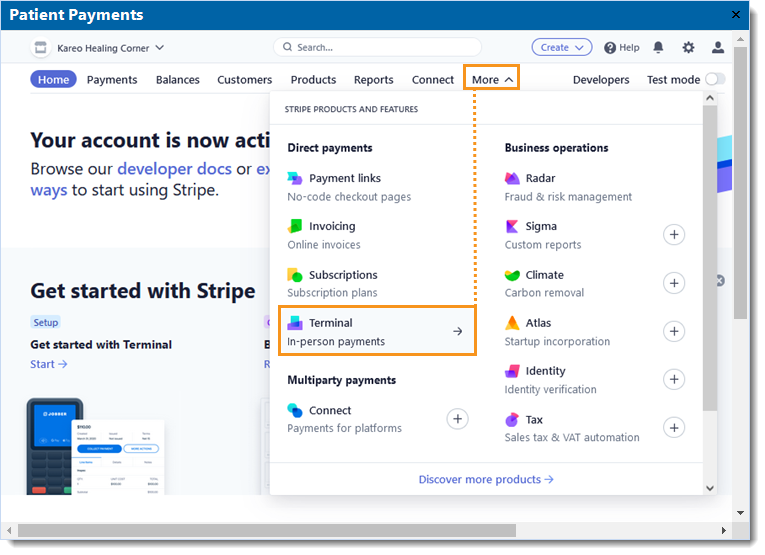
- Click More > Terminal. The TERMINAL window opens.
- For the classic dashboard view, click Readers > Locations on the left side menu.
|
 |
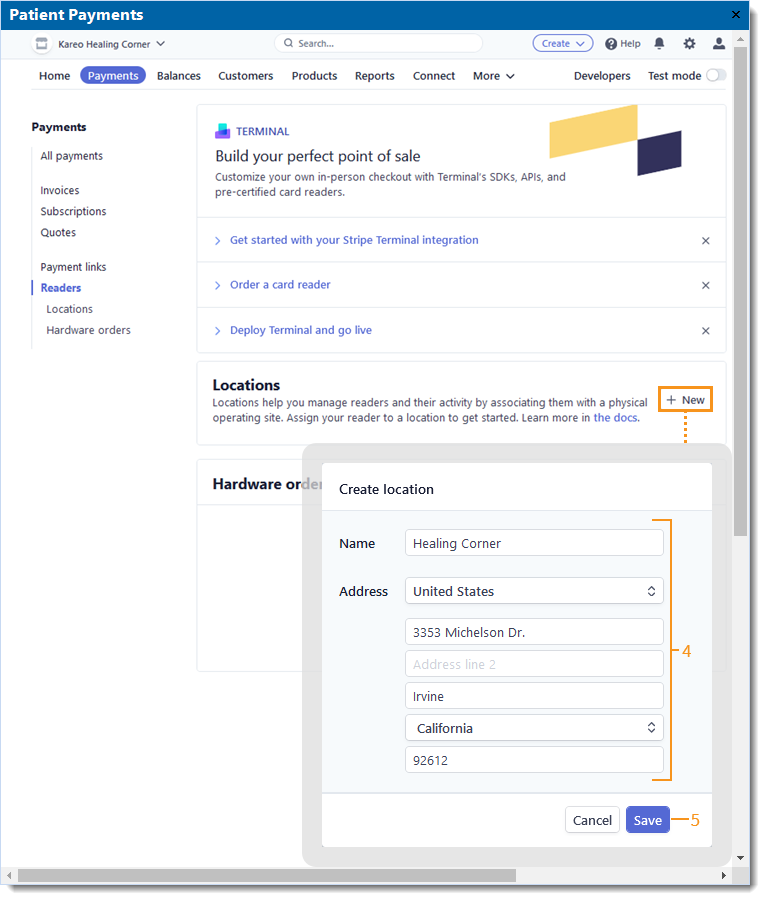
- Under the Locations section, click + New. The Create location pop-up window opens.
- Enter the Name and Address for the location the WisePOS E reader is assigned to.
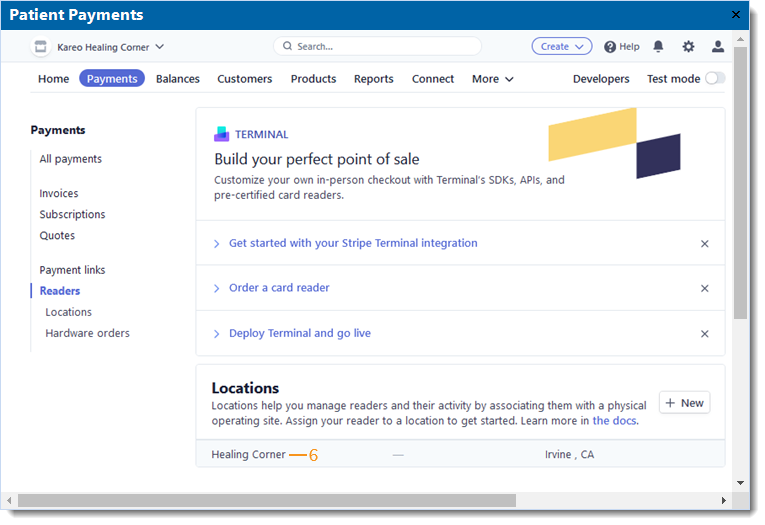
- Click Save. The location is listed.
|
 |
| |
|
- Click to select the listed location. The Location window opens.
|
 |
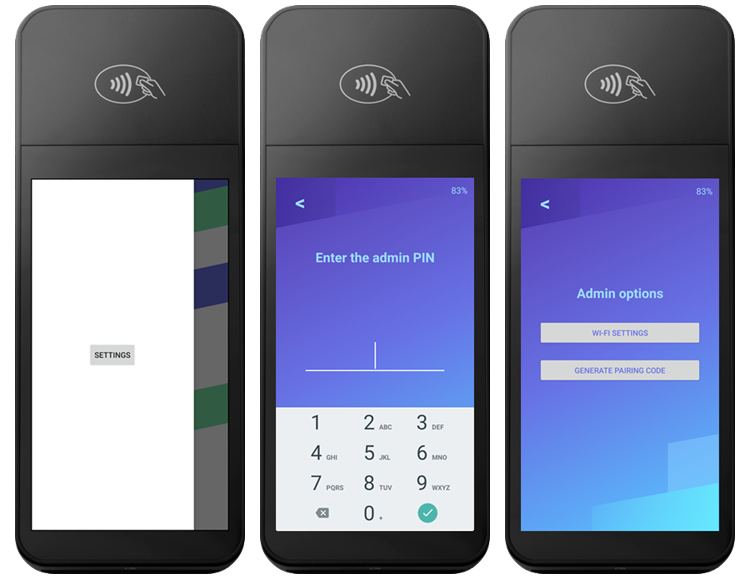
- On the WisePOS E reader, swipe right on the touchscreen and tap Settings. The Enter the admin PIN screen displays.
- Enter the key sequence 0-7-1-3-9. The Admin options screen displays.
- Tap Generate Pairing Code. The Register this reader screen displays with the registration code.
|
 |
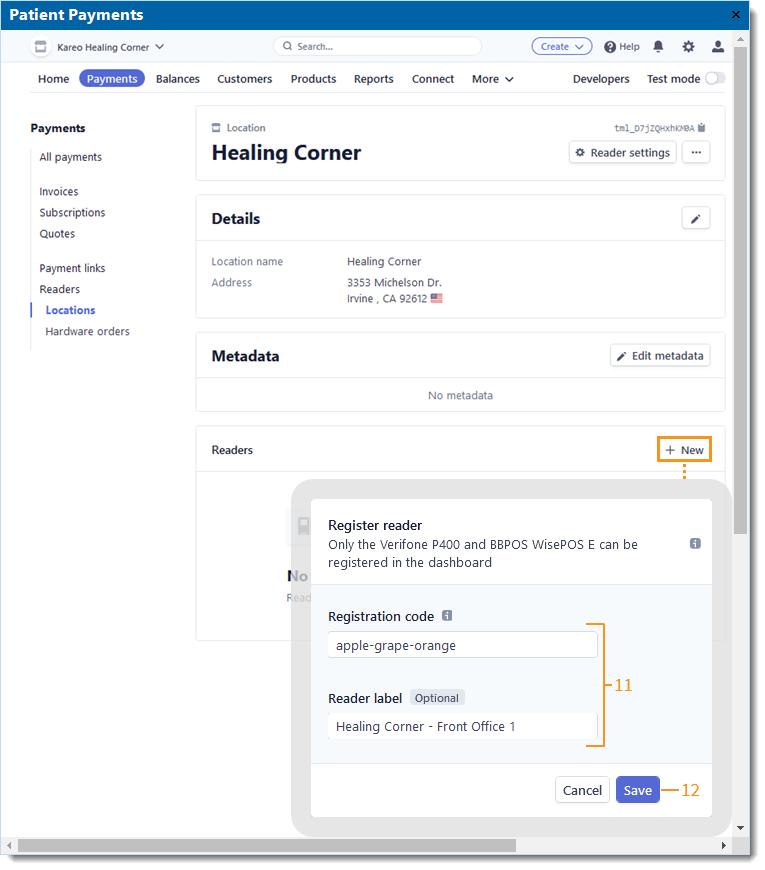
- In the Stripe Dashboard, click + New under the Readers section. The Register reader pop-up window opens.
- Enter the Registration code (displayed on the WisePOS E reader) and a Reader label.
Note: The Reader label is the name of the reader that displays in Tebra.
- Click Save. The reader is registered in the Stripe dashboard and displays the default Stripe splash screen.
Once the Stripe credit card terminal setup is complete, begin collecting patient payments.
Note: It is recommended to create a test patient in Tebra and test new Stripe terminal transactions such as a credit card payment via chip, swipe or contactless payment method, and processing a refund.
|
 |