Updated: 11/10/2021
Views: 3454
Payer scenarios are used to categorize patient encounters according to their billing situation (e.g. Medicare, Commercial, Workers' Compensation). Kareo includes a standard list of payer scenarios, however, you can customize the list according to the workflow and reporting needs of the practice.
Key benefits of payer scenarios:
- Provides a simple categorization scheme for billing situations.
- Filter and group various reports by payer scenario.
- Configure specific payer scenarios as unpayable, meaning any charges associated with the payer scenario are not billed.
- Disable sending patient statements for charges associated with specific payer scenarios.
You always begin with finding the payer scenario before creating, editing, or deleting a payer scenario.
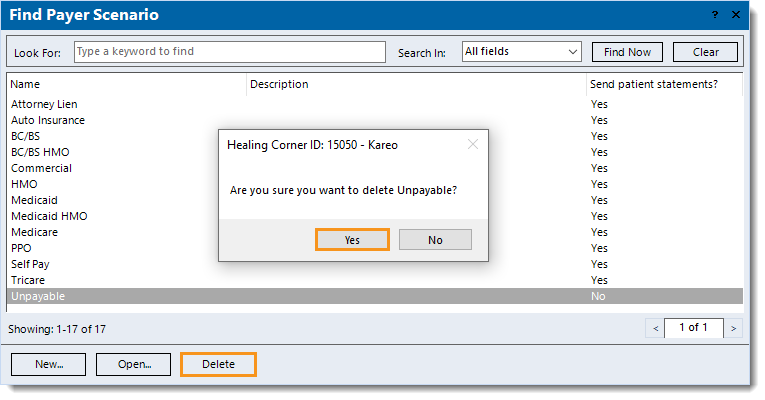
Find Payer Scenario
- Click Settings > Other Lists > Find Payer Scenarios. The Find Payer Scenario window opens.
 Tip: When there are numerous payer scenarios listed, use the Look For search bar to enter all or part of a keyword for the payer scenario. Then, click Find Now. Tip: When there are numerous payer scenarios listed, use the Look For search bar to enter all or part of a keyword for the payer scenario. Then, click Find Now.
|
 |
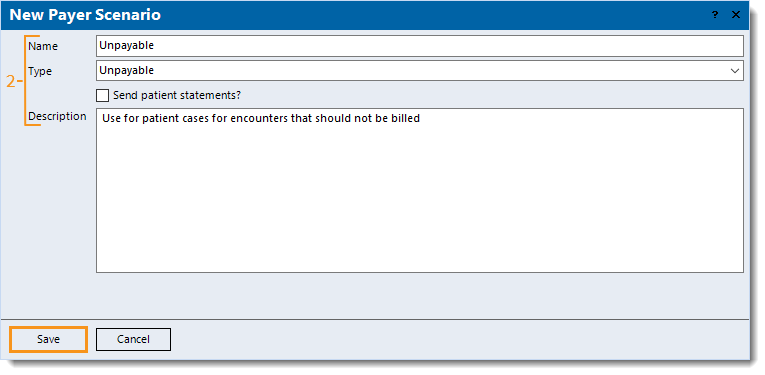
New Payer Scenario
- To prevent duplication, verify the payer scenario is not in the system then click New at the bottom. The New Payer Scenario window opens.
- Enter the information.
- Name: The name of the payer scenario.
- Click the drop-down arrow to select the appropriate Type of payer scenario: Attorney Lien, Normal, Unpayable, or Workers Comp.
Note: Charges associated to a payer scenario type set to Unpayable are excluded from claims generated by encounters; instead, once the encounter is approved, it is saved under the Unpayable tab of the Find Encounter window. For more information, review Unpayable Encounters.
- "Send patient statements?" is disabled by default. Click to enable if charges associated with the payer scenario should be billed to the patient.
Note: When disabled, charges associated with the payer scenario are excluded from Automated Patient Billing and the Send Patient Statements wizard. The charges with open balances are not considered in the patient balance, insurance balance, total balance, or the aging on patient statements.
- Description: A brief description to describe the purpose of the payer scenario.
- Click Save. Log out and back into Kareo to use the new payer scenario.
|
 |
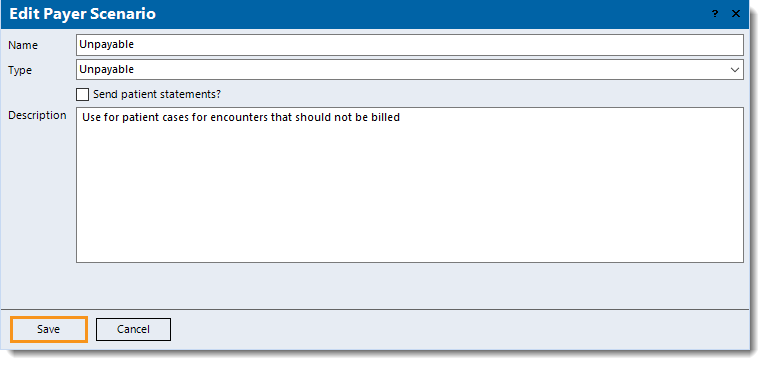
Edit Payer Scenario
To avoid errors during billing processes, payer scenarios already associated with case records and charges should not be edited.
- Find the payer scenario then double click to open it. The Edit Payer Scenario window opens.
- Make the desired changes.
Note: The name and type cannot be edited for Kareo generated payer scenarios.
- Click Save.
|
 |
Delete Payer Scenario
- Find the payer scenario then click once to select it > Delete. A confirmation pop-up appears.
- Click Yes to confirm the deletion. The payer scenario is deleted.
Note: Only payer scenarios with no other records associated, such as a patient's case, can be deleted.
|
 |