Updated: 07/21/2023 | Views: 17400
The Encounter Options allow you to set default information to aid in efficiency when users create new encounters for the practice. These are only default settings and users can override the information.
Note: When users create new encounters and select a specific Appointment or Patient, all of the pre-existing defaults prevail and override the Encounter Options default settings.
Encounter Options
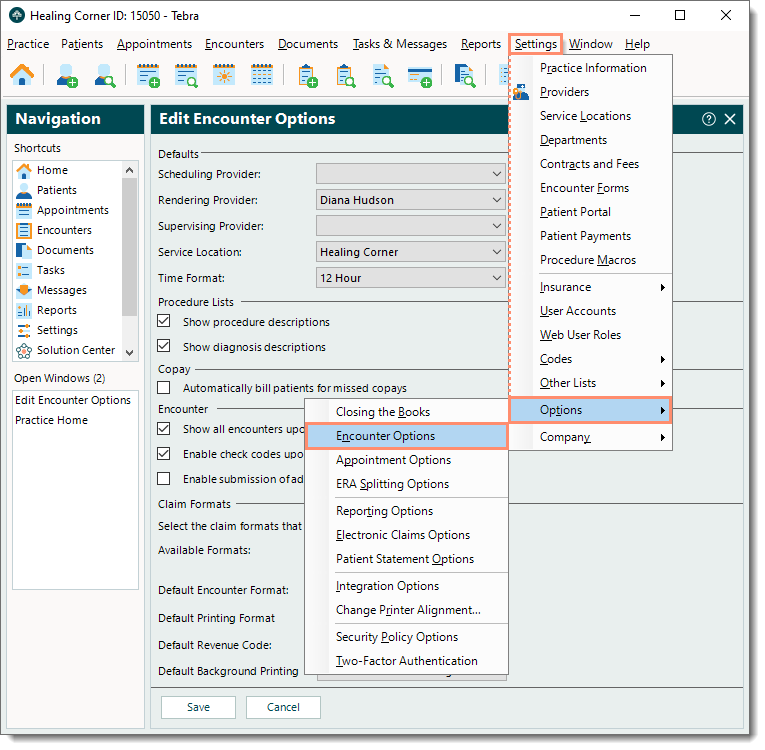
- Click Settings > Options > Encounter Options. The Edit Encounter Options window opens.
|
 |
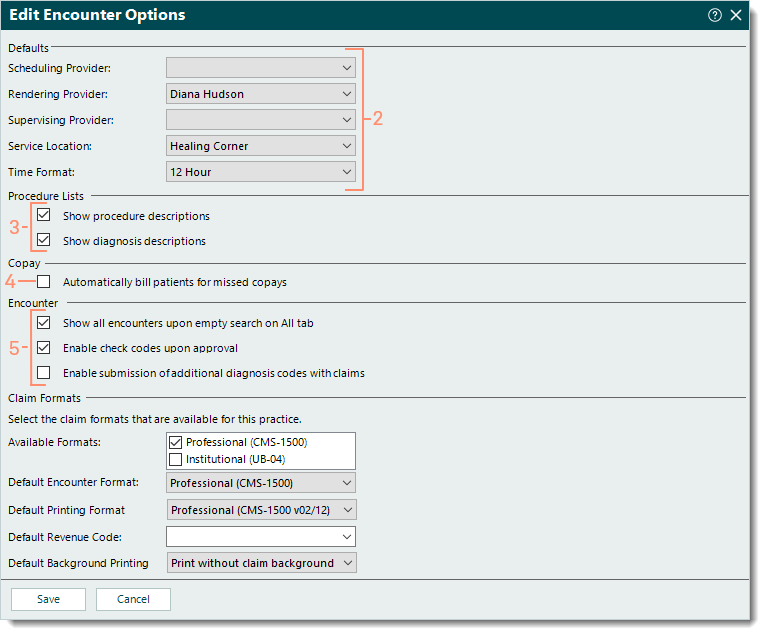
- Defaults: Enter the default information as necessary.
- Scheduling Provider, Rendering Provider, and/or Supervising Provider: Click to select the default provider(s).
- Service Location: Click to select the default location.
- Time Format: Click to select 12 Hour or 24 Hour.
Note: Updates to this setting switches all encounters including previously entered encounters to the selected time format.
- Procedure Lists: Click to enable or disable the following options as necessary.
- "Show procedure descriptions": Displays procedure descriptions on the service line(s) under the Procedures section of the Encounter record.
- "Show diagnosis descriptions": Displays diagnosis descriptions on the service line(s) under the Procedures section of the Encounter record.
- Copay: Click to enable or disable the following option as necessary.
- "Automatically bill patients for missed copays": Bills patients automatically for any missed copay(s).
- Encounter: Click to enable or disable the following options as necessary.
- "Show all encounters upon empty search on All tab": Shows all encounters on the All tab of the Find Encounter window.
- "Enable check codes upon approval": Automatically performs a code check upon encounter approval without having to manually click the Check Codes button.
- "Enable submission of additional diagnosis codes with claims": Displays the option to "Include additional diagnosis codes to submit with claim" on the Encounter record which allows up to 12 unique diagnosis codes at the encounter level for each visit. For more information, review Add 12 Diagnosis Codes to a Claim.
|
 |
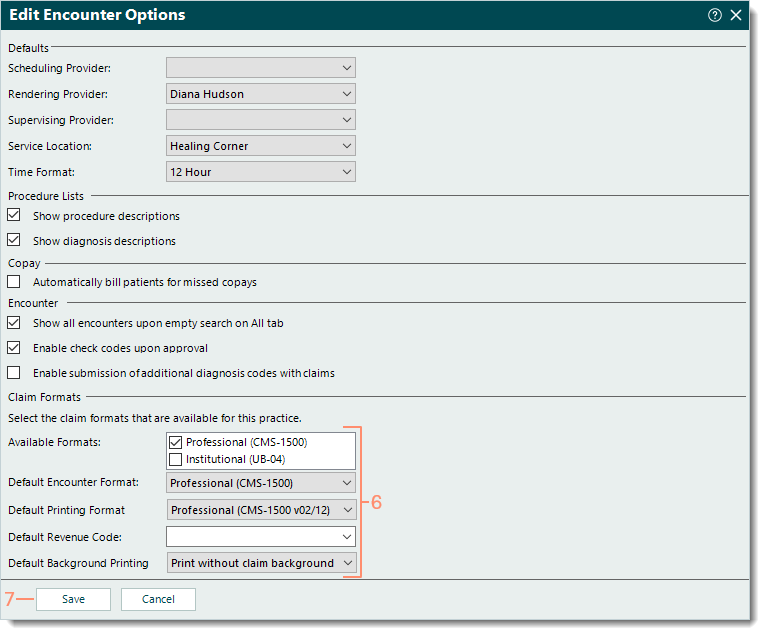
- Claim Formats: Enter the default claim format information as necessary.
- Available Formats: Indicates the Claim Type(s) available for selection when users create encounters as well as the formats available for selection in the Default Encounter Format and Default Printing Format drop-down menus (below). Click to select "Professional (CMS-1500)" and/or "Institutional (UB-04)".
- Default Encounter Format: If applicable, click to select the default claim format (when users create encounters).
- Default Printing Format: If applicable, click to select the default claim format (when users print paper claims).
- Default Revenue Code: For Institutional (UB-04) claims, click the drop-down arrow to select the default revenue code. This populates the Rev Code on the service line(s) under the Procedures section of the Encounter record.
- Default Background Printing: For Professional (CMS-1500) claims, click to select one of the following claims printing options.
- Print without claim background: Requires the correct claim forms be loaded in the printer.
- Print with claim background: Prints the claim(s) as a black and white version of the claim form.
- Click Save.
|
 |


