Updated: 06/07/2023
Views: 7630
The practice record information is entered during the New Practice Setup wizard. However, you can review and edit the information at any time.
You always begin with finding the practice before creating (when there are multiple practices), editing, or deleting a practice.
Find Practice
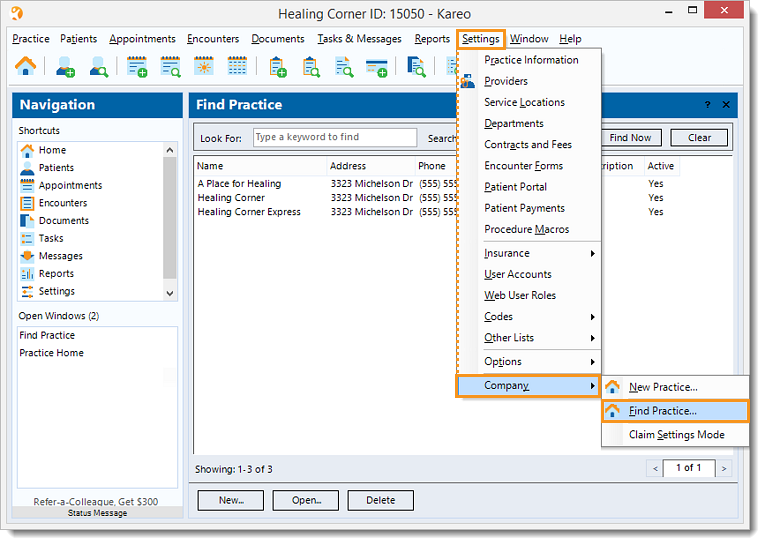
- Click Settings > Company > Find Practice.
- Enter all or part of a the practice name in the Look For search bar.
- Click Find Now.
|
 |
New Practice
To prevent duplication when there are multiple practices, verify the practice is not in the system. Then, click New at the bottom and complete the New Practice Setup wizard.
|
 |
Edit Practice
- Find the practice then double click to open it. The Edit Practice window opens.
 Tip: When needed, the practice ID can be found in parenthesis next to the practice name on the title bar. Tip: When needed, the practice ID can be found in parenthesis next to the practice name on the title bar.
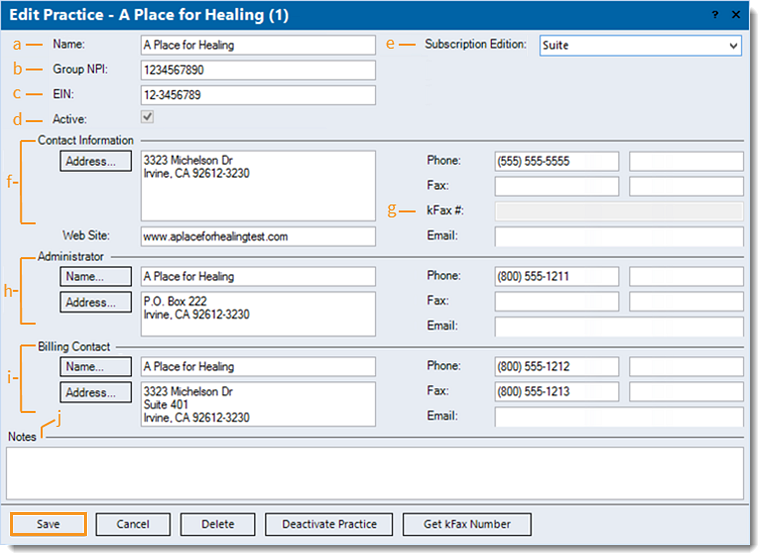
- Enter any needed changes:
- Name: The practice's name (not to exceed 60 characters for e-claim submission purposes). Populates Box 33 of the claim form.
- Group NPI: The National Provider Identifier (NPI) used when the provider is credentialed to bill payers as a group. Populates Box 33a of the claim form.
- EIN: The Employer Id Number (EIN) assigned to the practice by the IRS. Populates Box 25 of the claim form.
- When selected, the shaded "Active" checkbox indicates the practice is an active practice.
- Subscription Edition: The subscription level of the practice.
Note: The subscription levels vary depending on the pricing in effect for the account.
- Contact Information: The address and phone number populates Box 33 of the claim form. For e-claim submission purposes, the address must be a physical location (cannot be a P.O. Box) with a 9-digit zip code.
Tip: Click Address to enter the information in the Check Address pop-up window; this will ensure that the practice address is formatted correctly. Then, click USPS Website to access the USPS zip code lookup tool to verify the 9-digit zip code is valid.
- kFax #: Auto-populates by getting a kFax number.
- Administrator (optional): Can be used for the Return Address or Remit Address on patient statements (e.g., if patient statement remittances are sent to a P.O. Box or an address different than the one entered in the Contact Information section).
- Billing Contact: Contact information applies to all e-claim submissions to ensure payers have the correct point-of-contact, including phone number. This information can also be used for the Return Address or Remit Address on patient statements (e.g., if patient statement remittances are sent to a P.O. Box or an address different than the one entered in the Contact Information section).
- Notes (optional): Internal notes related to the practice.
- Click Save to record any changes made.
|
 |
Delete Practice
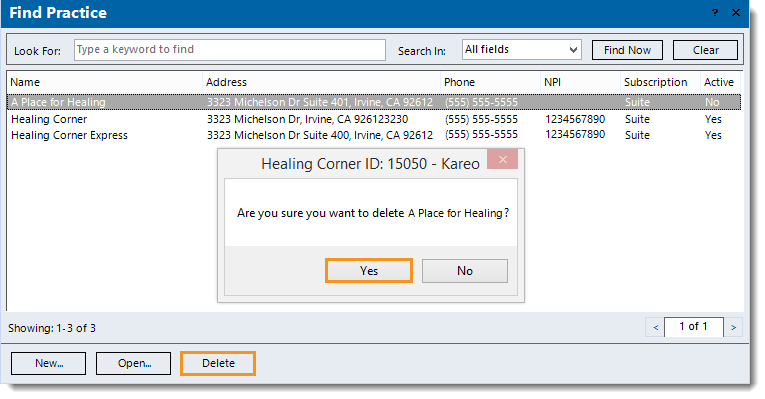
- Find the practice then click to select it > Delete. A confirmation pop-up appears.
- Click Yes to confirm the deletion. The practice is deleted.
Note: Only inactive practices with no other records associated, such as an appointment, can be deleted.
|
 |