Updated: 12/19/2023 | Views: 9900
You can easily record or swipe a card to enter patient payments for copays and outstanding patient balances.
Depending on your practice's processes and enabled features, there are several workflows for creating a new Payment record for a patient payment:
- To create a Payment record via the patient's record or appointment, review Collect Patient Payment.
Note: This recommended workflow displays the patient’s balance for review, has the option to save or use a credit card on file, and print or email a payment receipt.
- To create a Payment record via the patient's record or appointment for Patient Collect (Stripe) activated practices, review Patient Collect (Stripe): Collect Patient Payment.
- To directly create a Payment record for the patient payment, follow the New Patient Payment steps below.
- To create a Payment record by entering the patient payment information on a new encounter, follow the New Encounter Patient Payment steps below.
New Patient Payment
- To prevent duplication, find the payment and verify the patient payment is not in the system. Then, click New. The General tab of the New Payment window opens.
Note: To ensure the payment is not in the system, select the All tab and click to clear "Show unapplied only" when searching for the record.
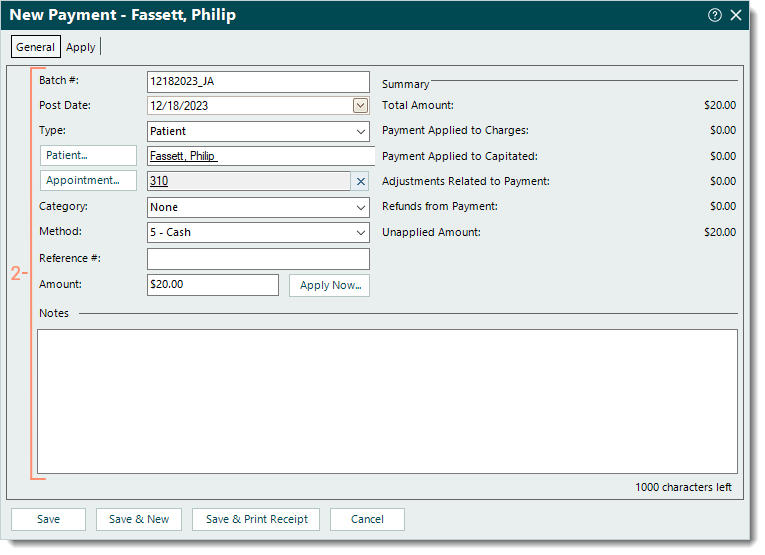
- Enter the following information as necessary.
- Batch #: If applicable, the batch number for the payment.
 Tip: Entering a batch number is helpful for running reports when there is a consistent naming convention such as the posting date with the user's initials (e.g., MMDDYYYYAB). Then, when running a report (e.g. Payments Detail), customize and filter by that specific batch number. Tip: Entering a batch number is helpful for running reports when there is a consistent naming convention such as the posting date with the user's initials (e.g., MMDDYYYYAB). Then, when running a report (e.g. Payments Detail), customize and filter by that specific batch number.
- Post Date: Defaults to the current date. If necessary, enter a different posting date for the payment.
- Type: Click the drop-down arrow and select Patient.
- Patient: Click Patient to search and select the appropriate patient.
- Appointment: Click Appointment to search and select the appropriate patient appointment if applicable.
- Category: If the practice uses categories for certain payment reports, click the drop-down arrow and select the appropriate category.
- Method: Click the drop-down arrow to select how the payment is being made.
- Reference #: The reference number for the payment if applicable (e.g., check number).
- Amount: The total amount of the payment.
- Notes: If applicable, enter internal notes related to the payment.
- When finished, do one of the following.
- To apply the payment, click Apply Now.
- To save the Payment record and apply the payment at a later time, click Save. A confirmation pop-up appears. Click Yes to continue without applying the payment.
- To save the Payment record and print a receipt, click Save & Print Receipt. A confirmation pop-up appears. Click Yes to continue without applying the payment then print the receipt using computer’s print function.
|
 |
New Encounter Patient Payment
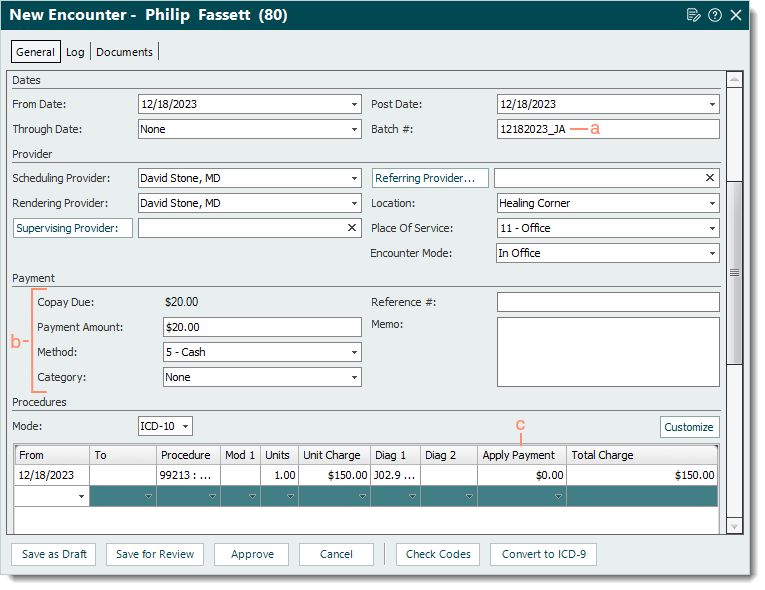
- Create a new encounter with the following information.
- If applicable, enter the Batch # under the Dates section.
Tip: Entering a batch number is helpful for running reports when there is a consistent naming convention such as the posting date with the user's initials (e.g., MMDDYYYYAB). Then, when running a report (e.g. Payments Detail), customize and filter by that specific batch number.
- Payment section: Enter the following information as necessary.
- Copay Due: Displays the Copay amount from the primary insurance policy within the associated case.
- Payment Amount: The total amount of the payment. Once entered, additional fields become available.
- Method: Click to select how the payment is being made from the drop-down menu.
- Category: Click to select the appropriate category from the drop-down menu if the practice uses categories for certain payment reports.
- Reference #: The reference number for the payment if applicable (e.g., check number).
- Memo: Internal notes related to the payment. When left blank, a note is automatically added to the Payment record that indicates the patient payment date and encounter ID.
- Apply Payment column: Only if necessary, enter the amount(s) to apply to the service line(s). If an amount is entered and the payer processes the claim differently, a payment reversal may need to be posted and/or a refund may need to be issued. When left blank, an unapplied Payment record is created upon encounter approval.
Note: The Procedures section may need to be customized if the Apply Payment column is not available.
- Complete the encounter as necessary. Then, click Approve. Once approved, the Payment record for the patient payment is created.
|
 |